Job Management
Use Point of Sale (POS) in FieldMagic
Learn how to use Point of Sale to add products and process payments in FieldMagic.
Instrucciones paso a paso
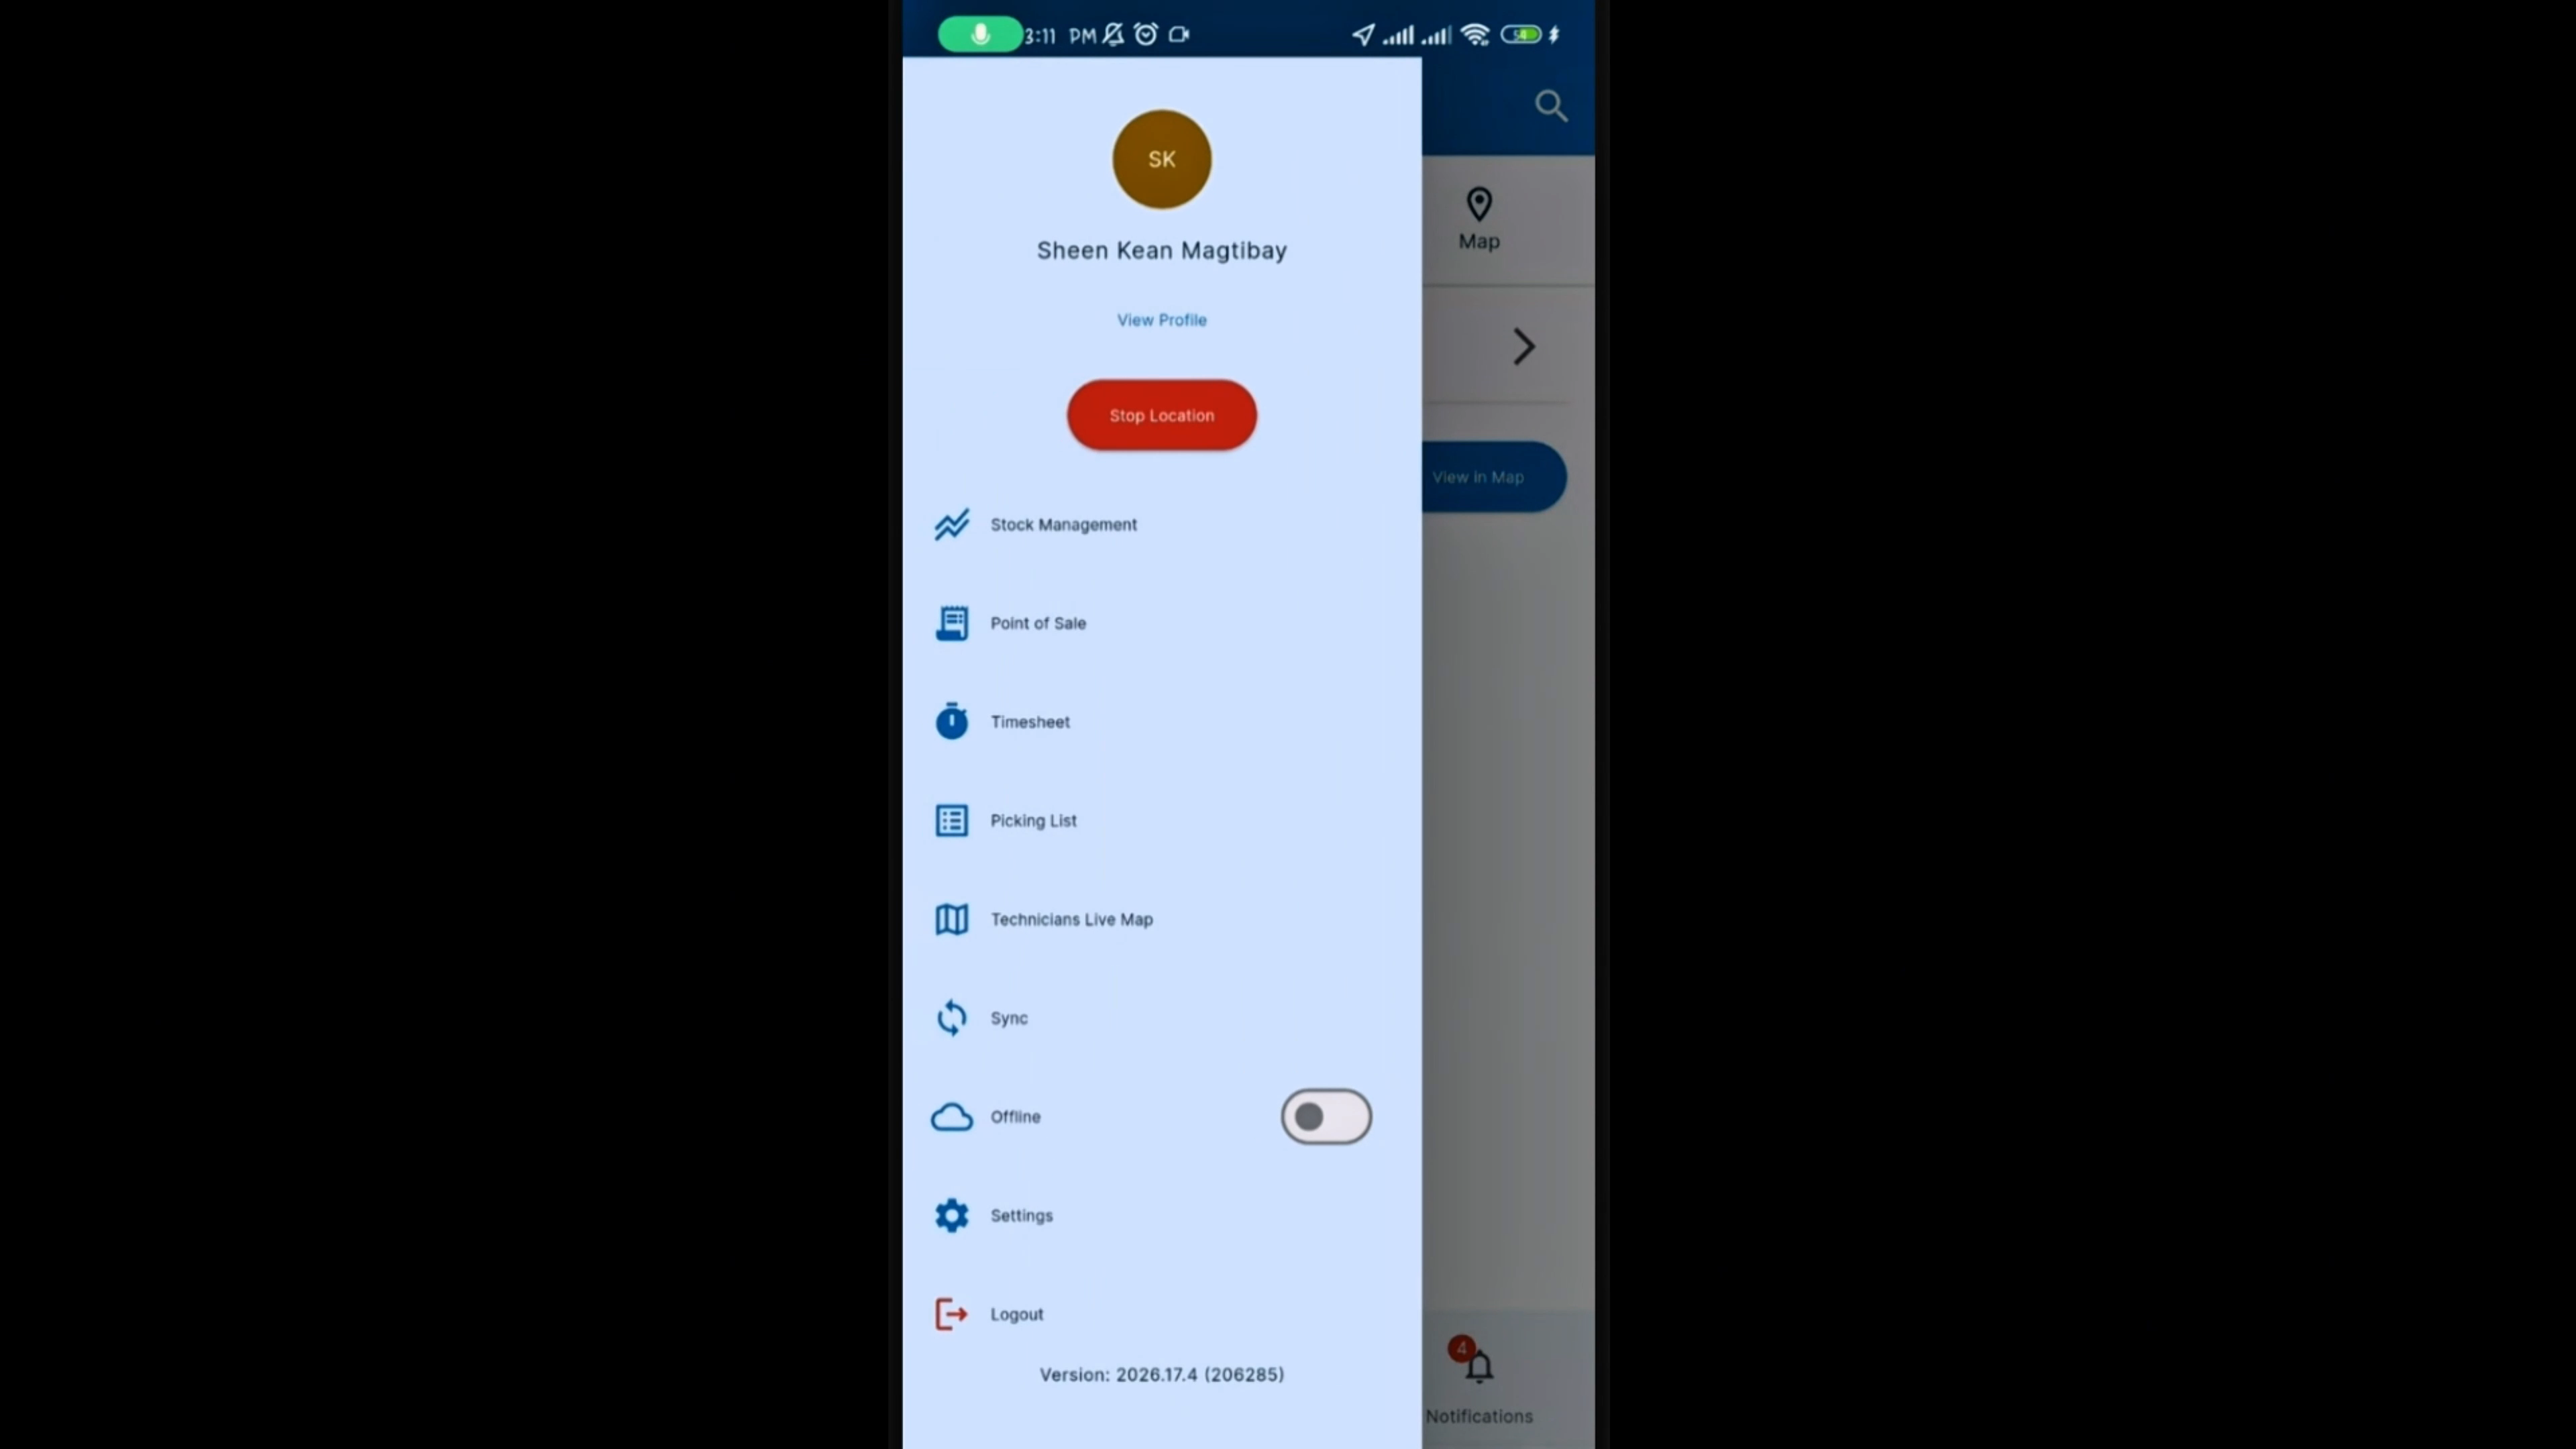 Paso 1
Open the hamburger menu in the top-left corner of the app and tap Point of Sale.
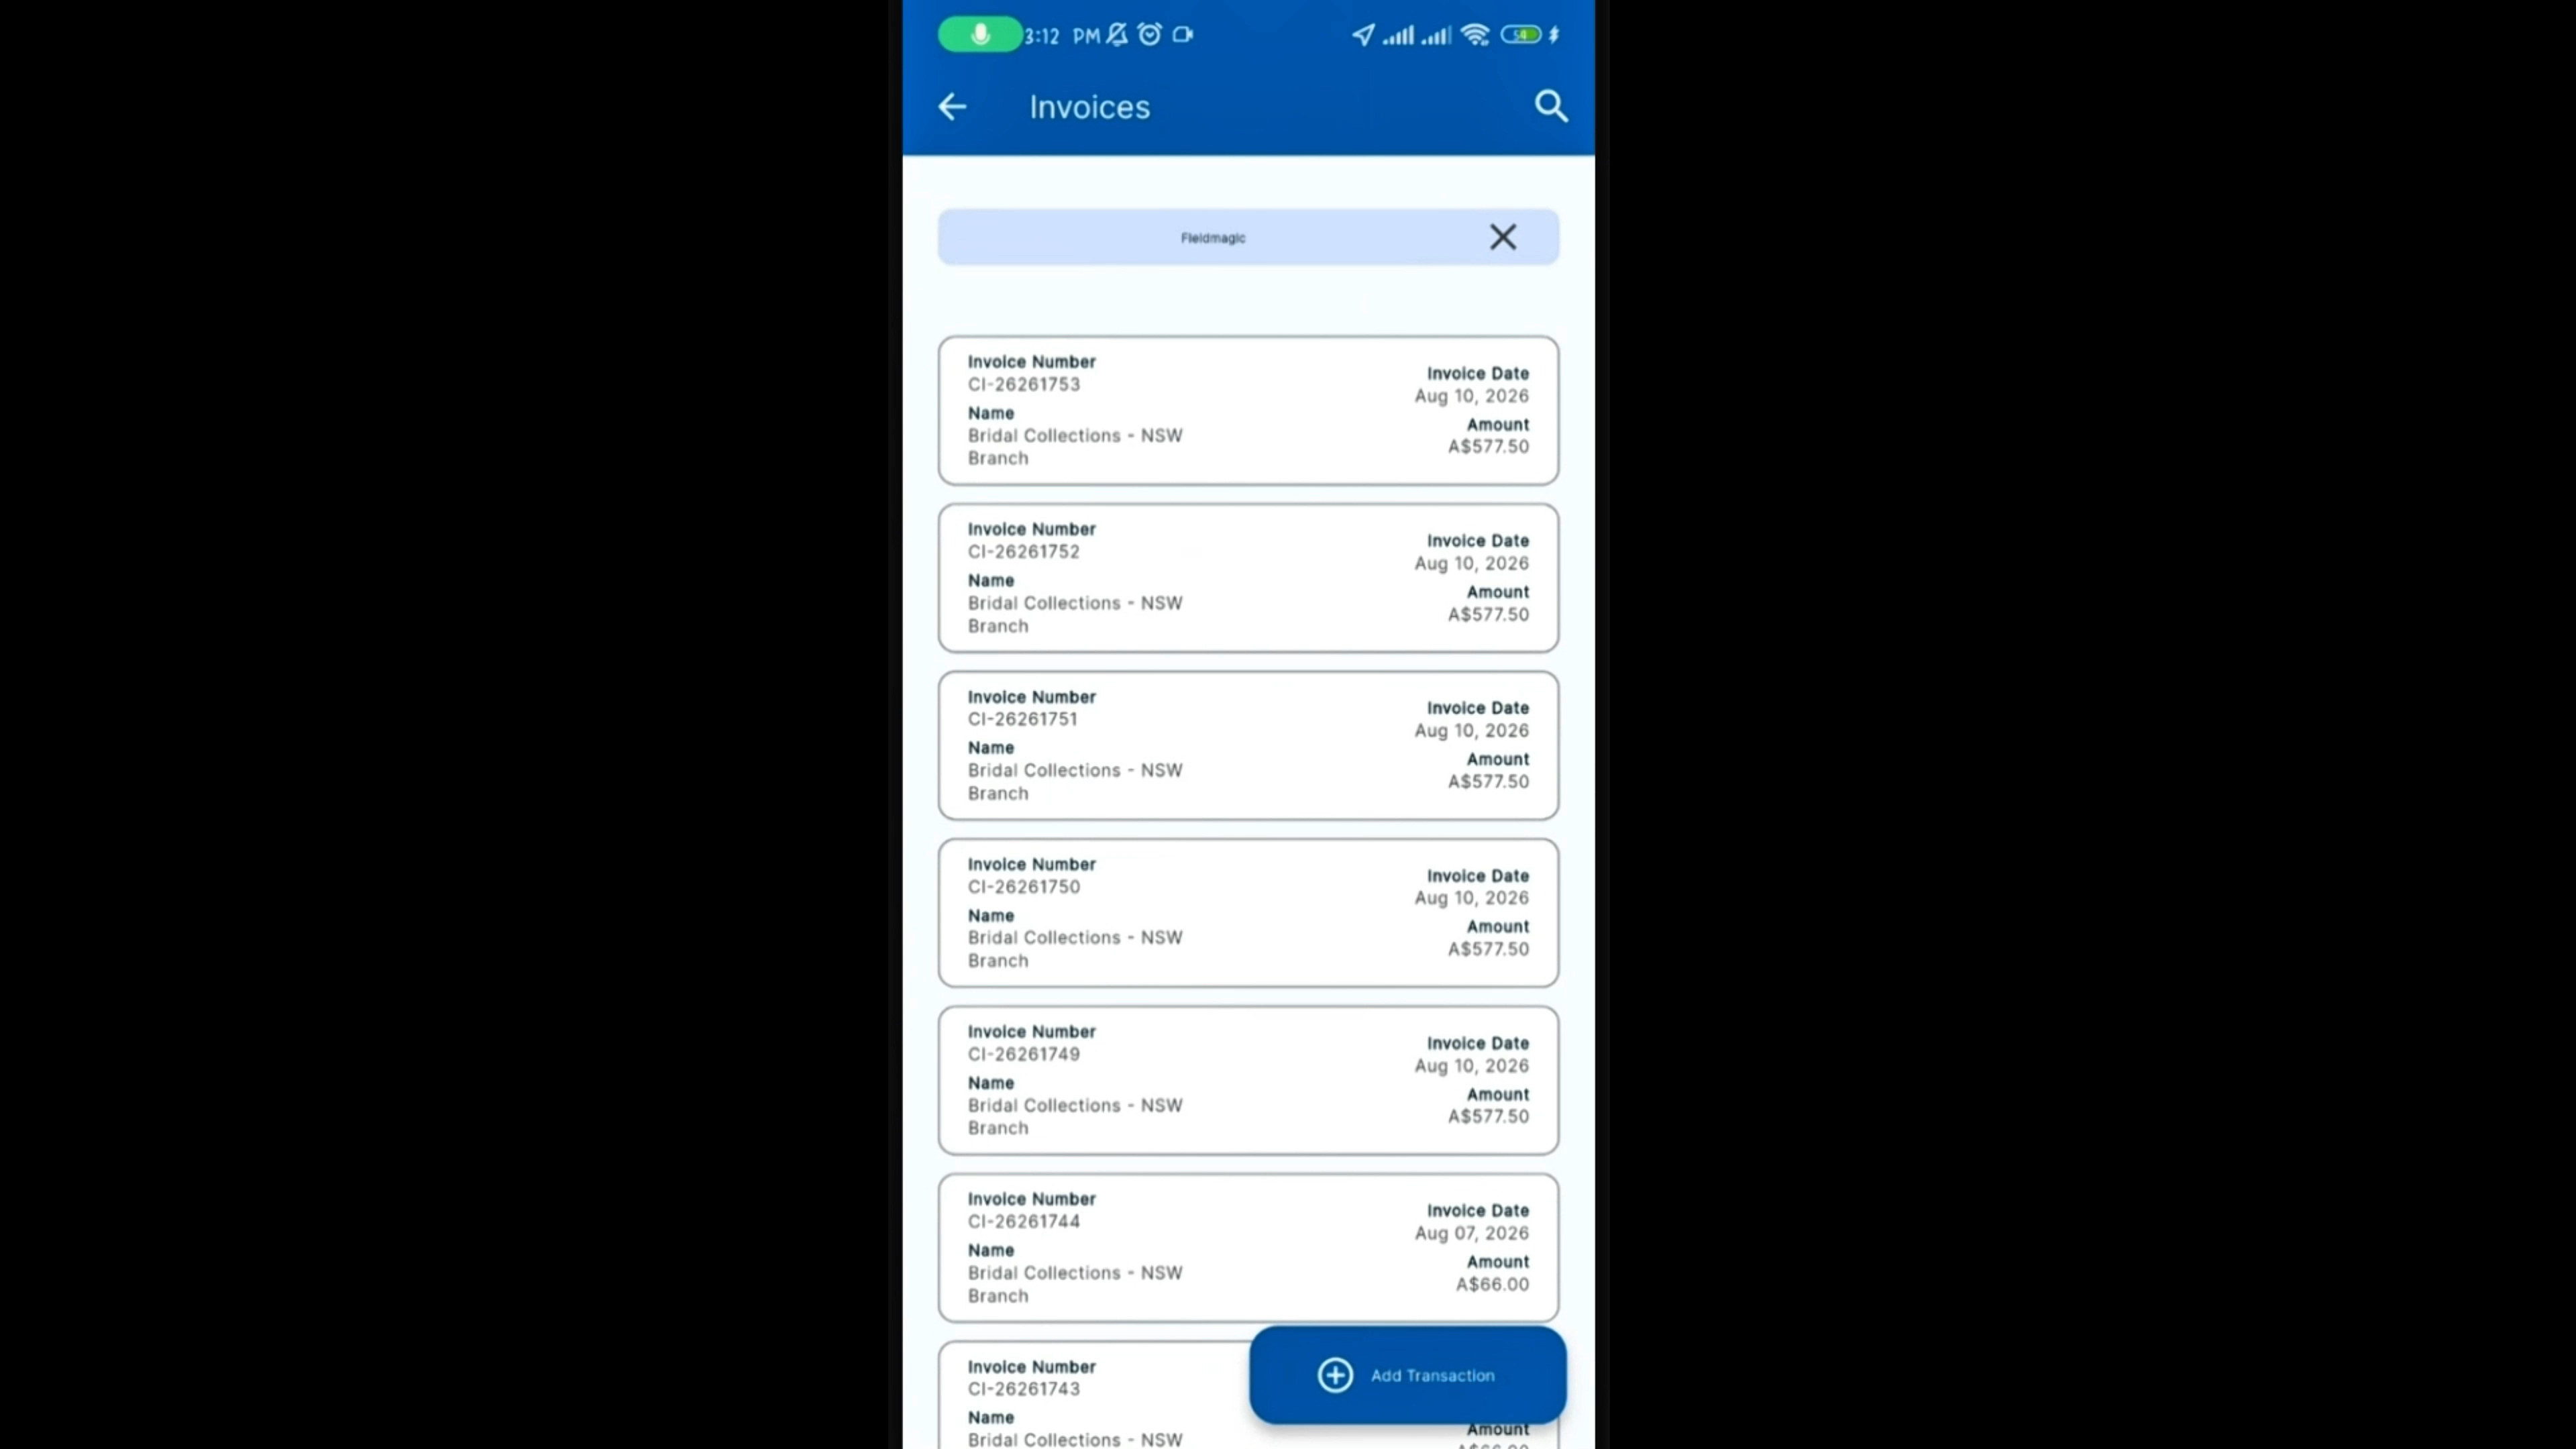 Paso 2
Tap Add Transaction to start a new sale.
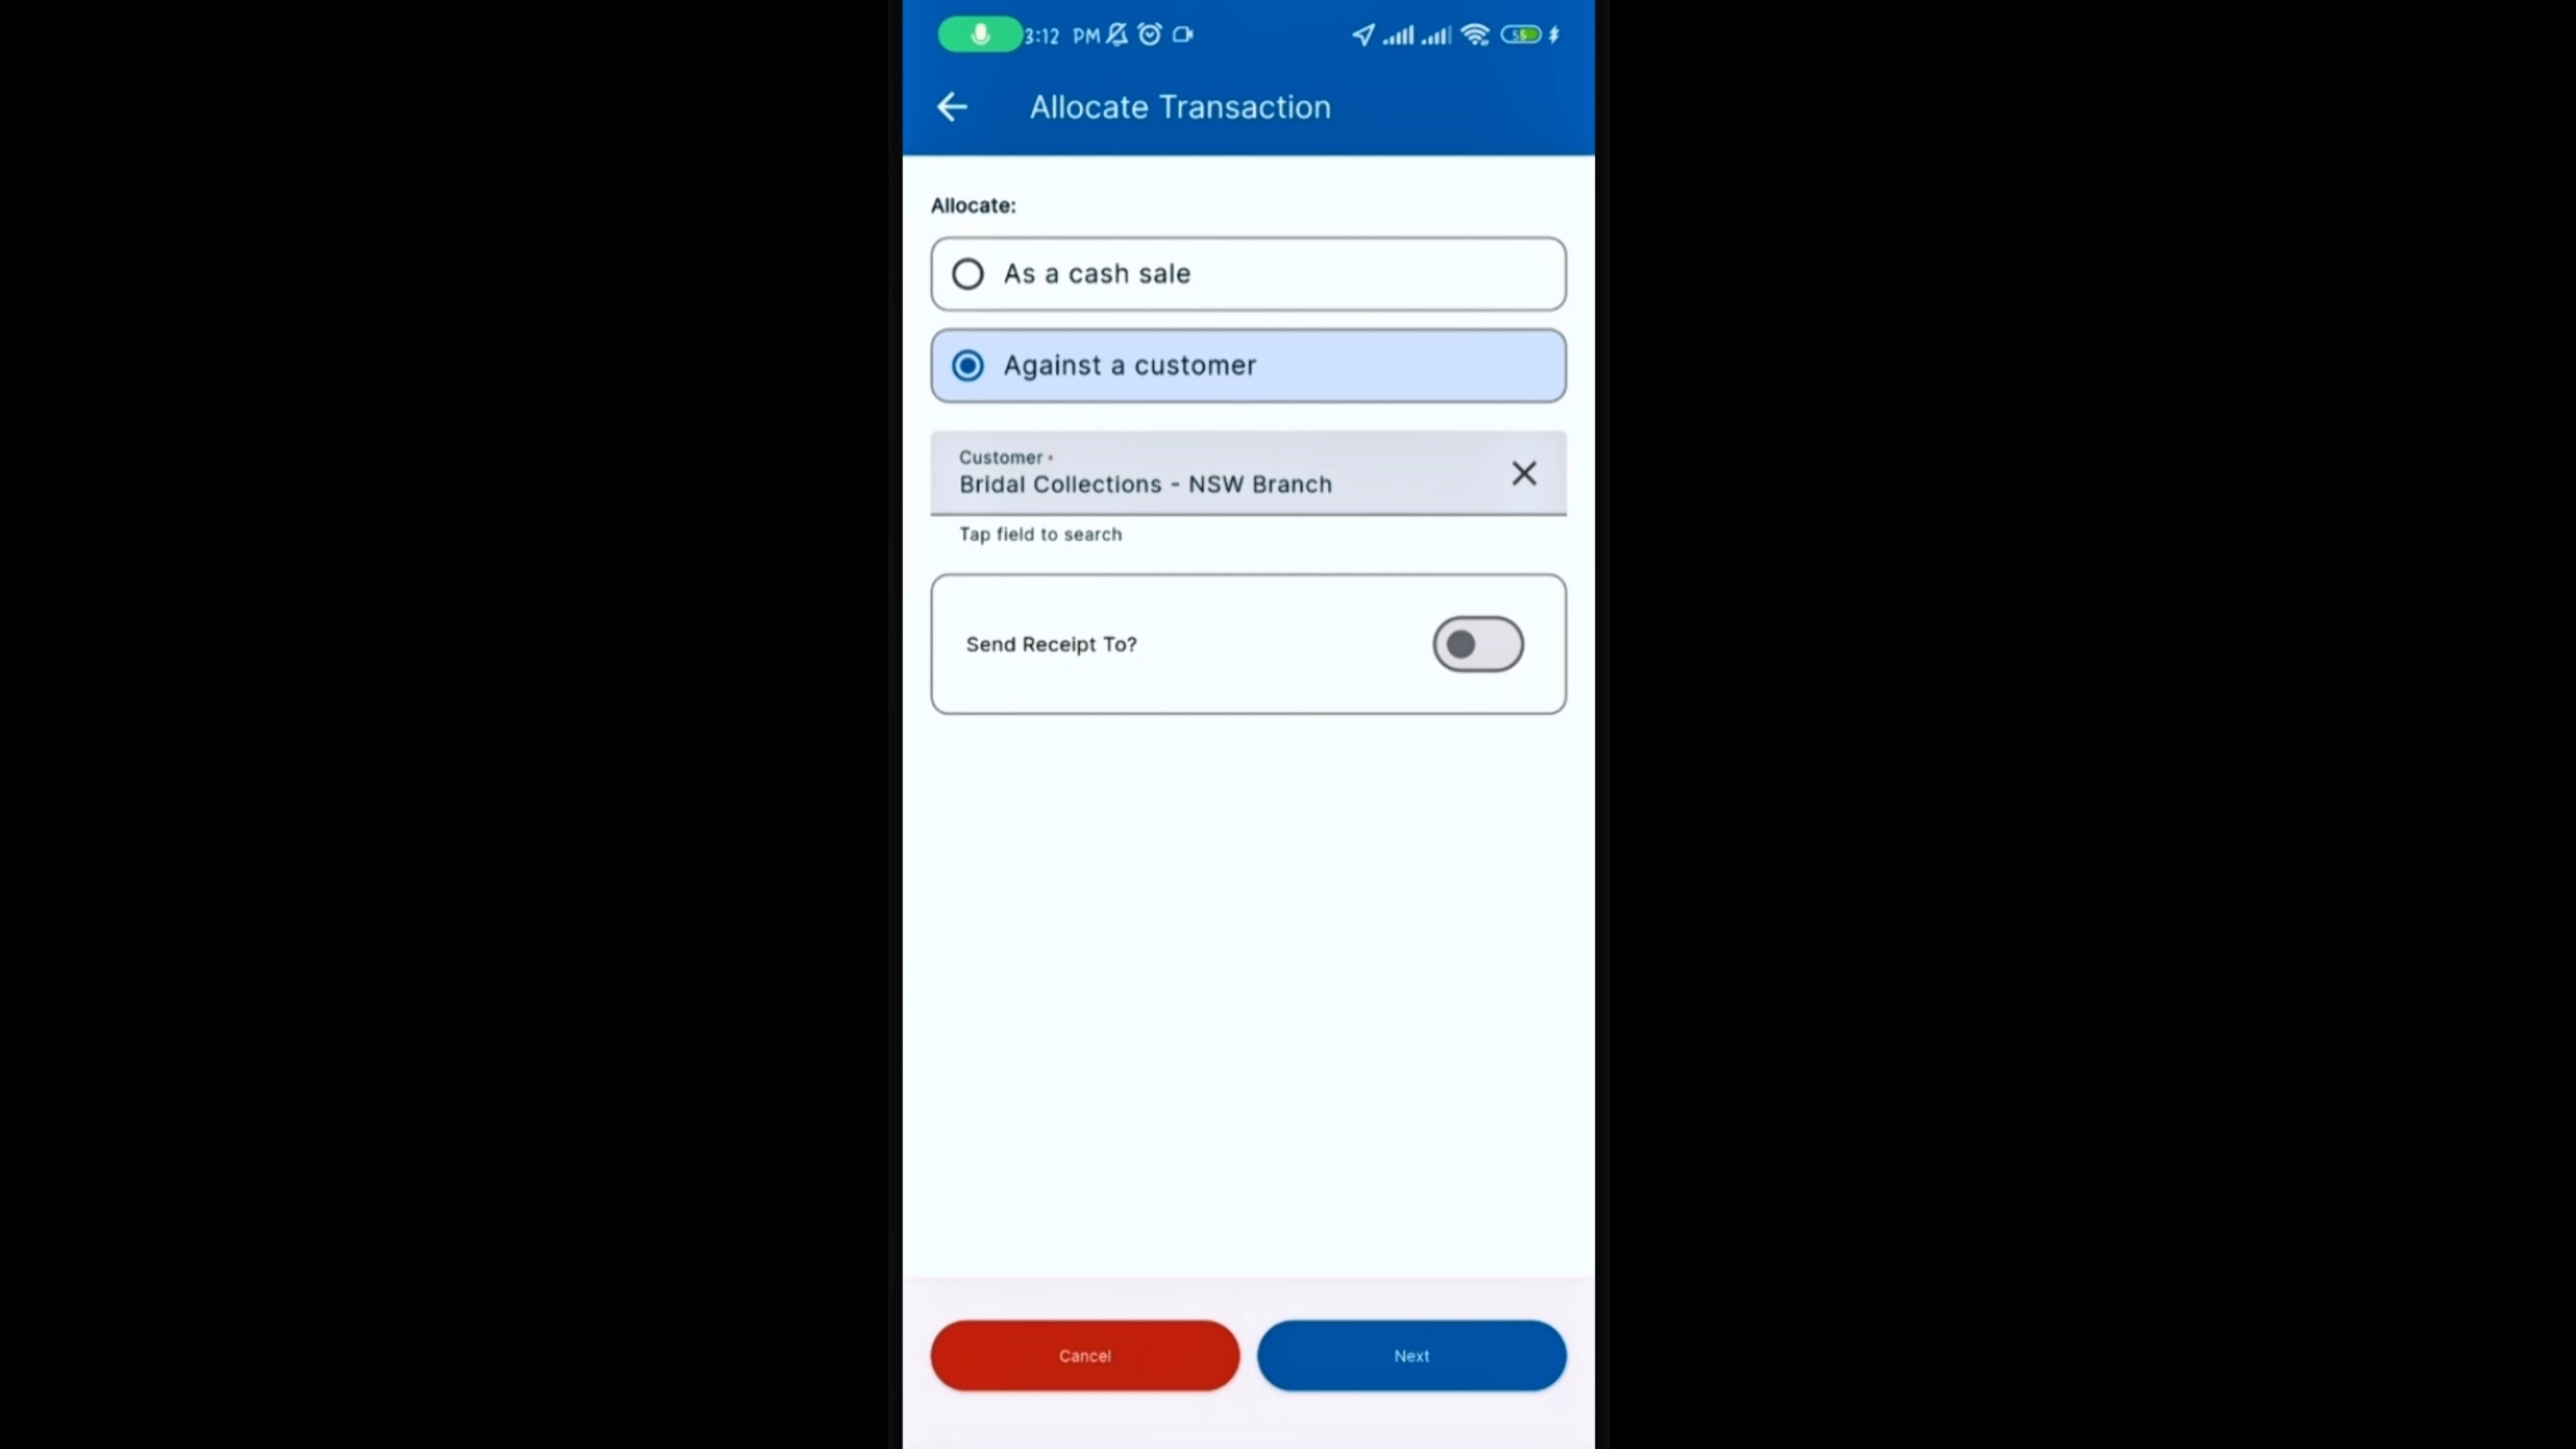 Paso 3
Select Against a Customer, then search for and select the customer. You can also toggle Send Receipt To if you'd like to email the receipt to a specific address.
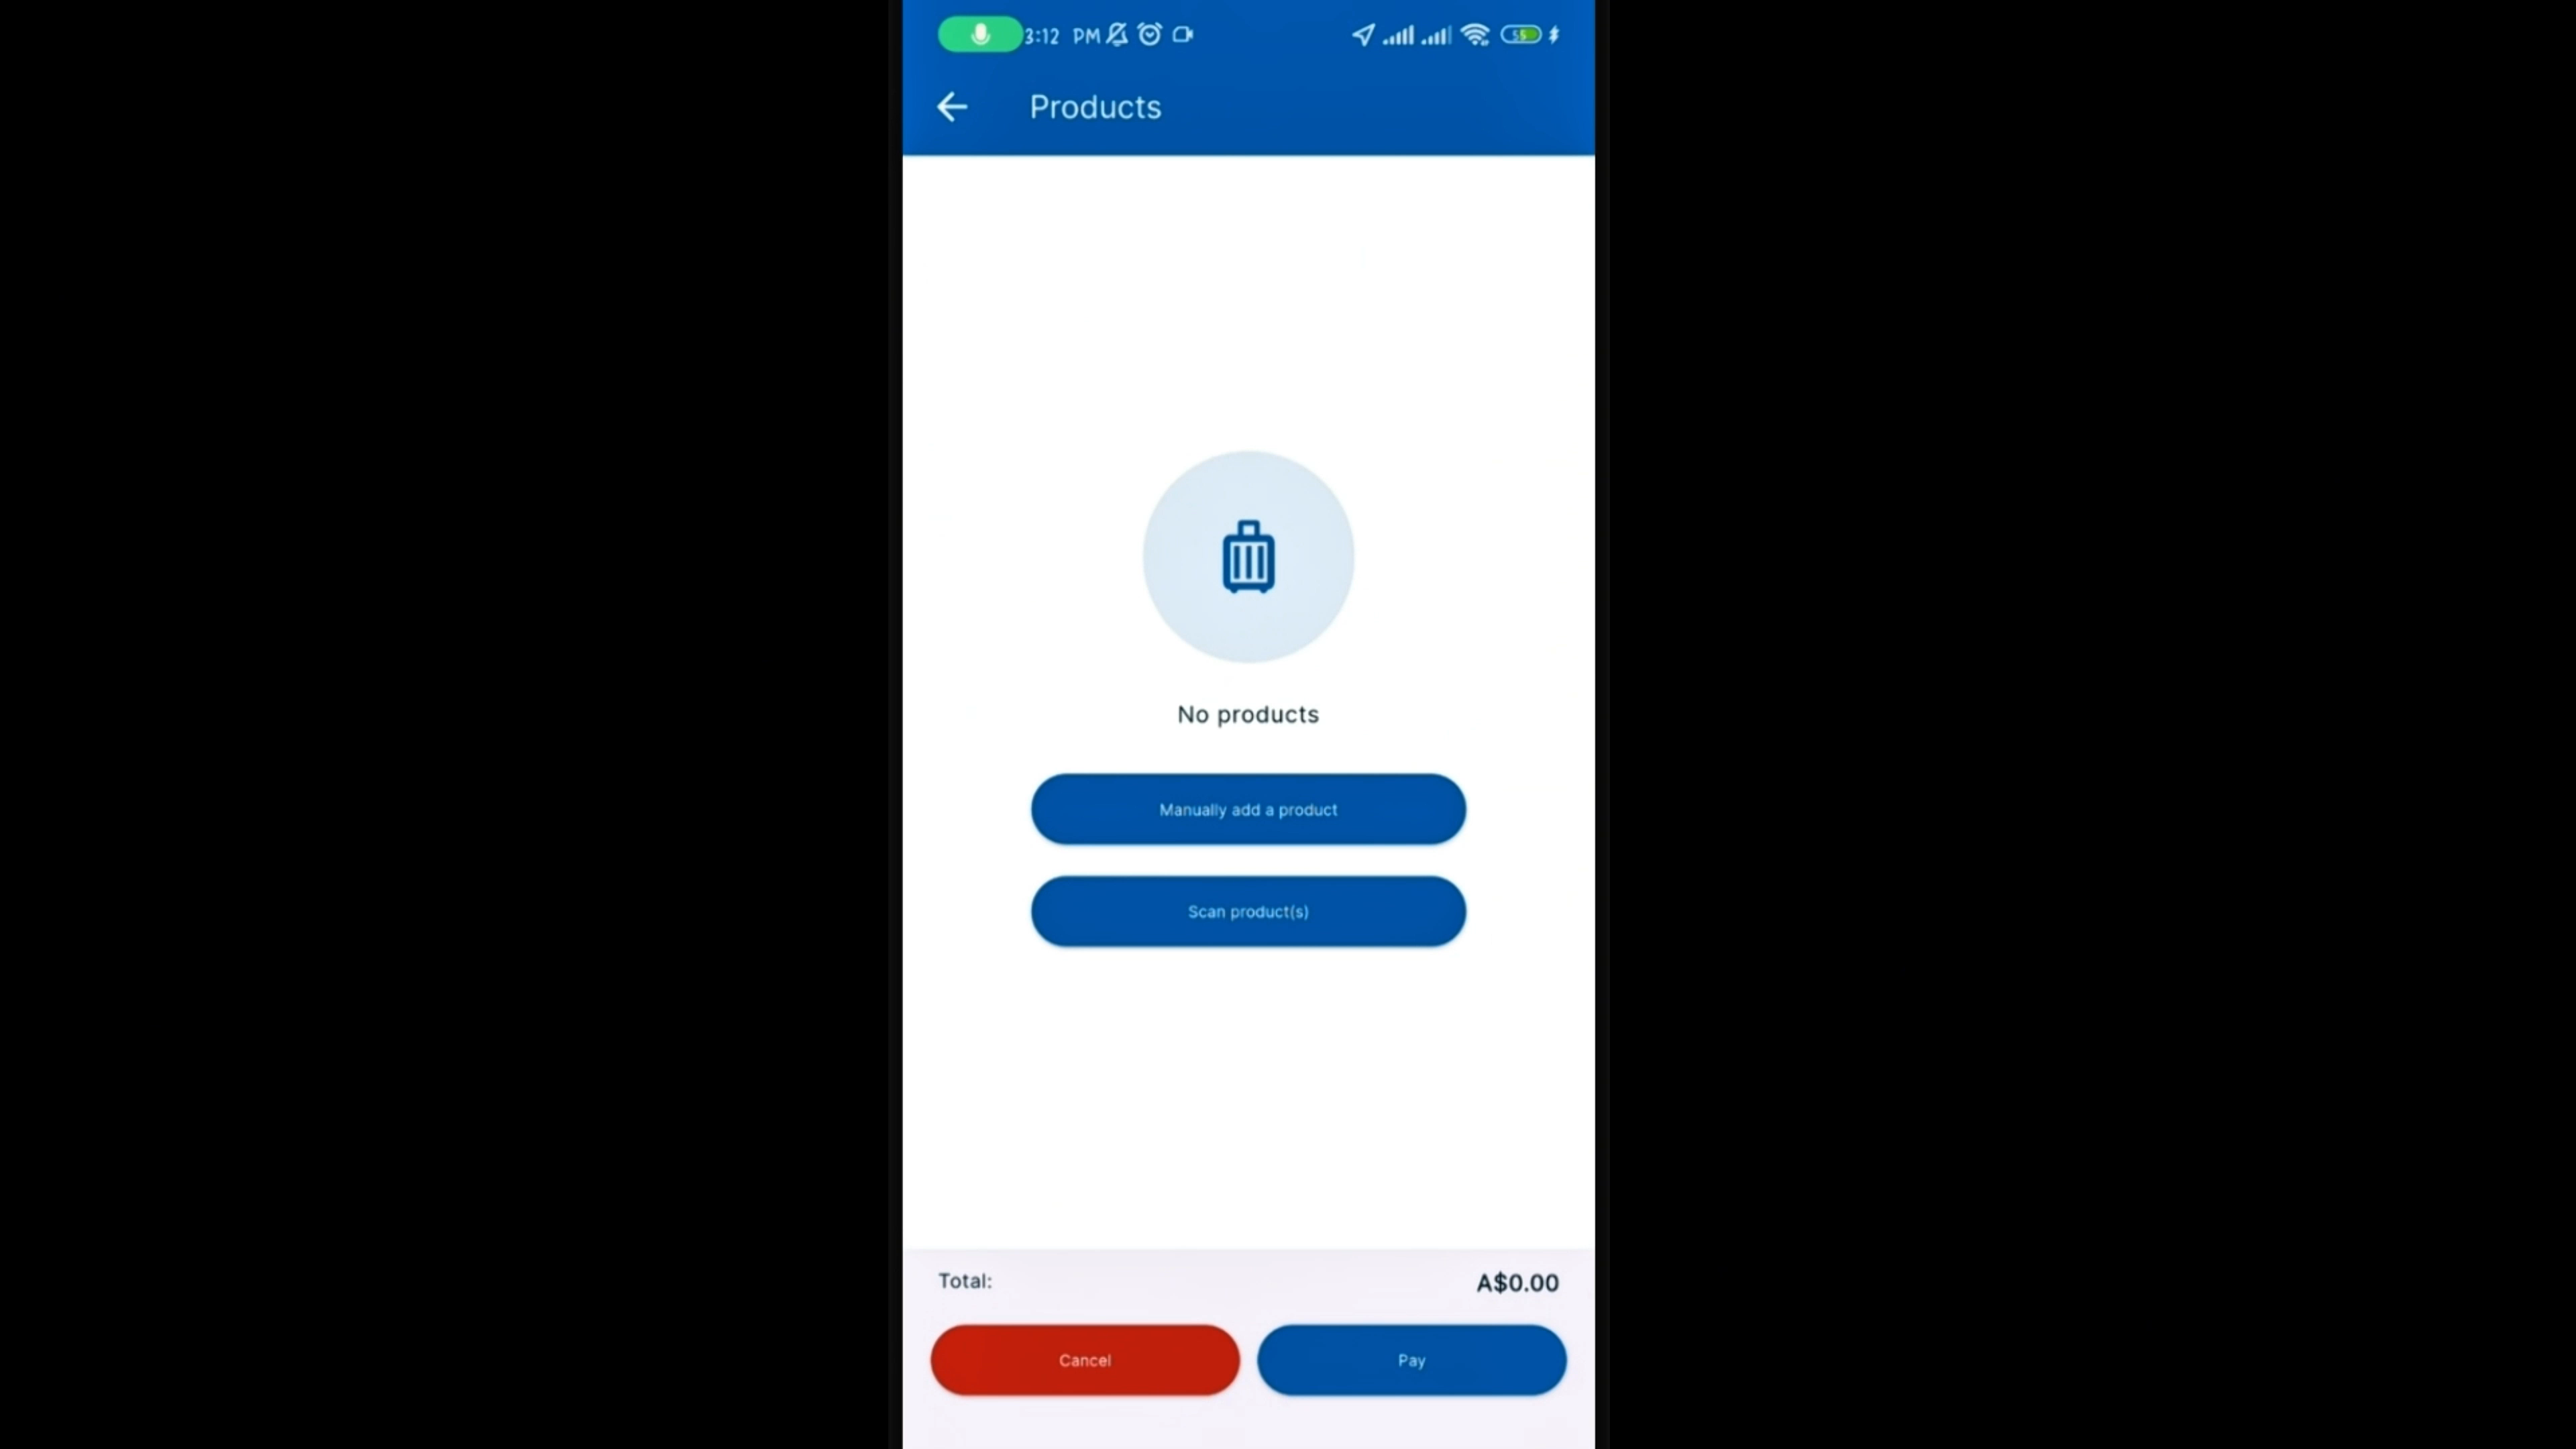 Paso 4
Add a product to the sale, either by scanning it or adding it manually. For this example, we'll add it manually.
 Paso 5
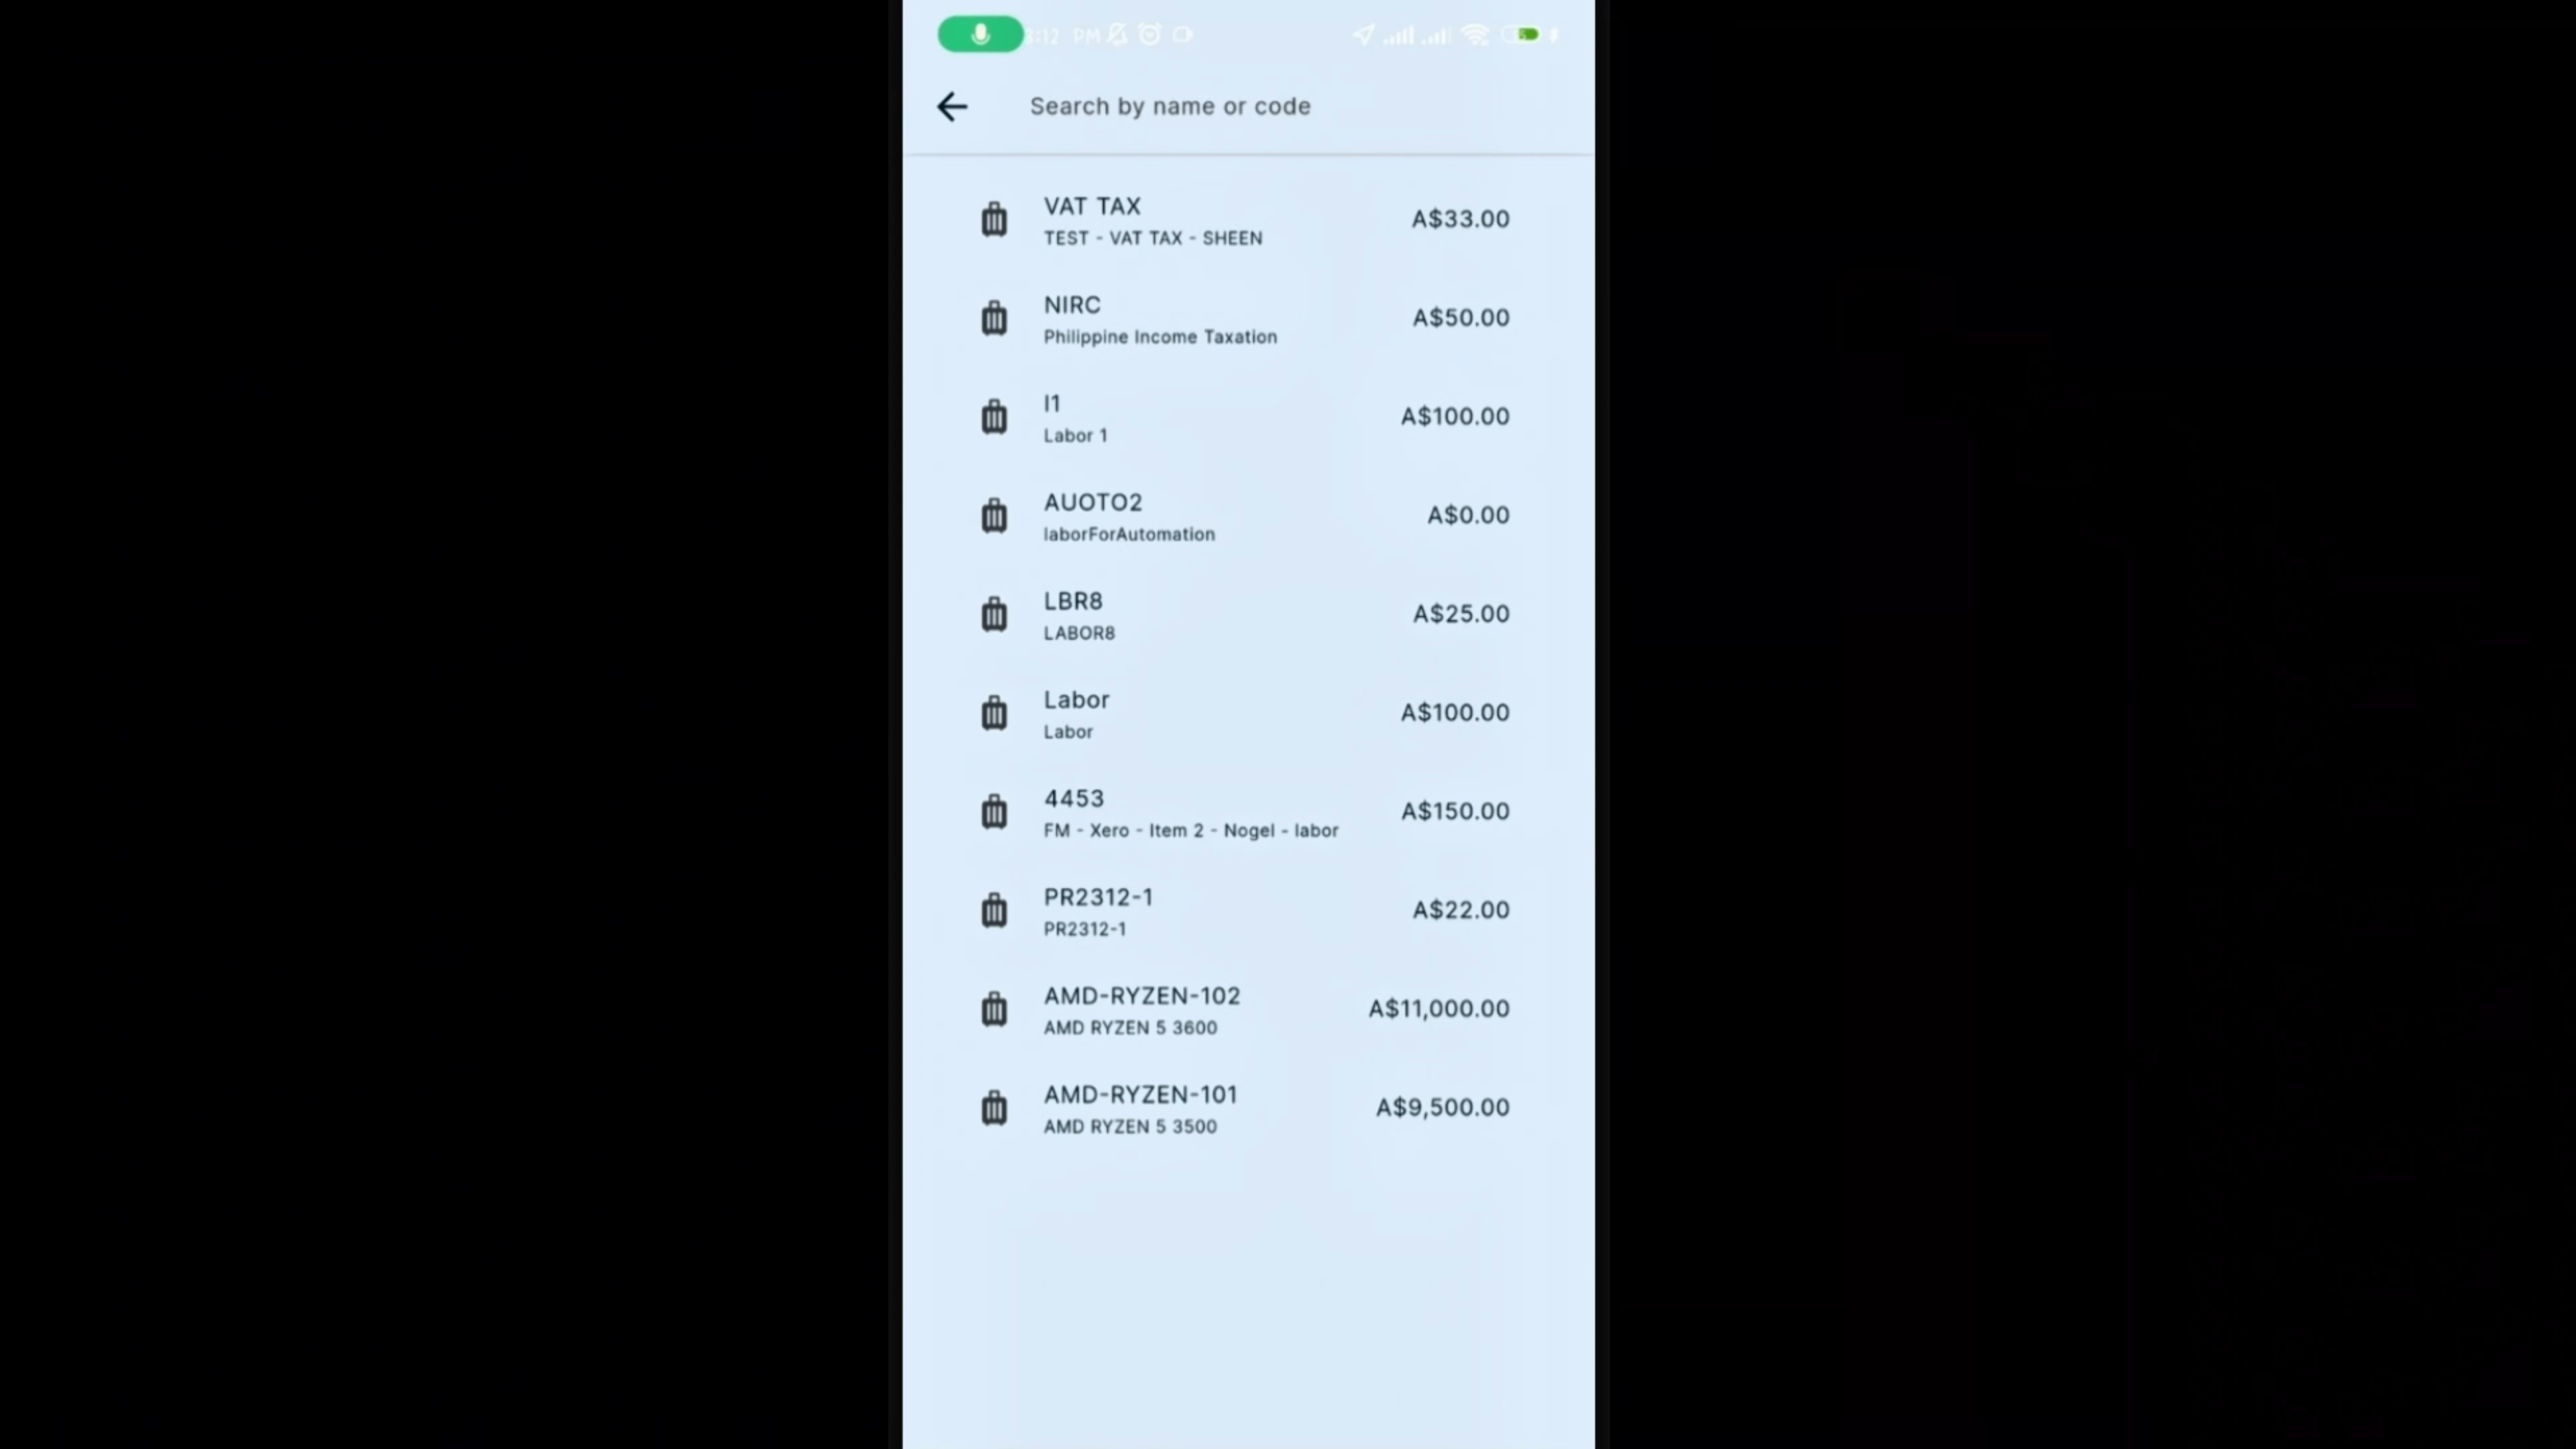
Search for the product, select it, then tap Add.
 Paso 6
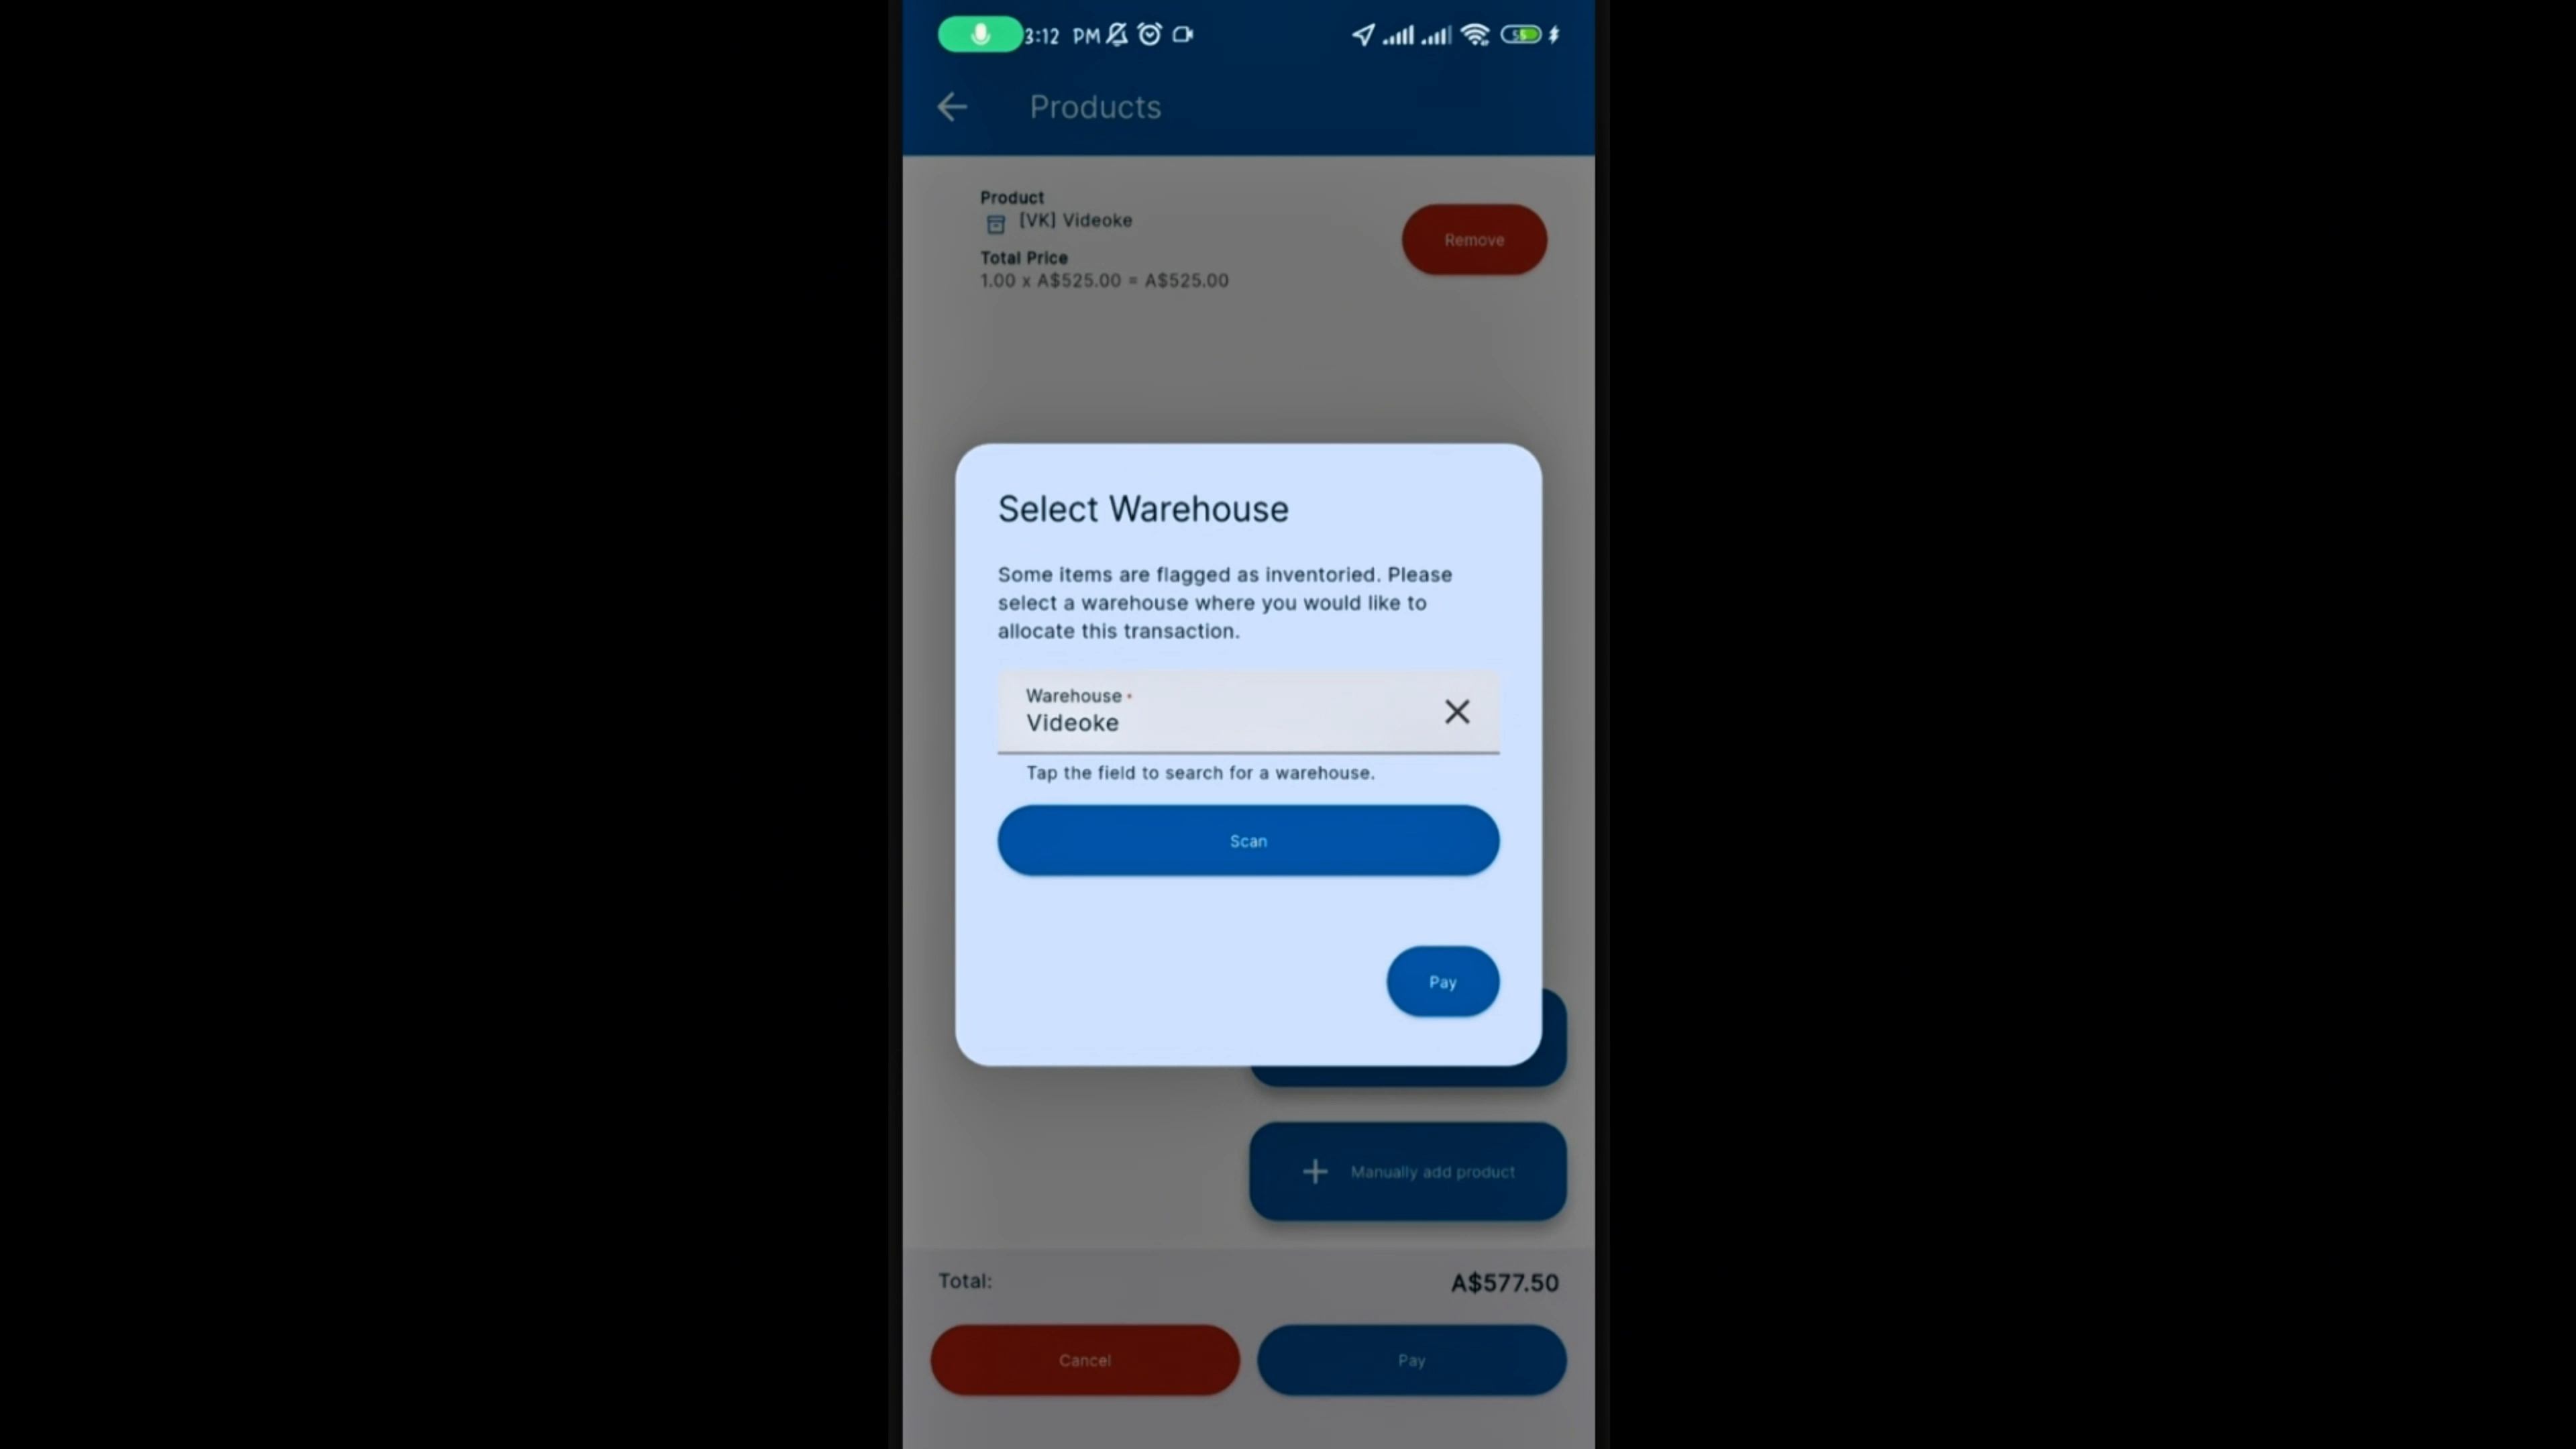
Once the product has been added, tap Pay, then select the warehouse to allocate the product from and tap Pay again.
 Paso 7
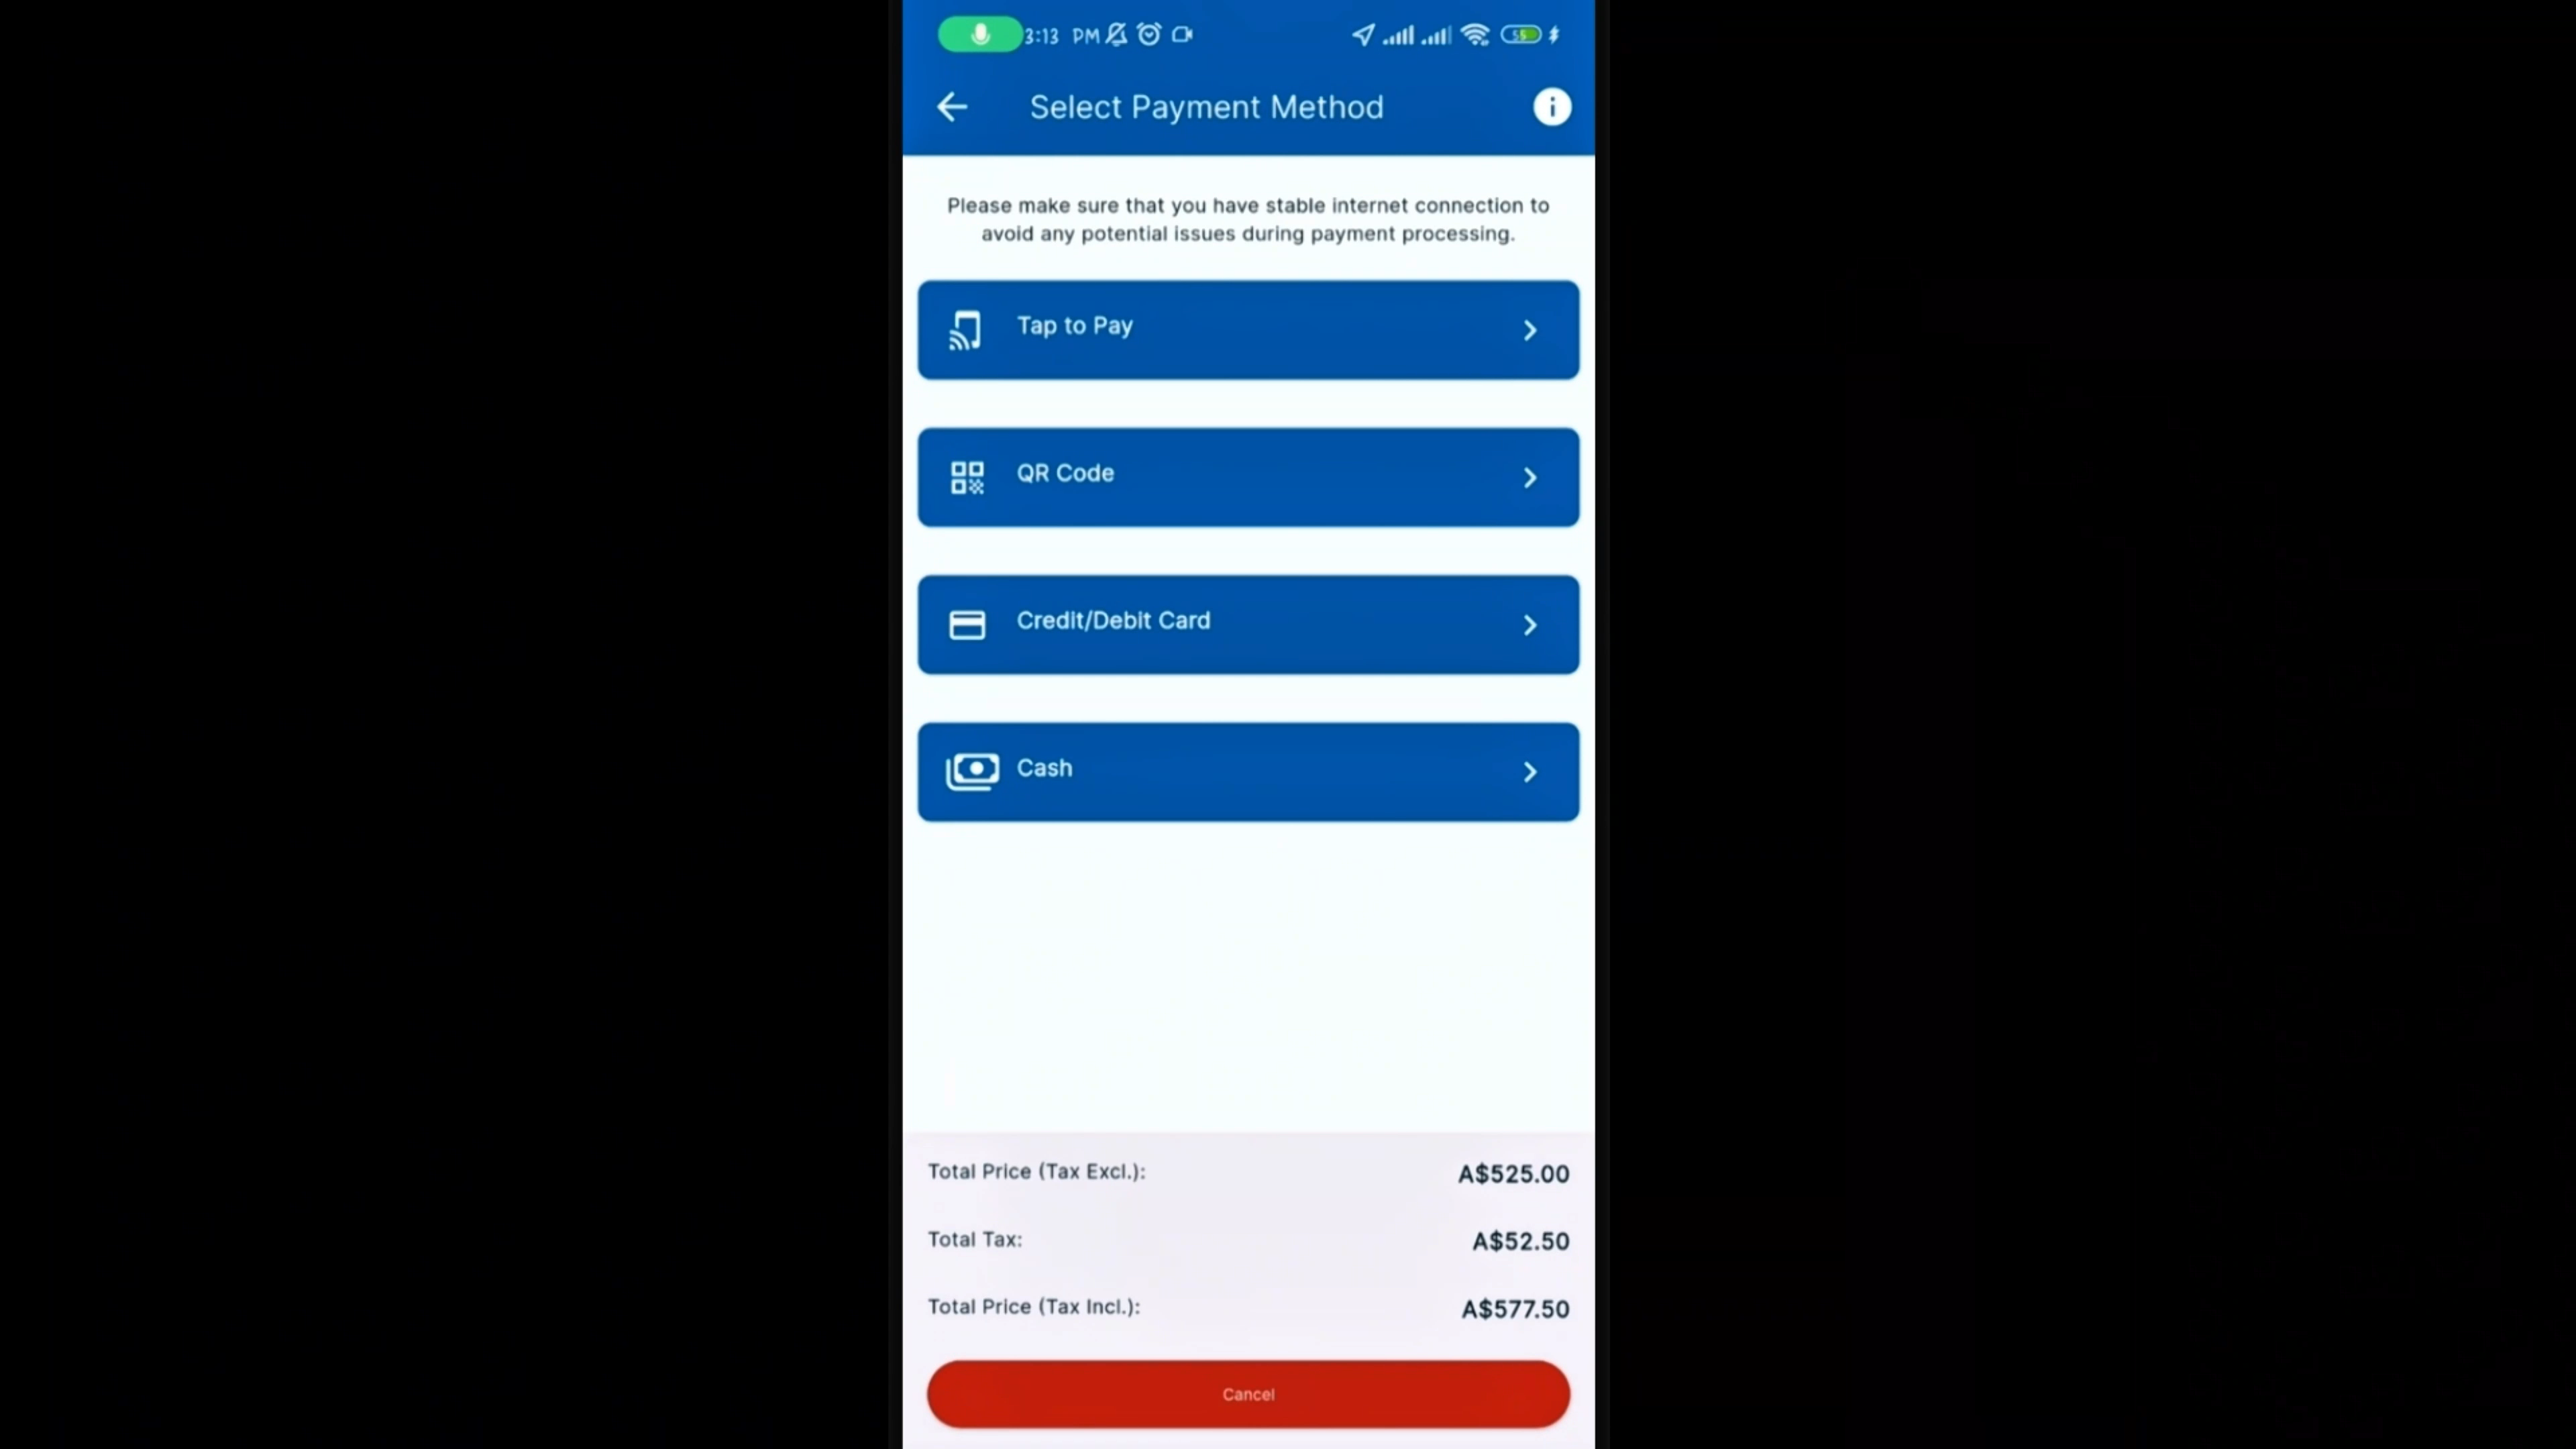
Select a payment method. Several options are available — for this tutorial, we'll select Cash.
 Paso 8
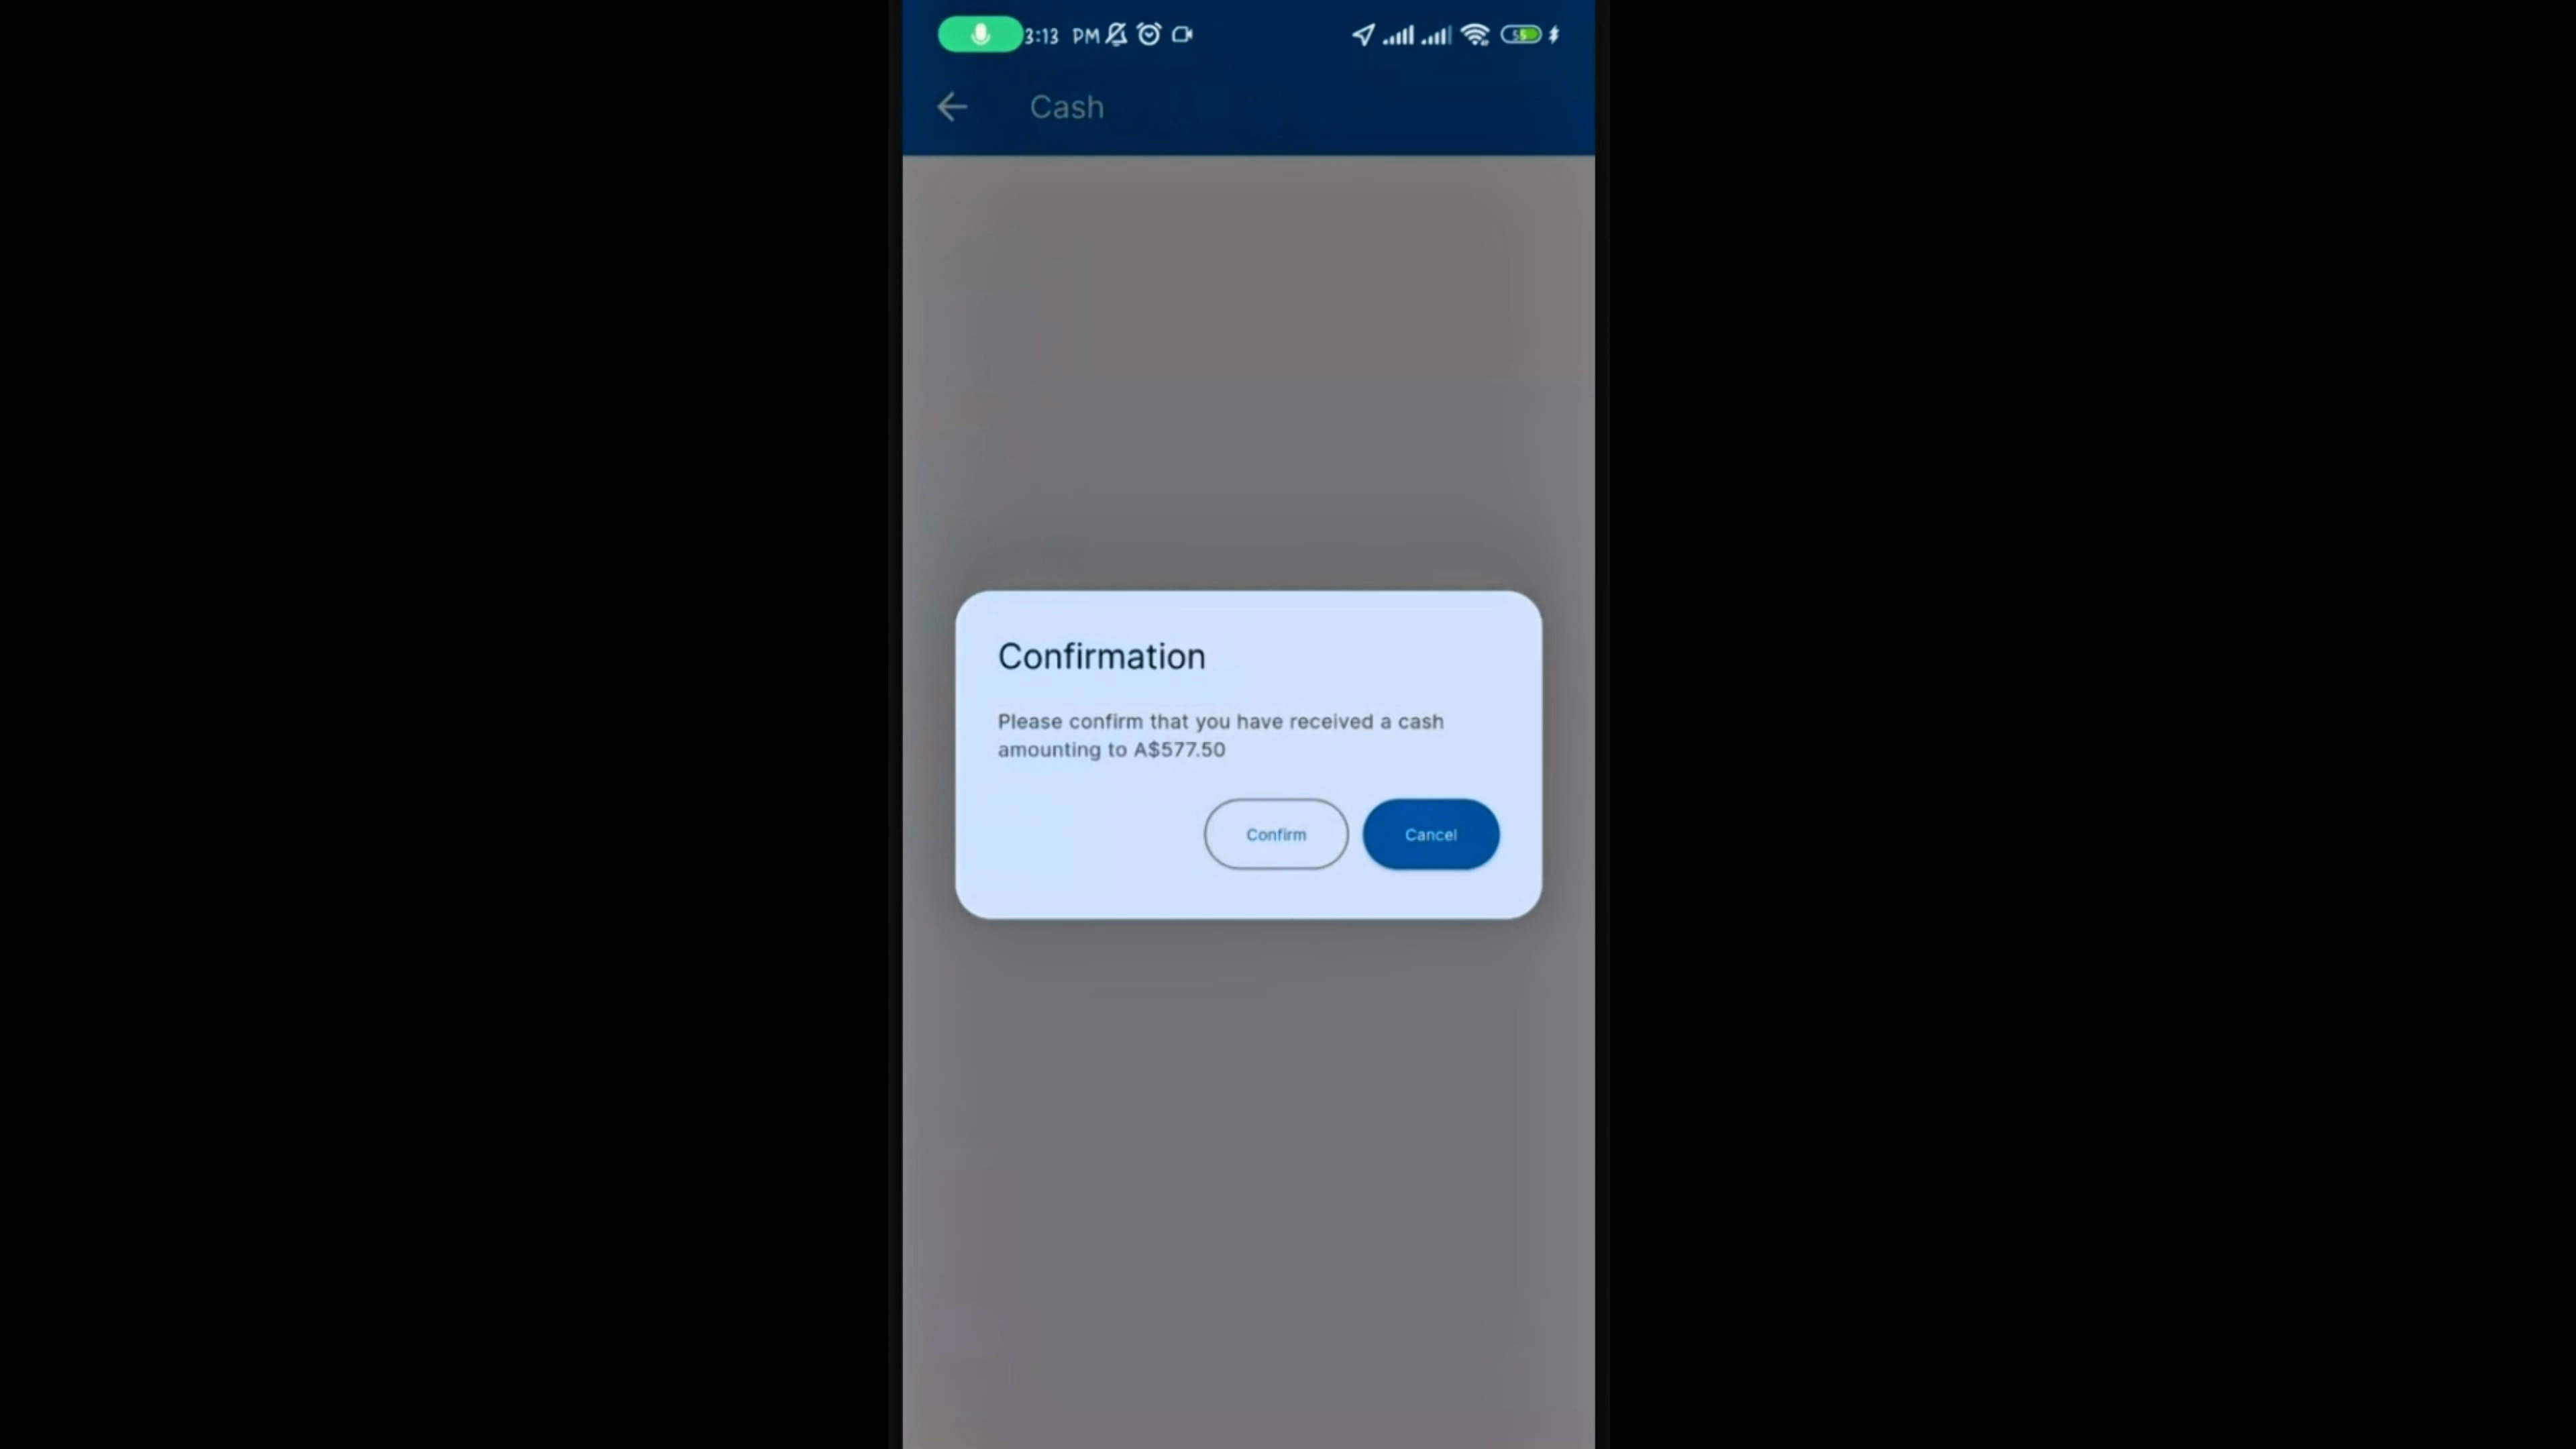
Confirm the payment.
 Paso 9
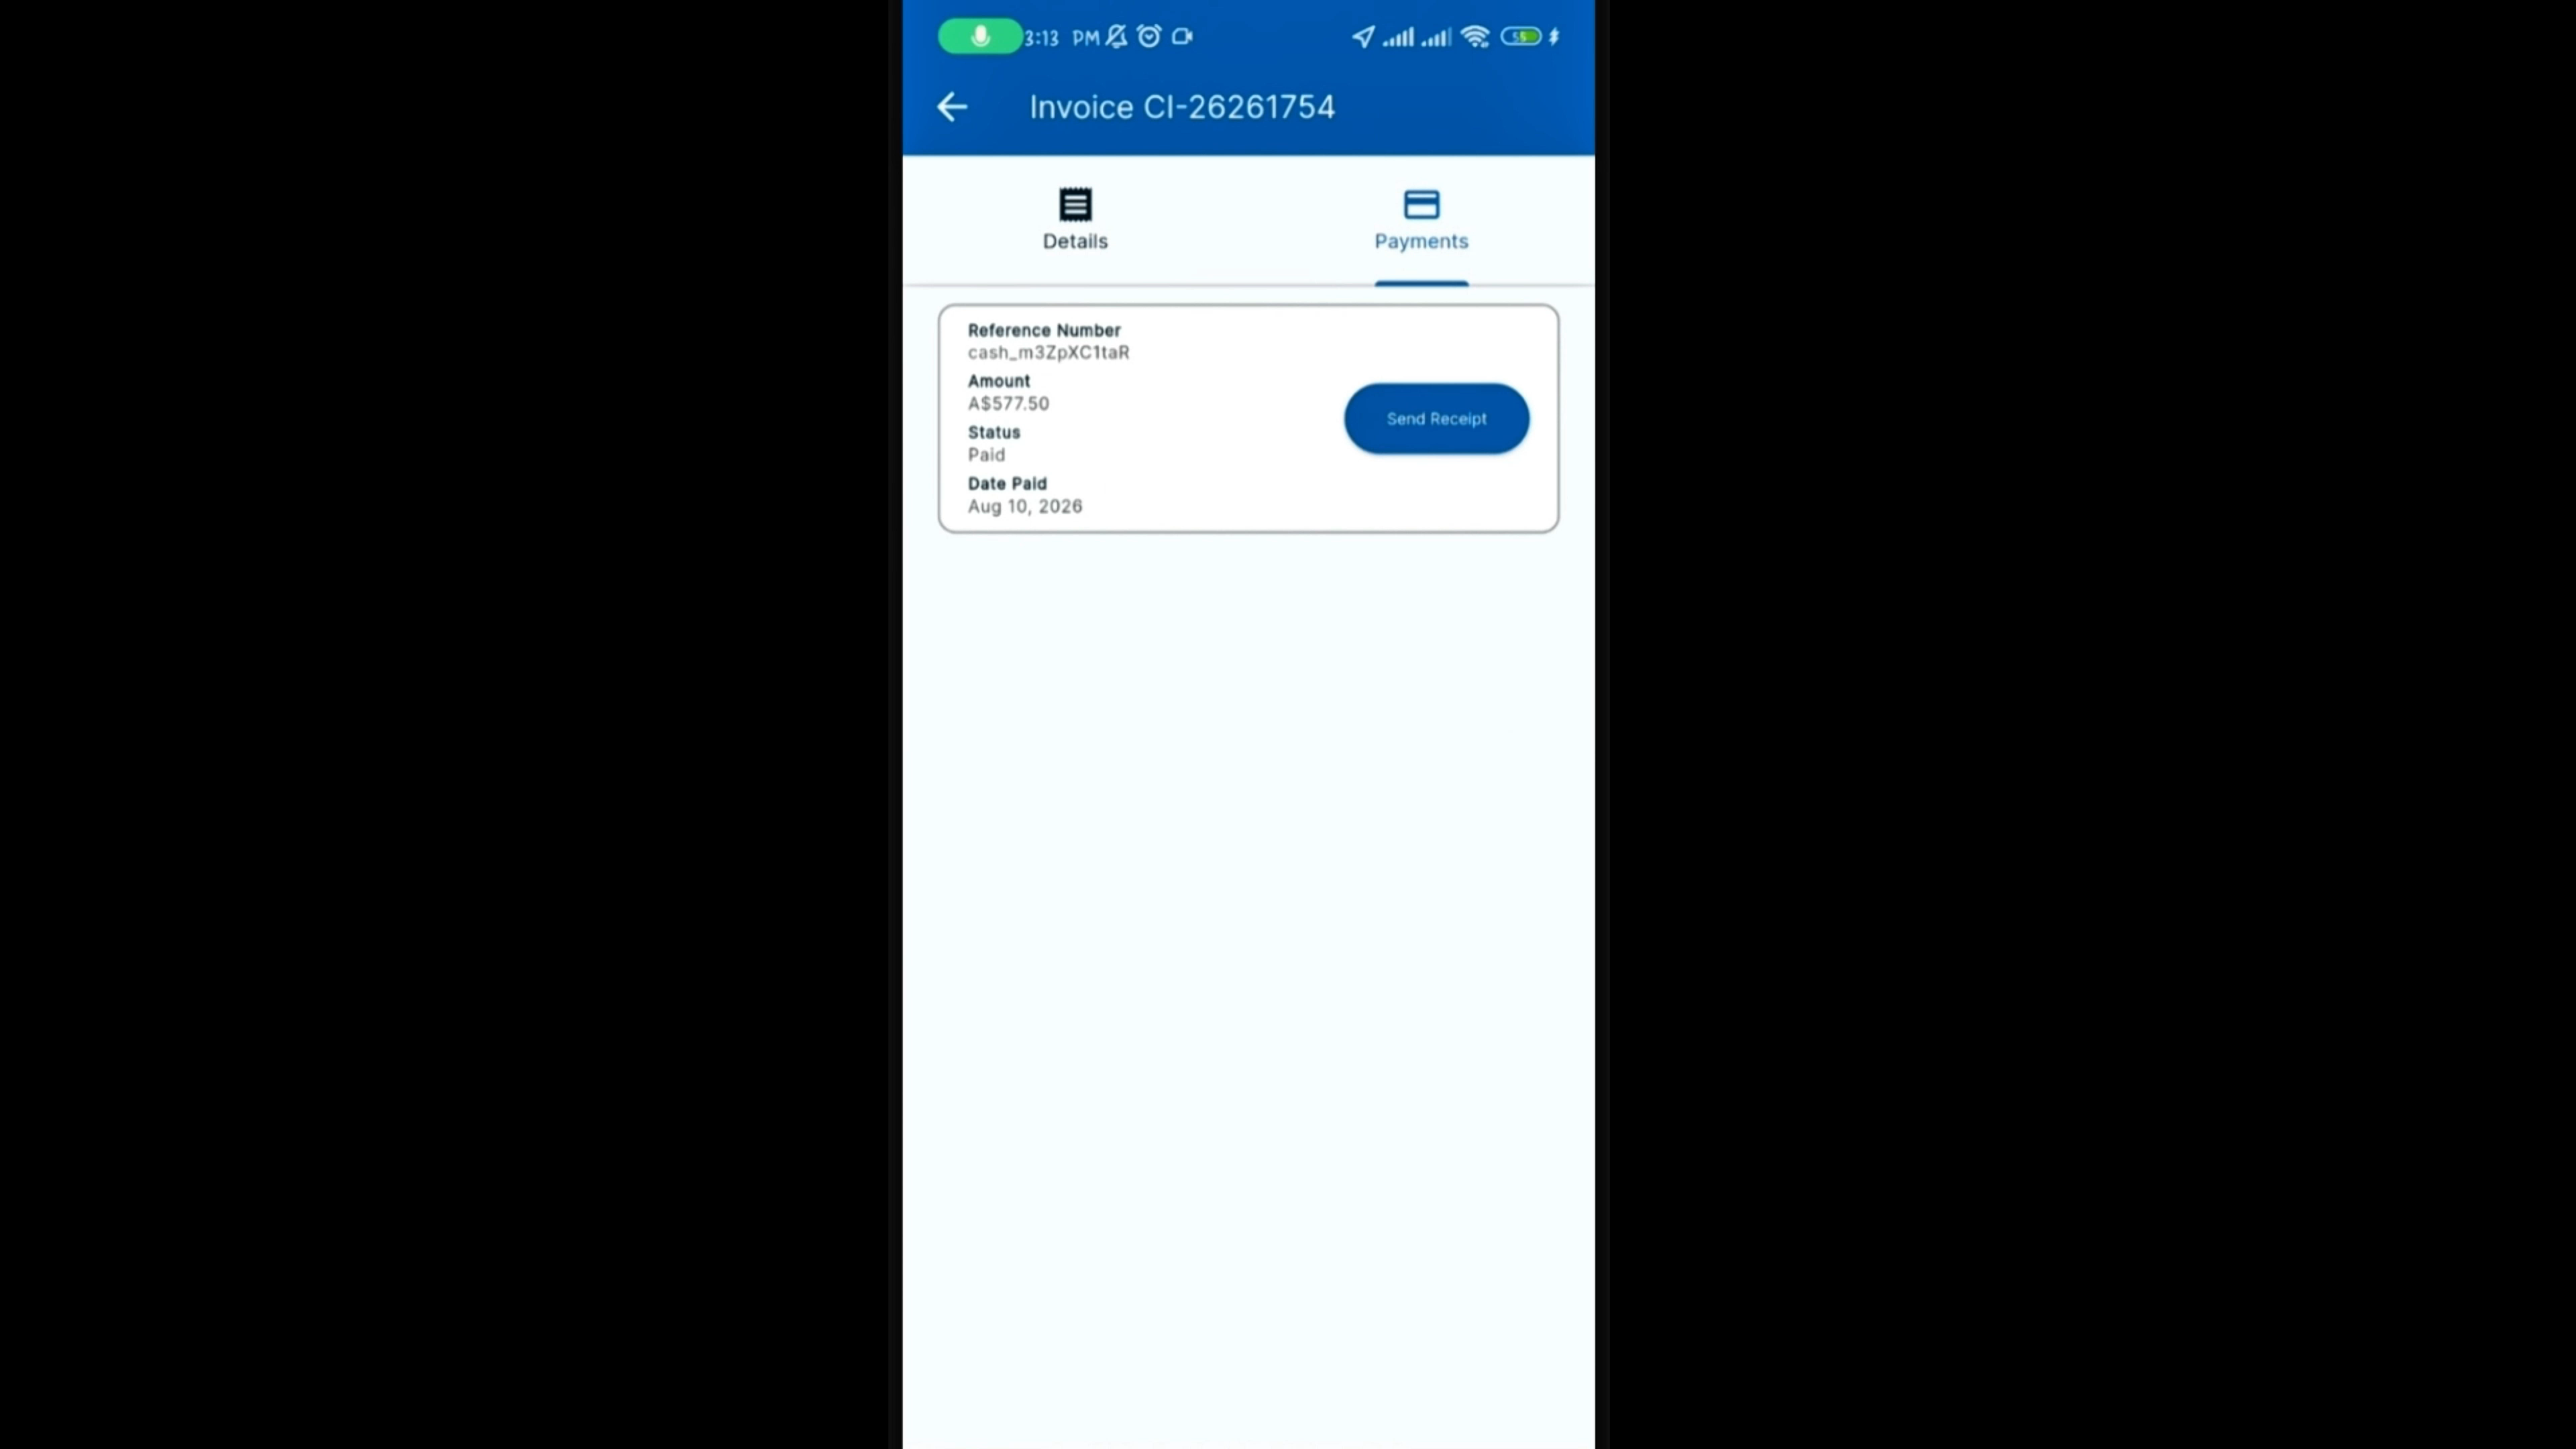
Once the payment is confirmed, you'll be taken to the invoice, where you can view the invoice and payment details or send the receipt.
 Paso 10
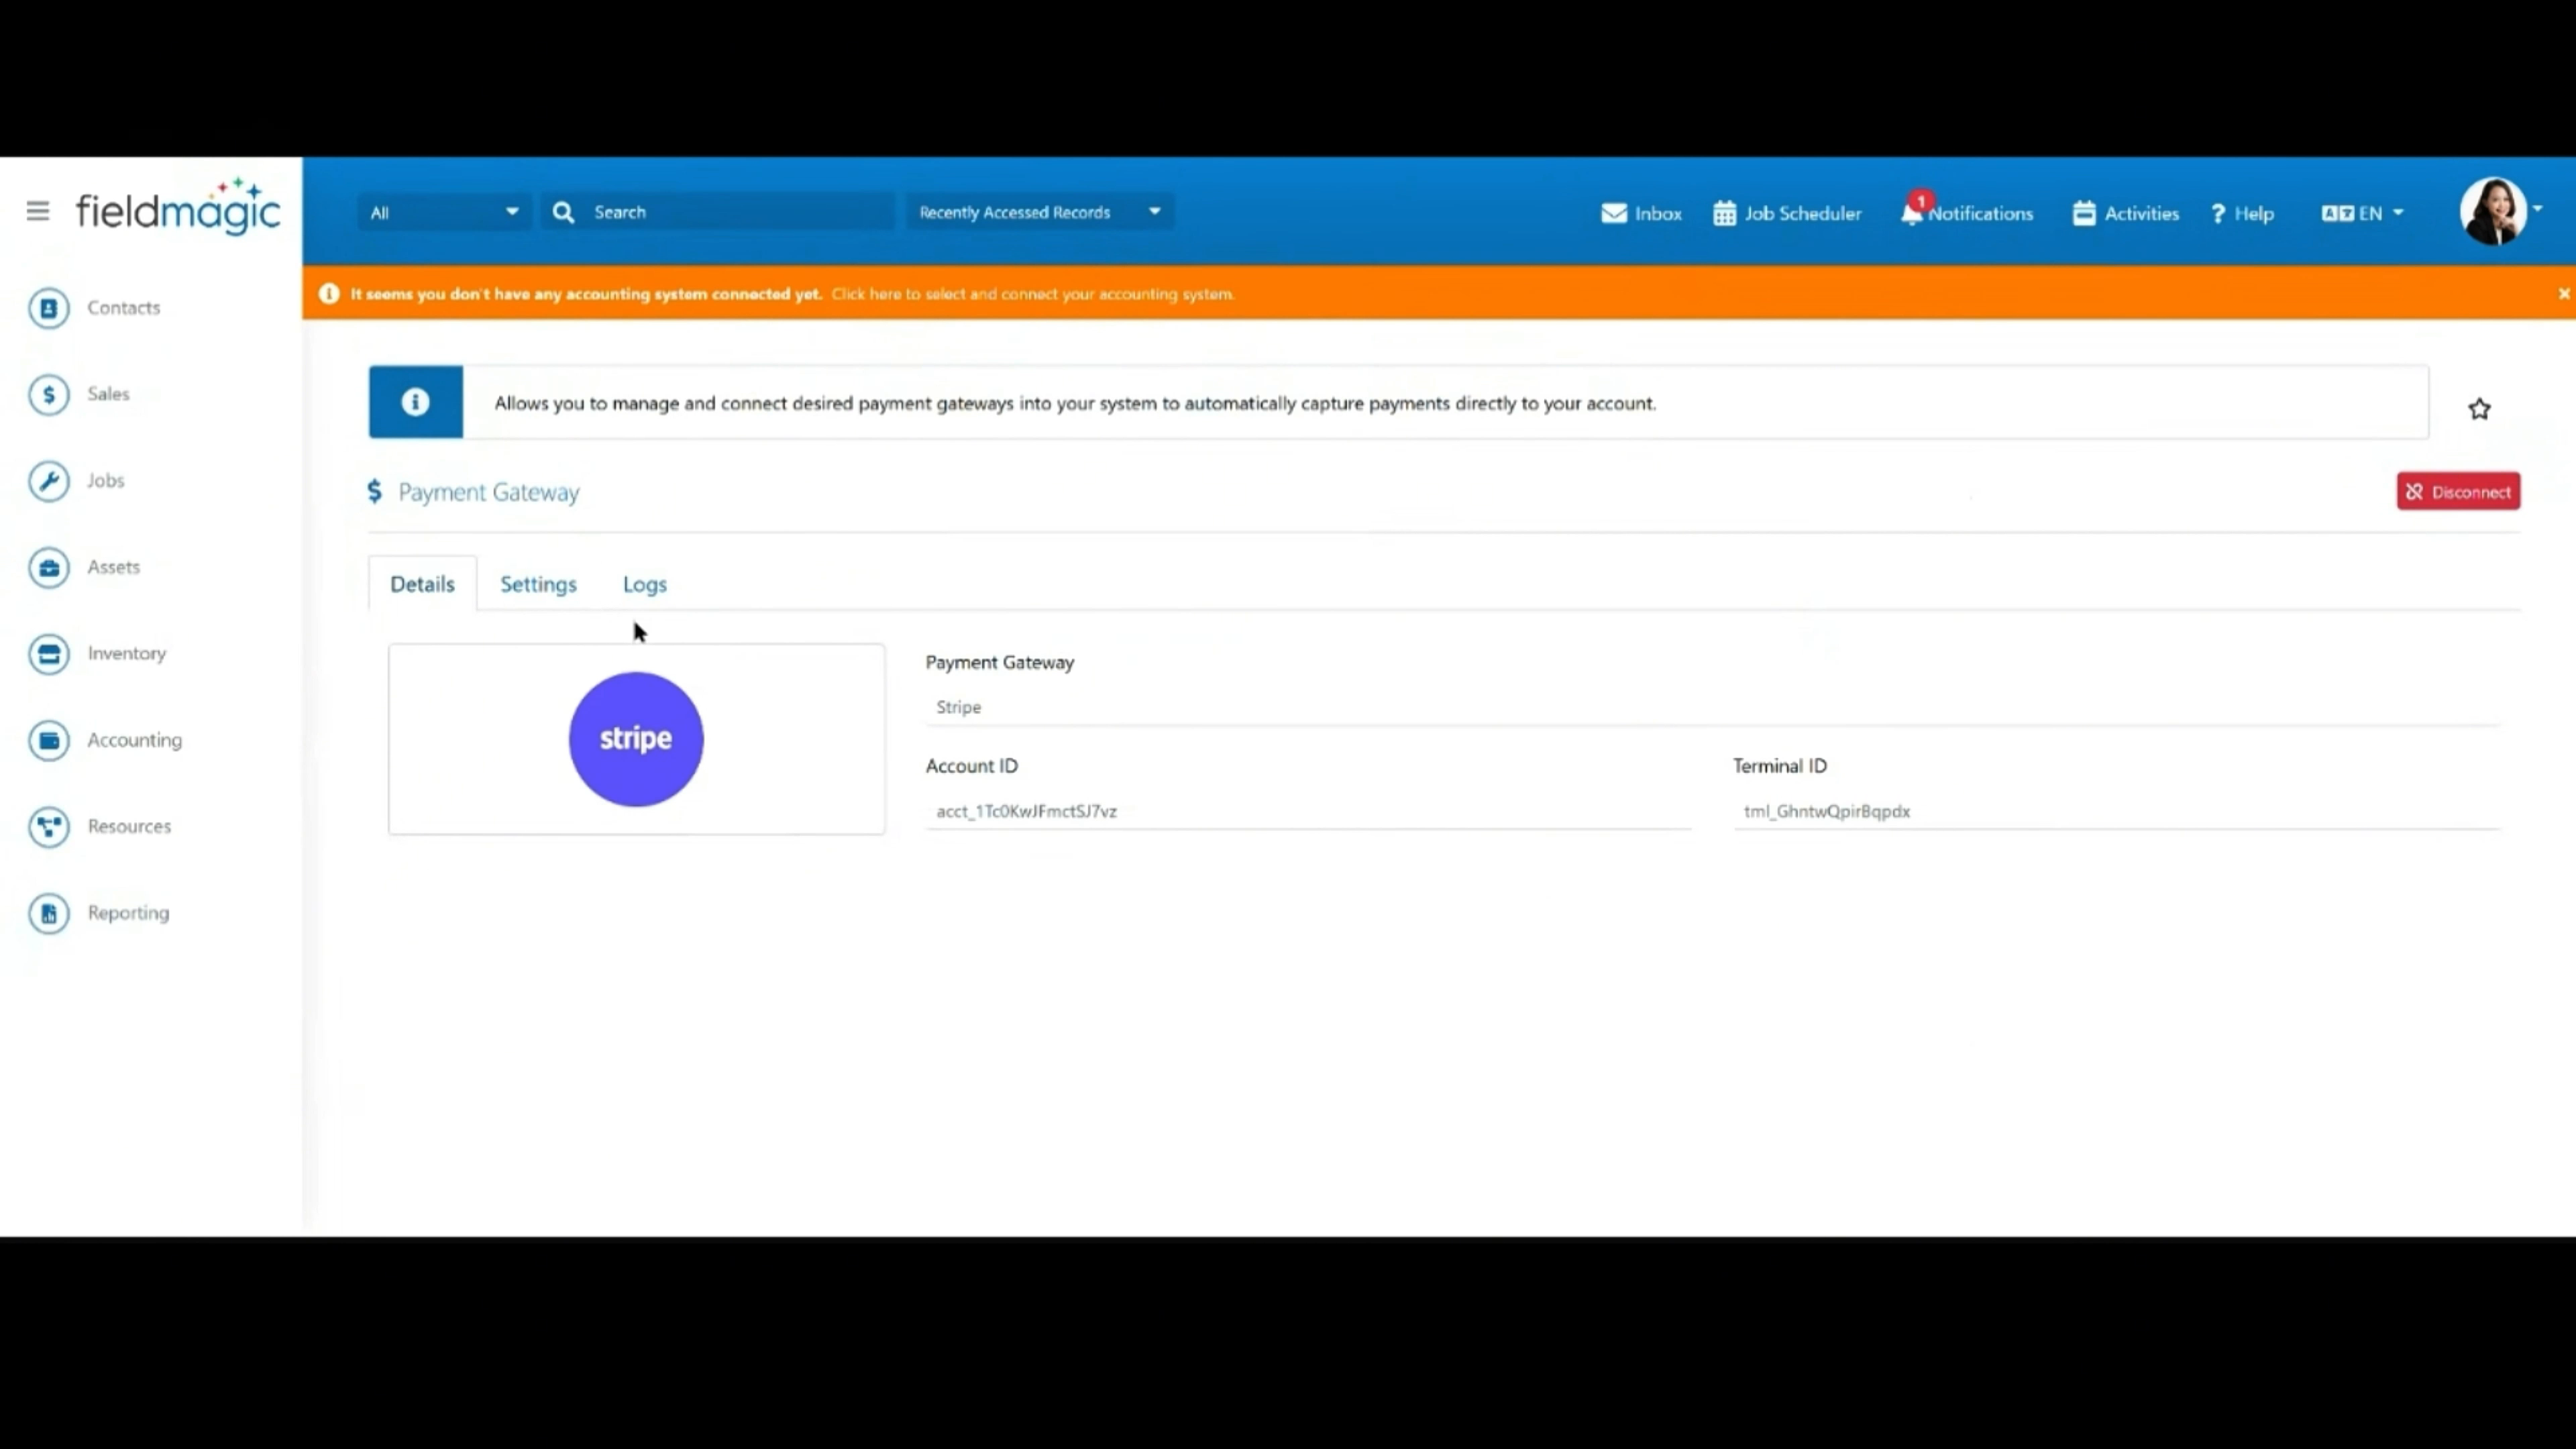
To verify the transaction, open FieldMagic on desktop and navigate to Payment Gateway.
 Paso 11
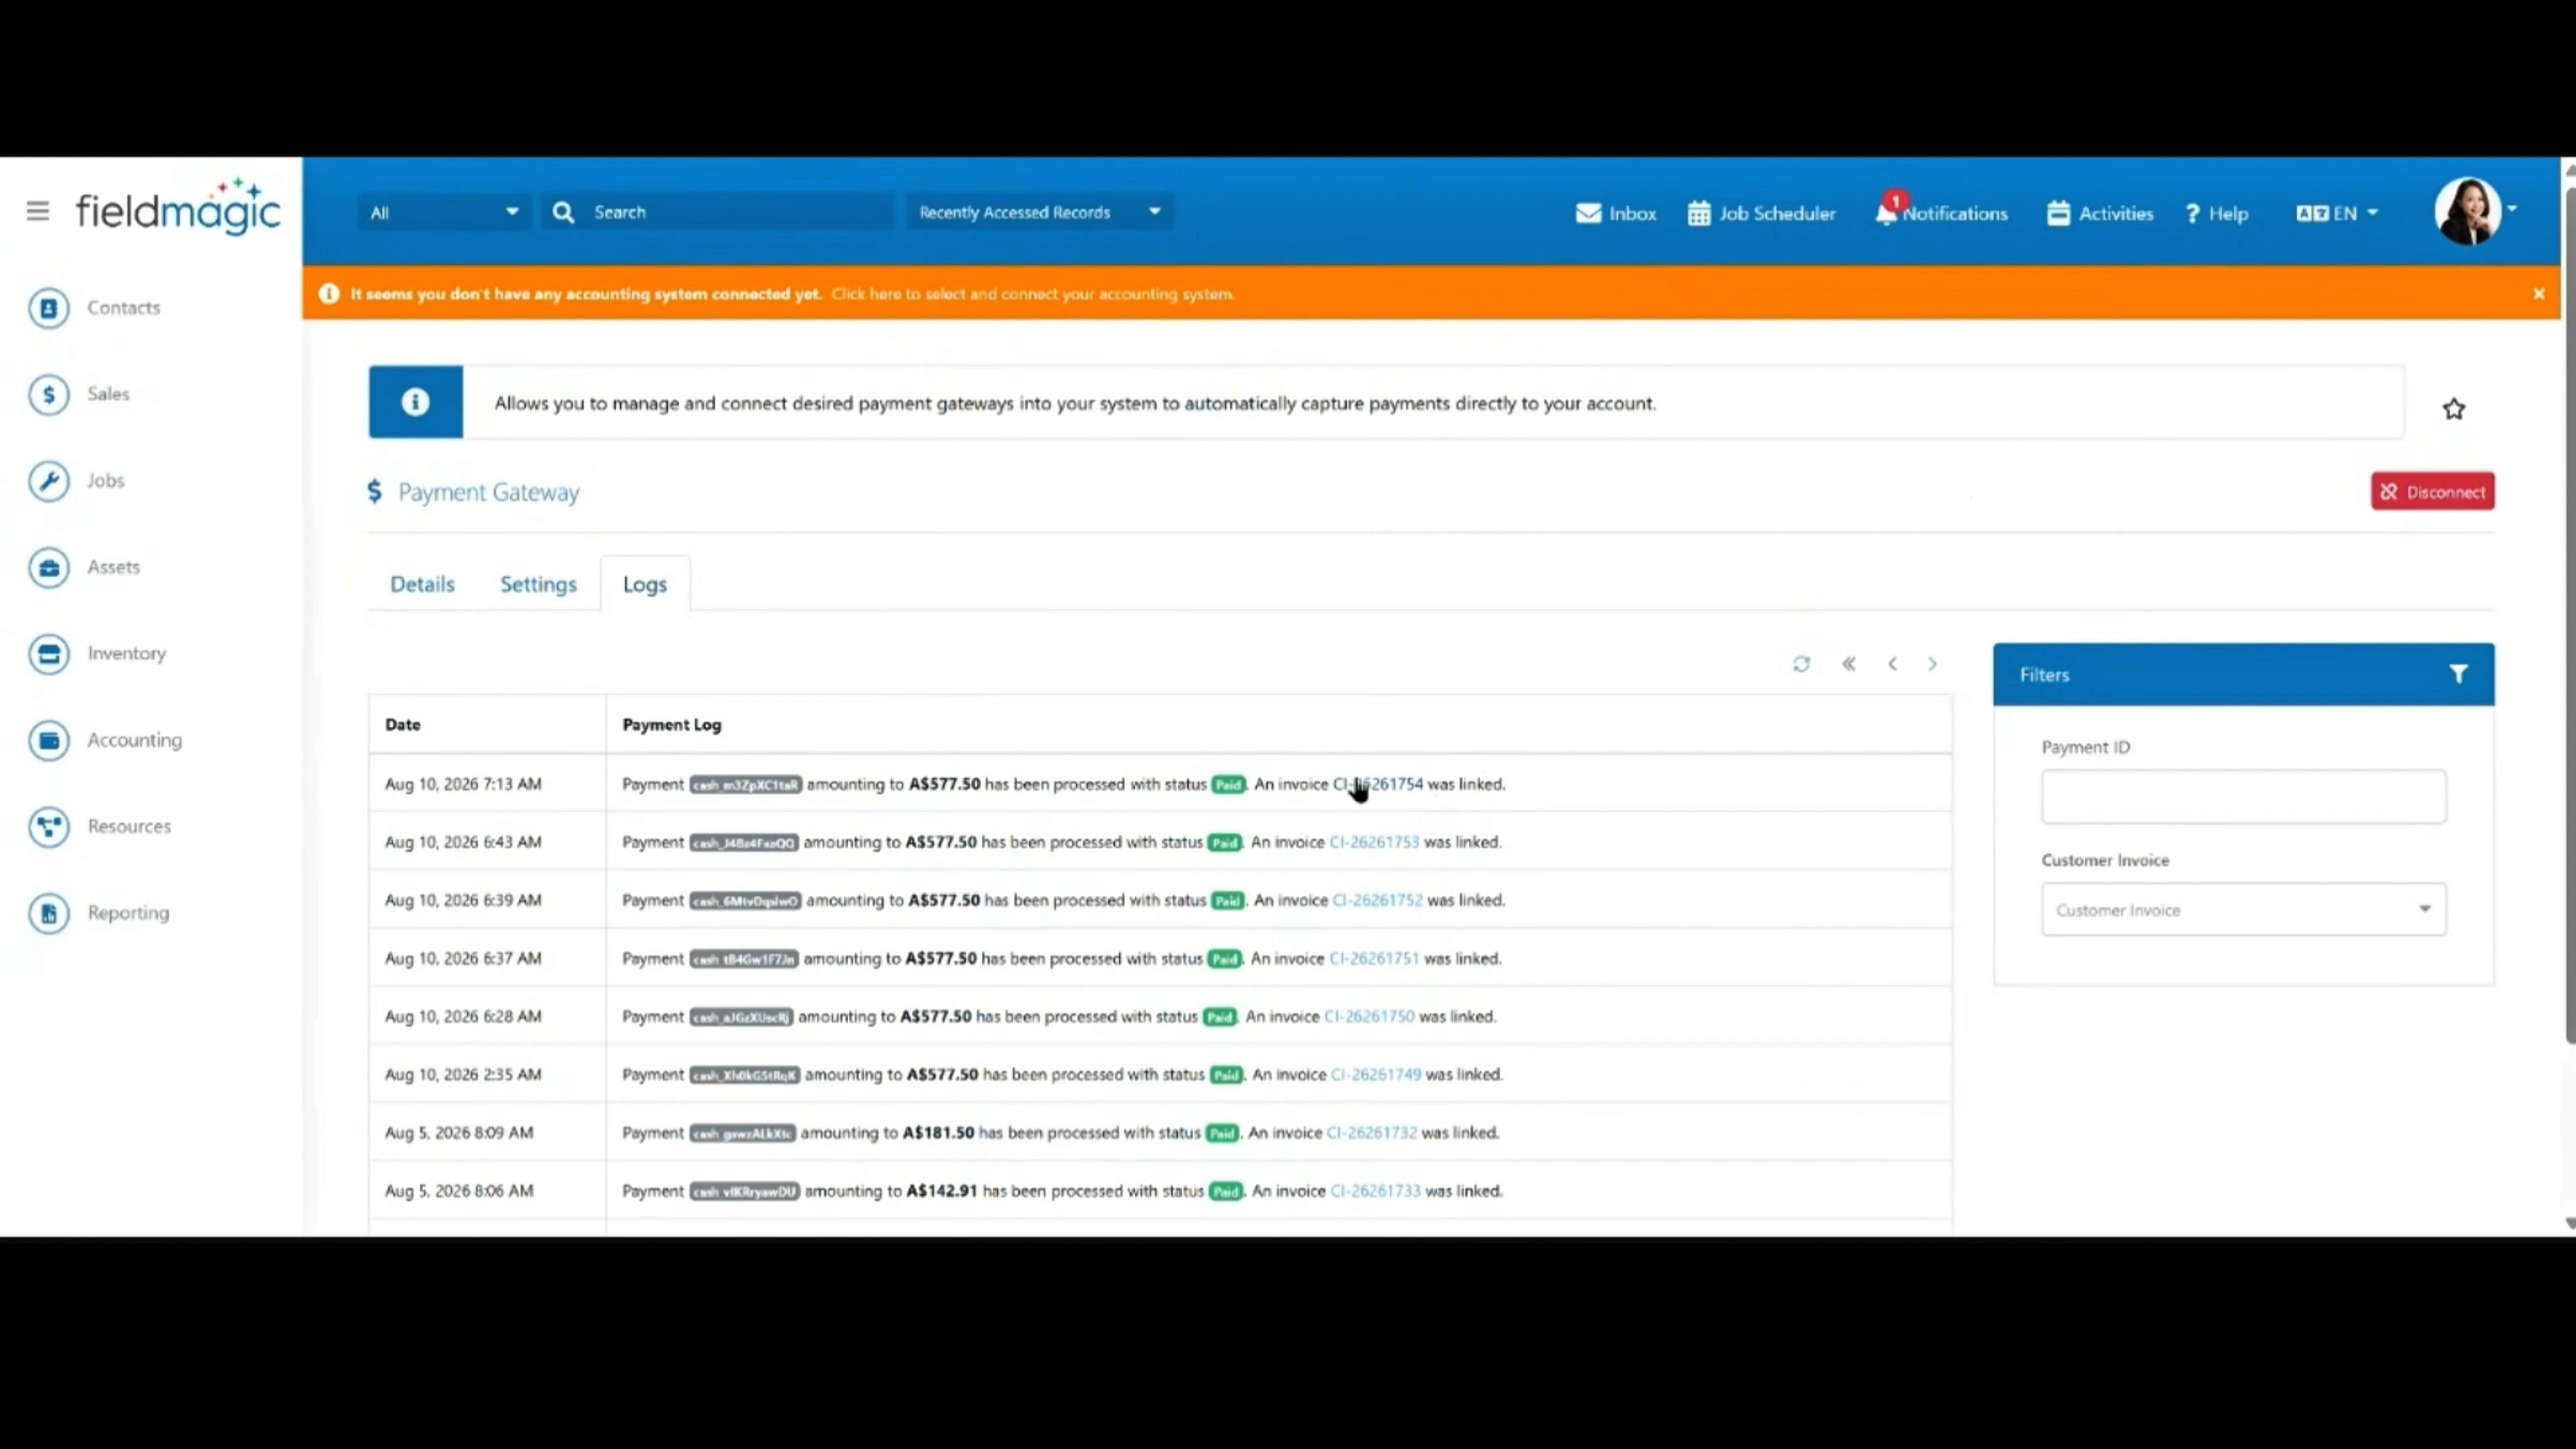
Click Logs to view all transaction logs. The invoice is automatically created in FieldMagic, where you can review the line items and other invoice details.