Job Management
Create a Job in FieldMagic
Learn how to create a job in FieldMagic, from selecting a customer and site to setting billing details and system options.
Step-by-step instructions
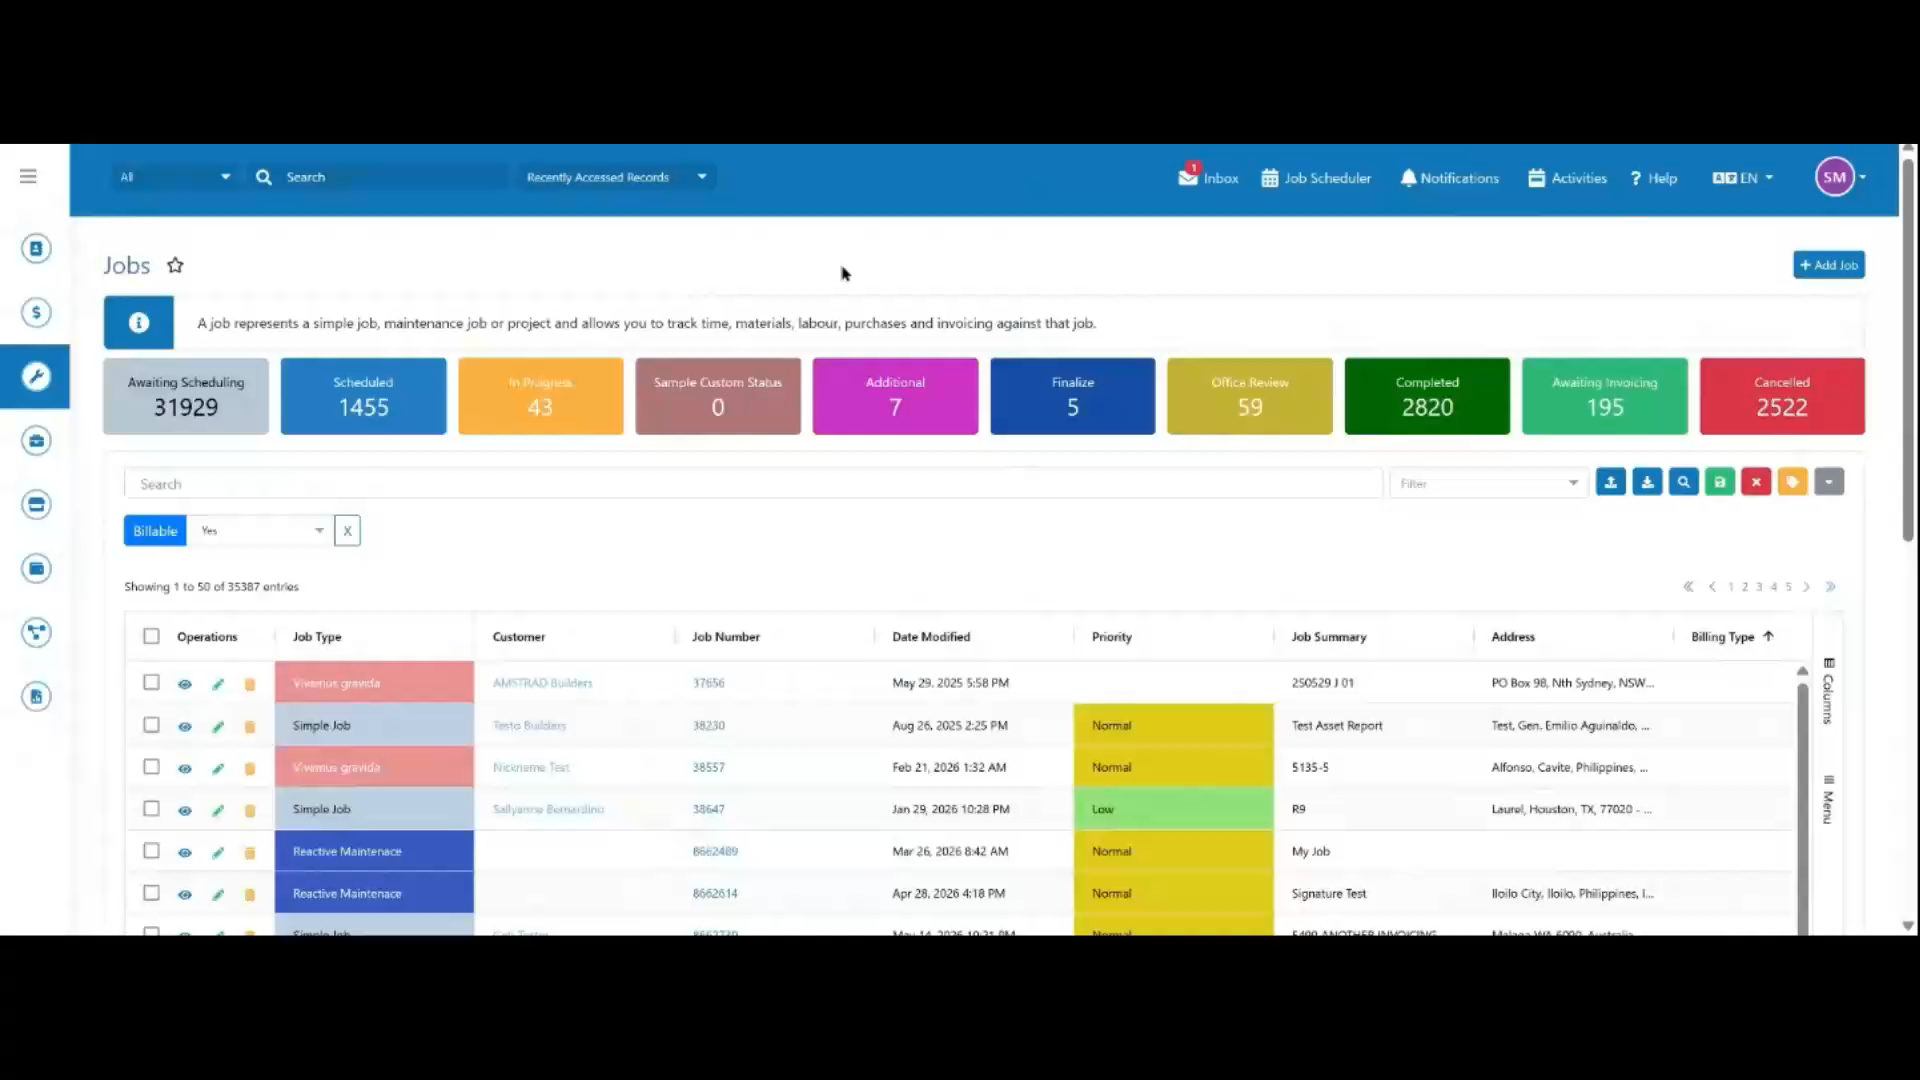 Step 1
Open the Jobs module from the main navigation to view your job list.
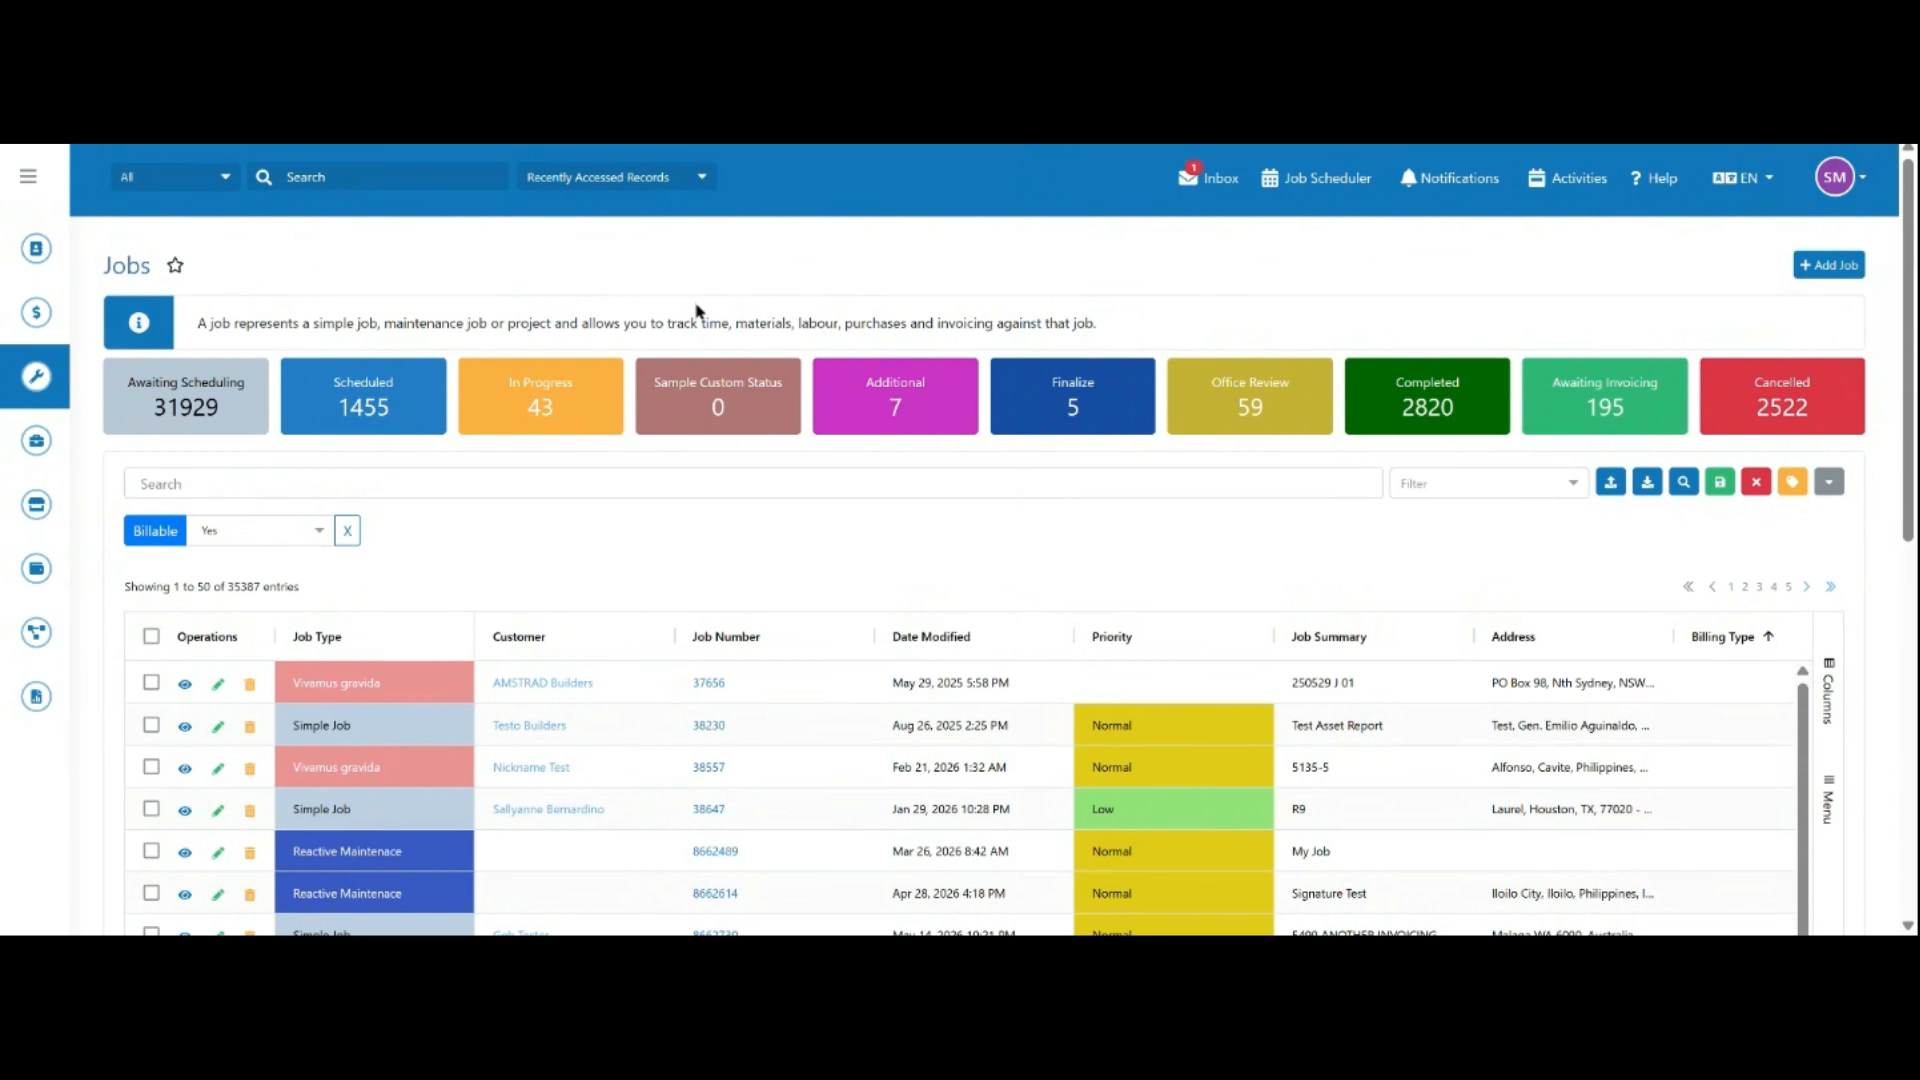 Step 2
Click Add Job to open the new job form.
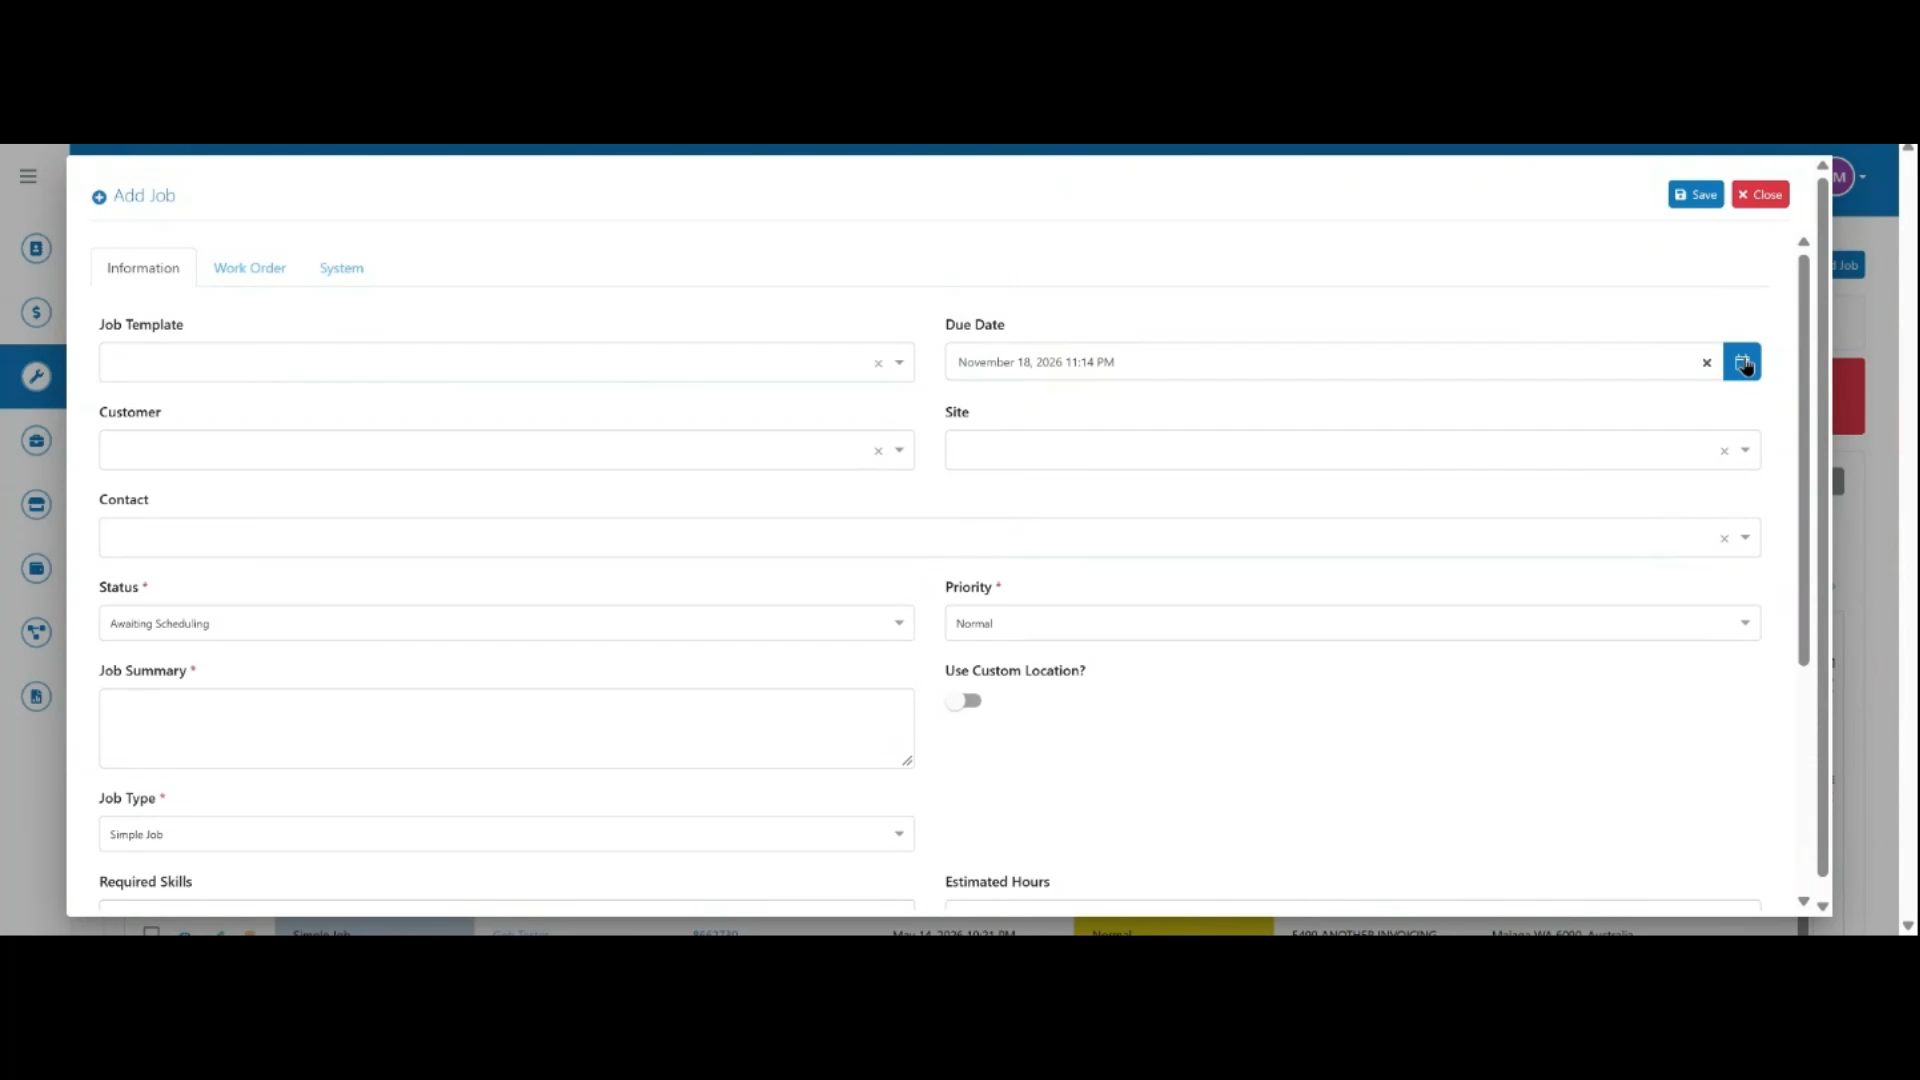 Step 3
Select a job template if one is available, then choose a due date for the job.
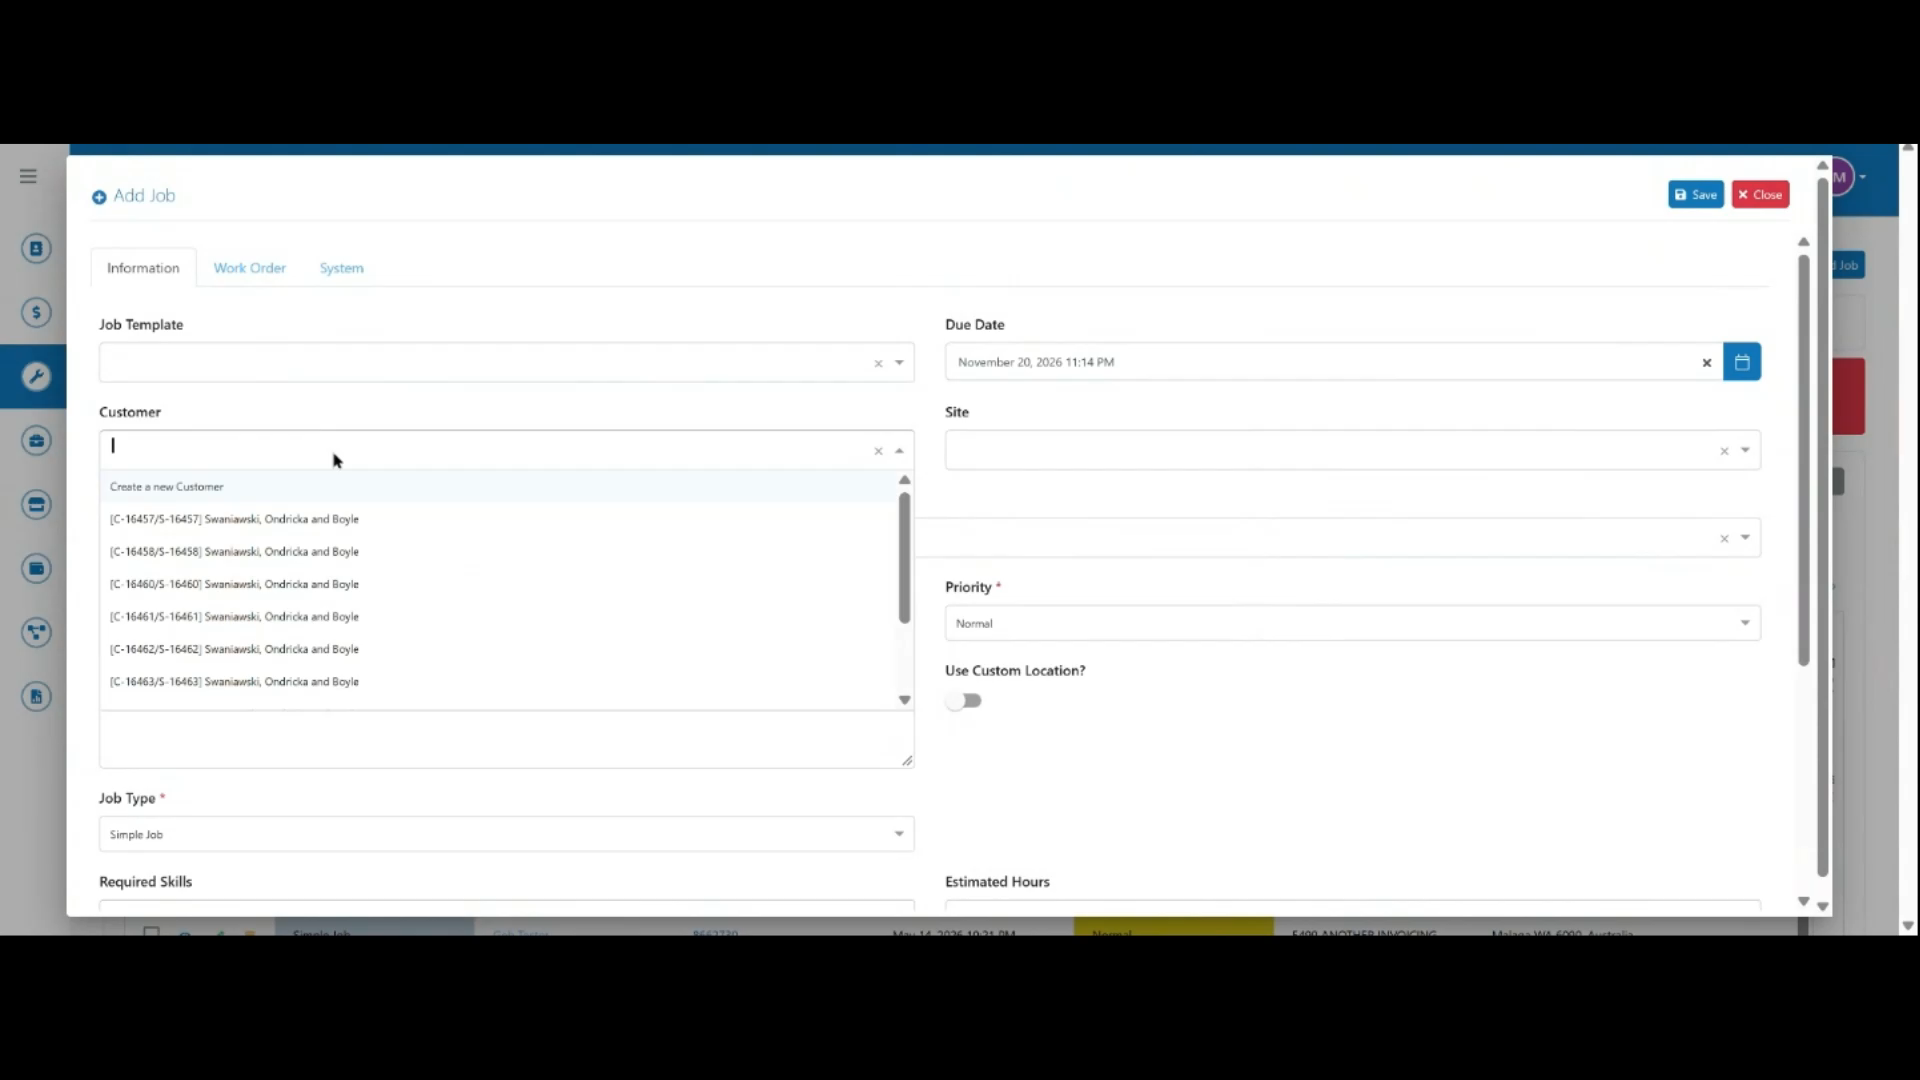 Step 4
Search for and select the customer this job is for.
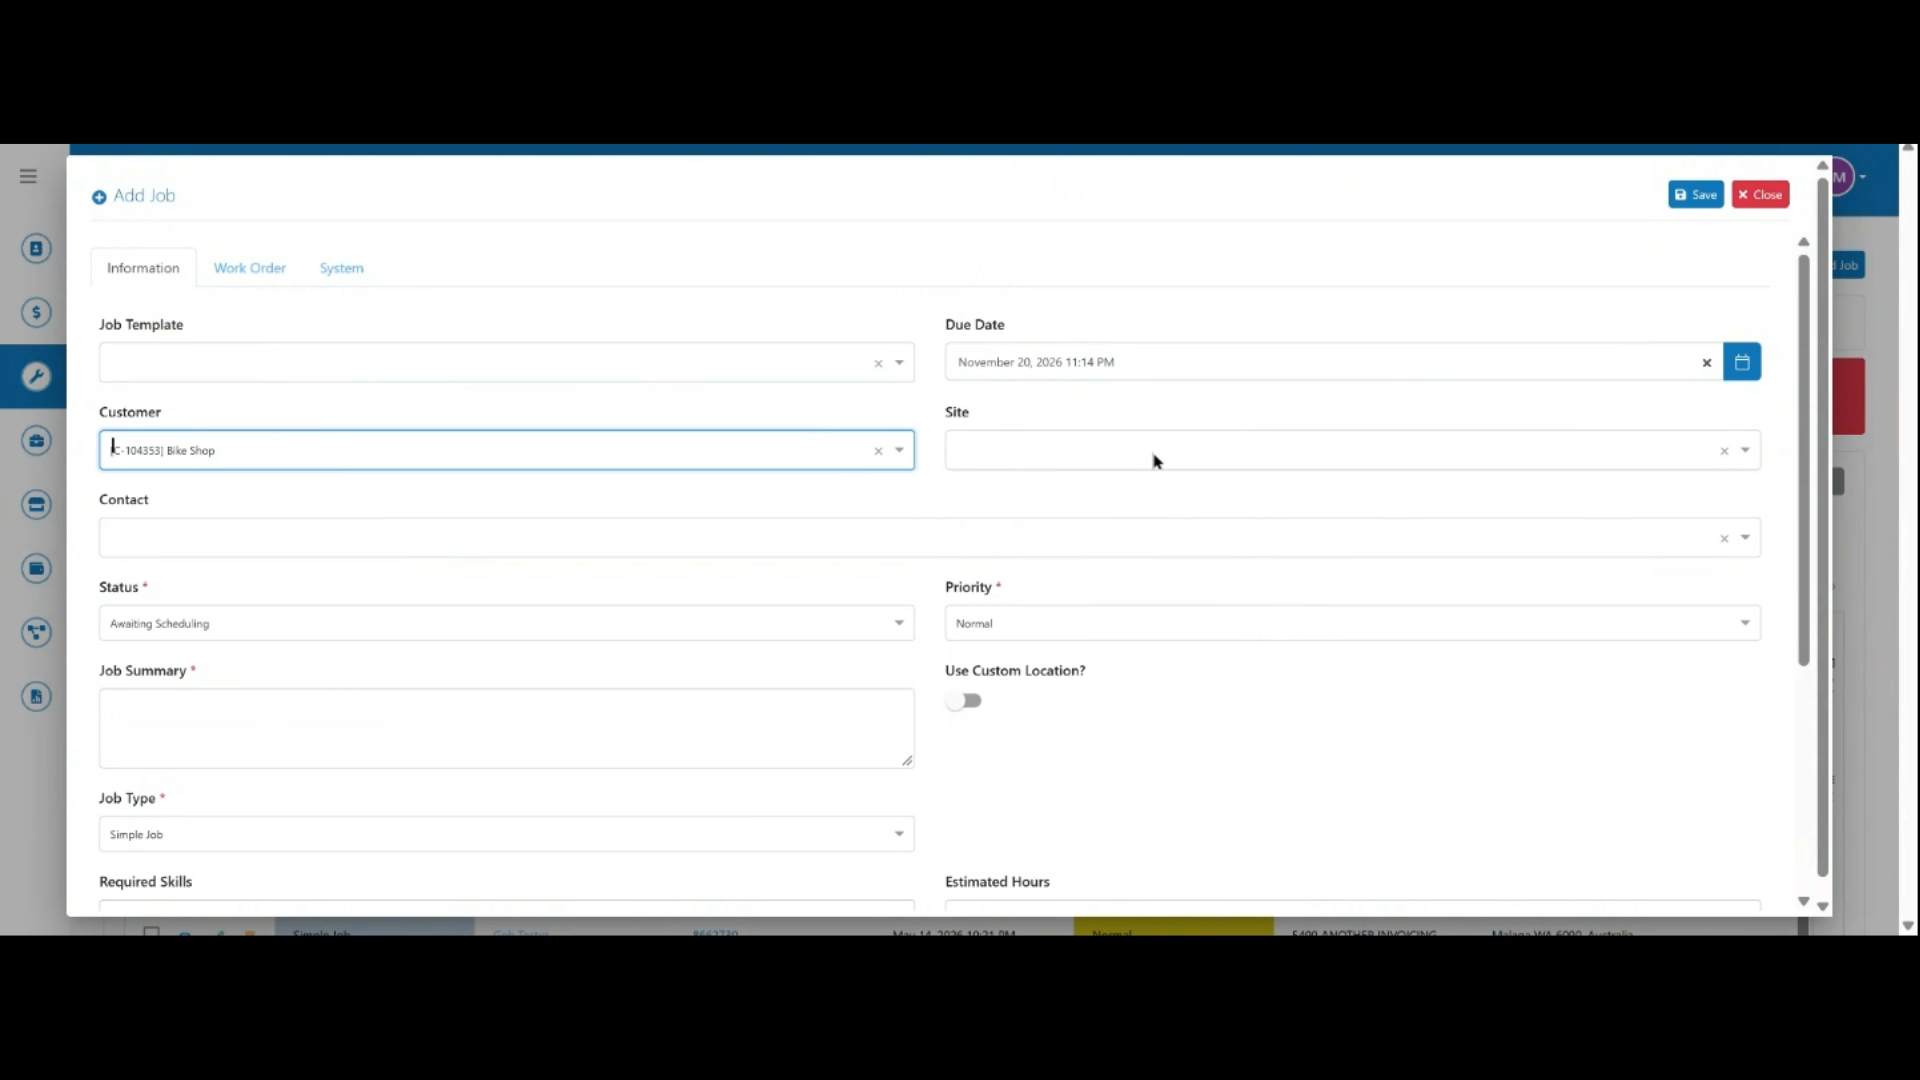 Step 5
Confirm the site, which auto-populates from the selected customer.
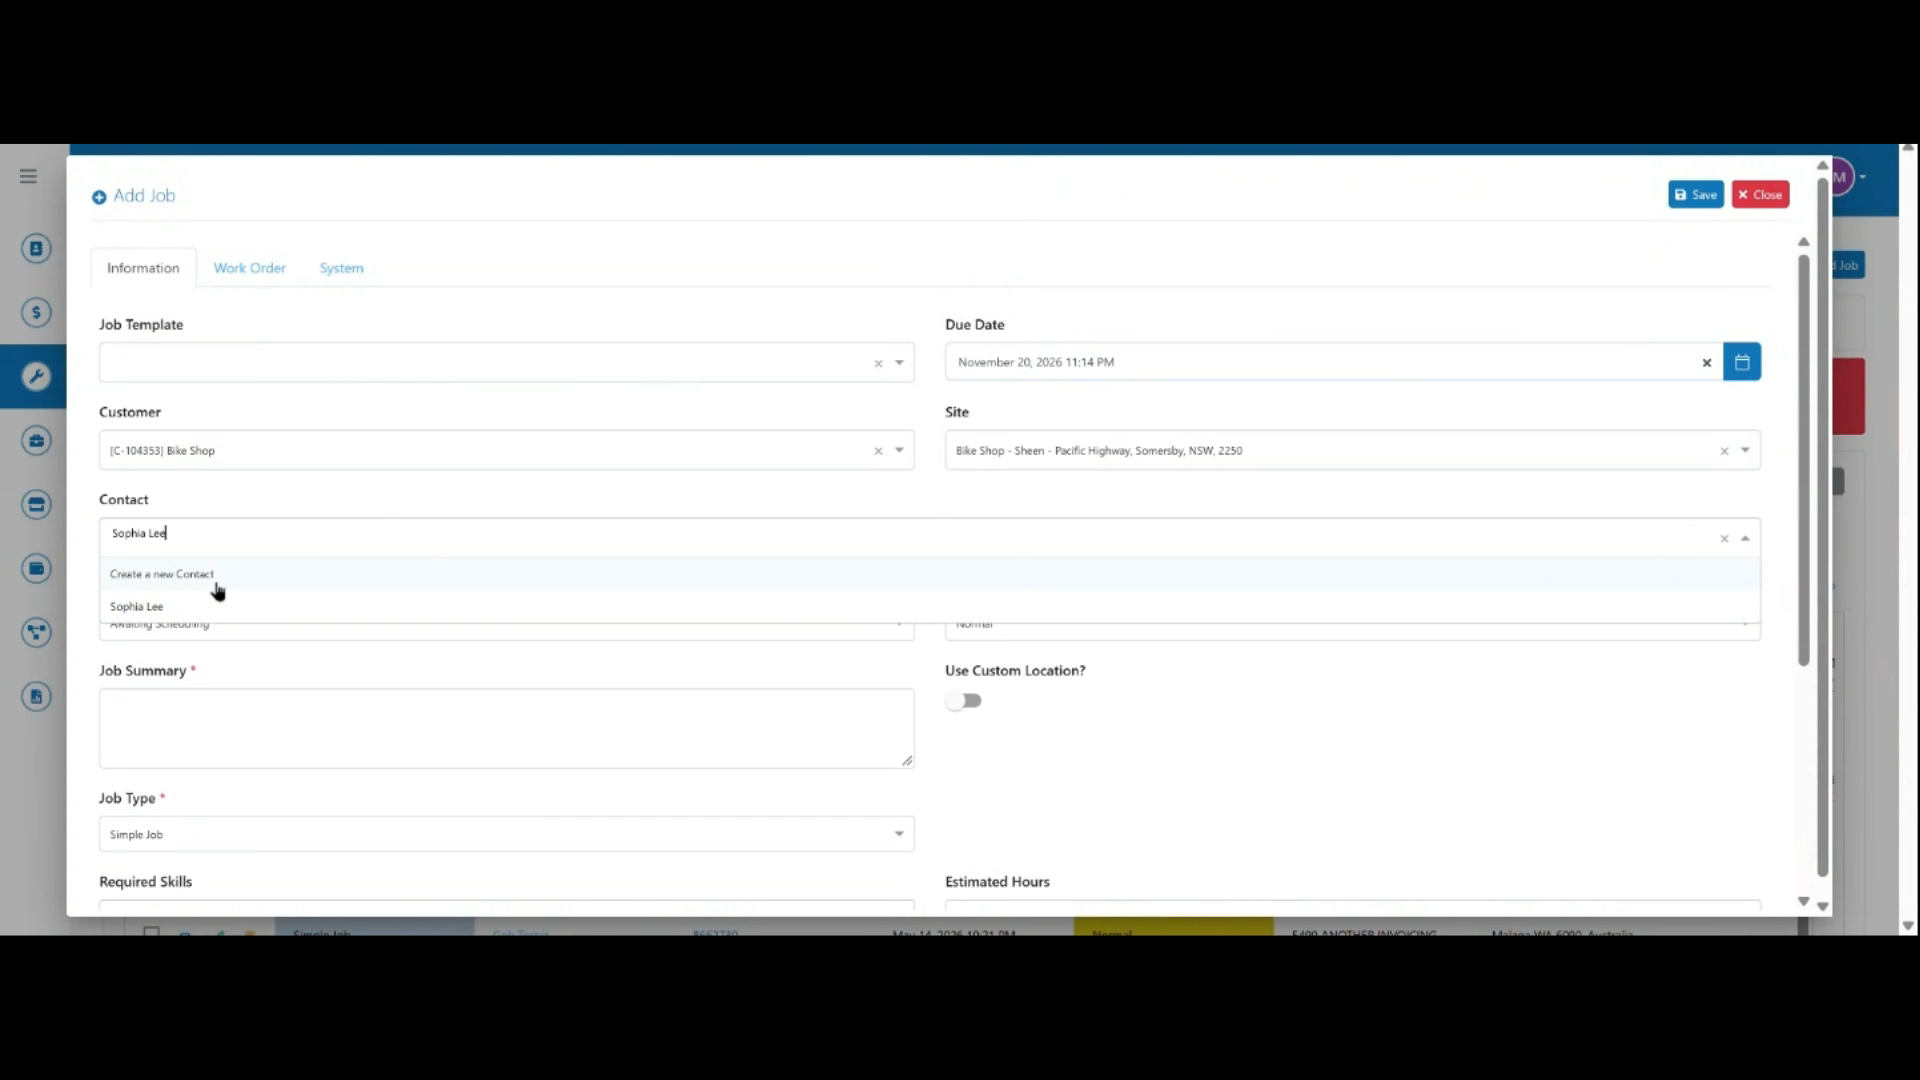 Step 6
Select an existing contact or create a new one for the job.
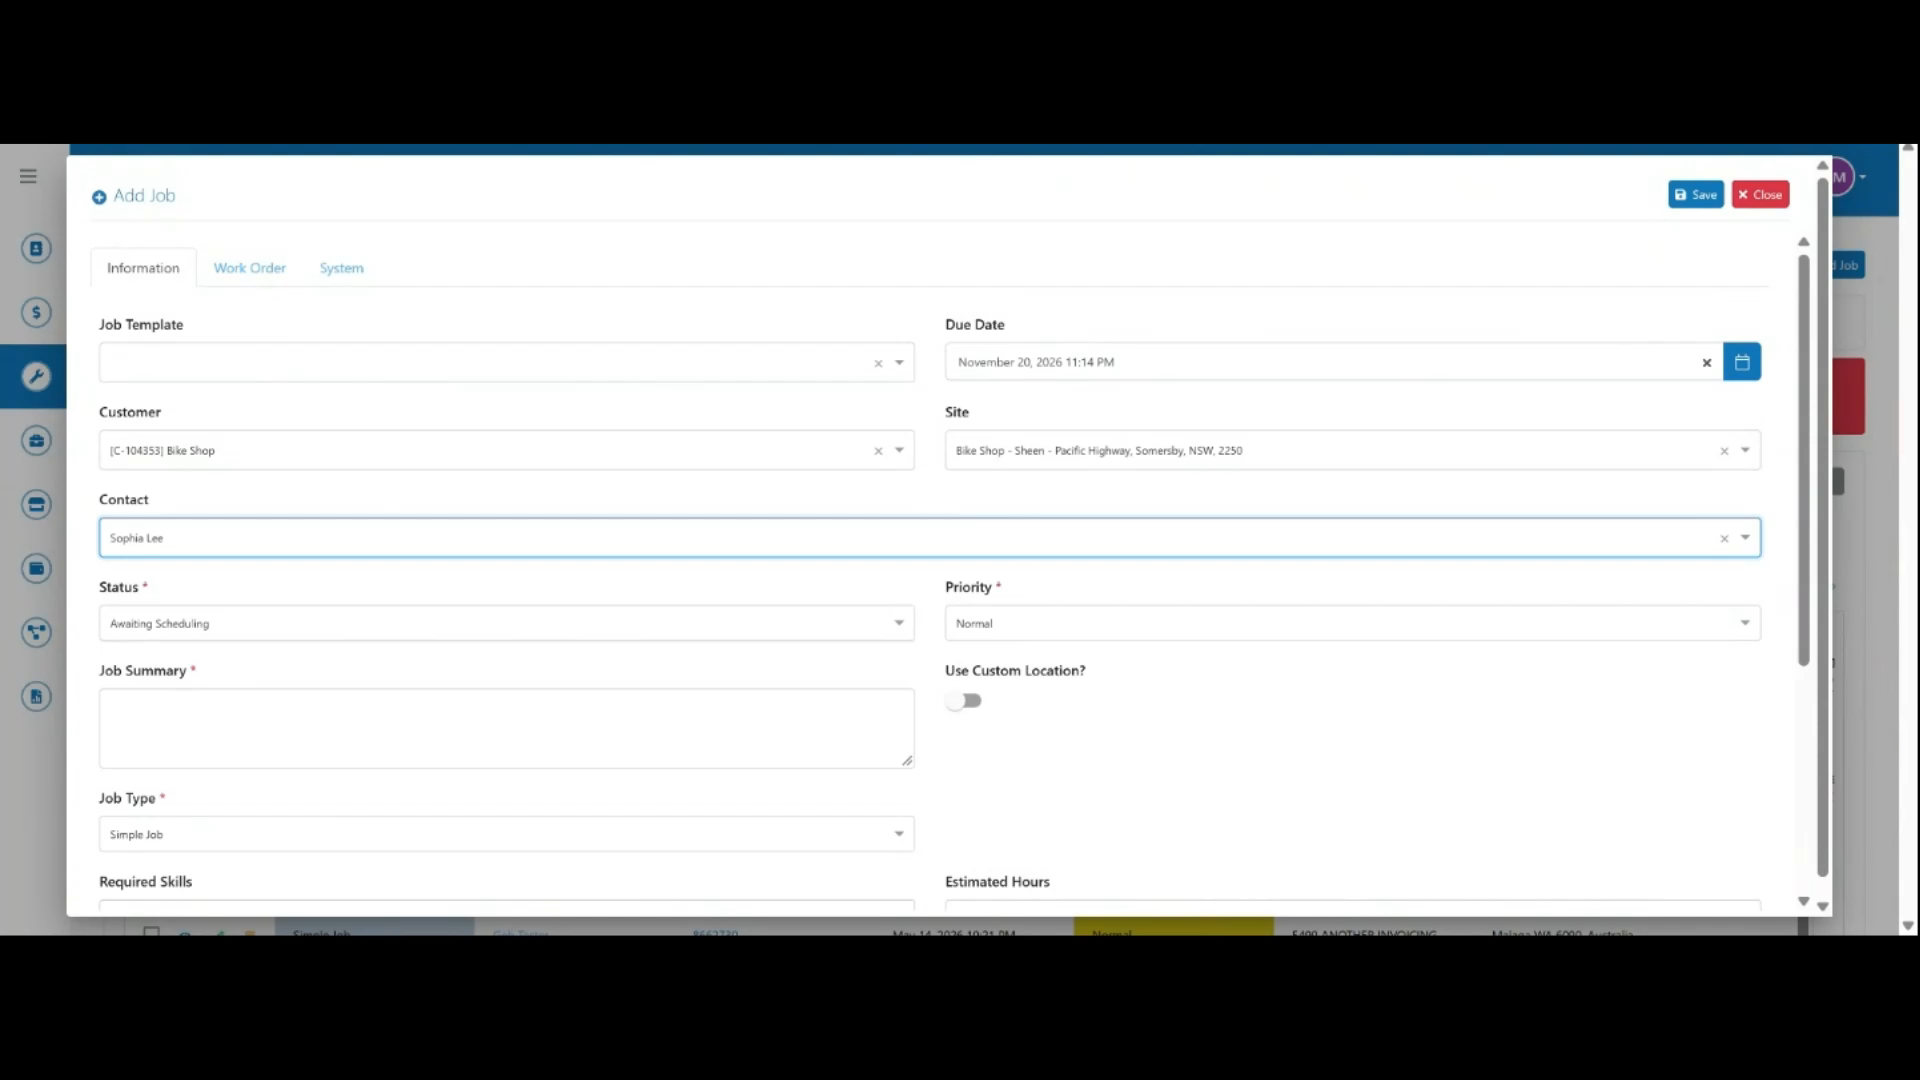 Step 7
Review the default status and set a priority level for the job.
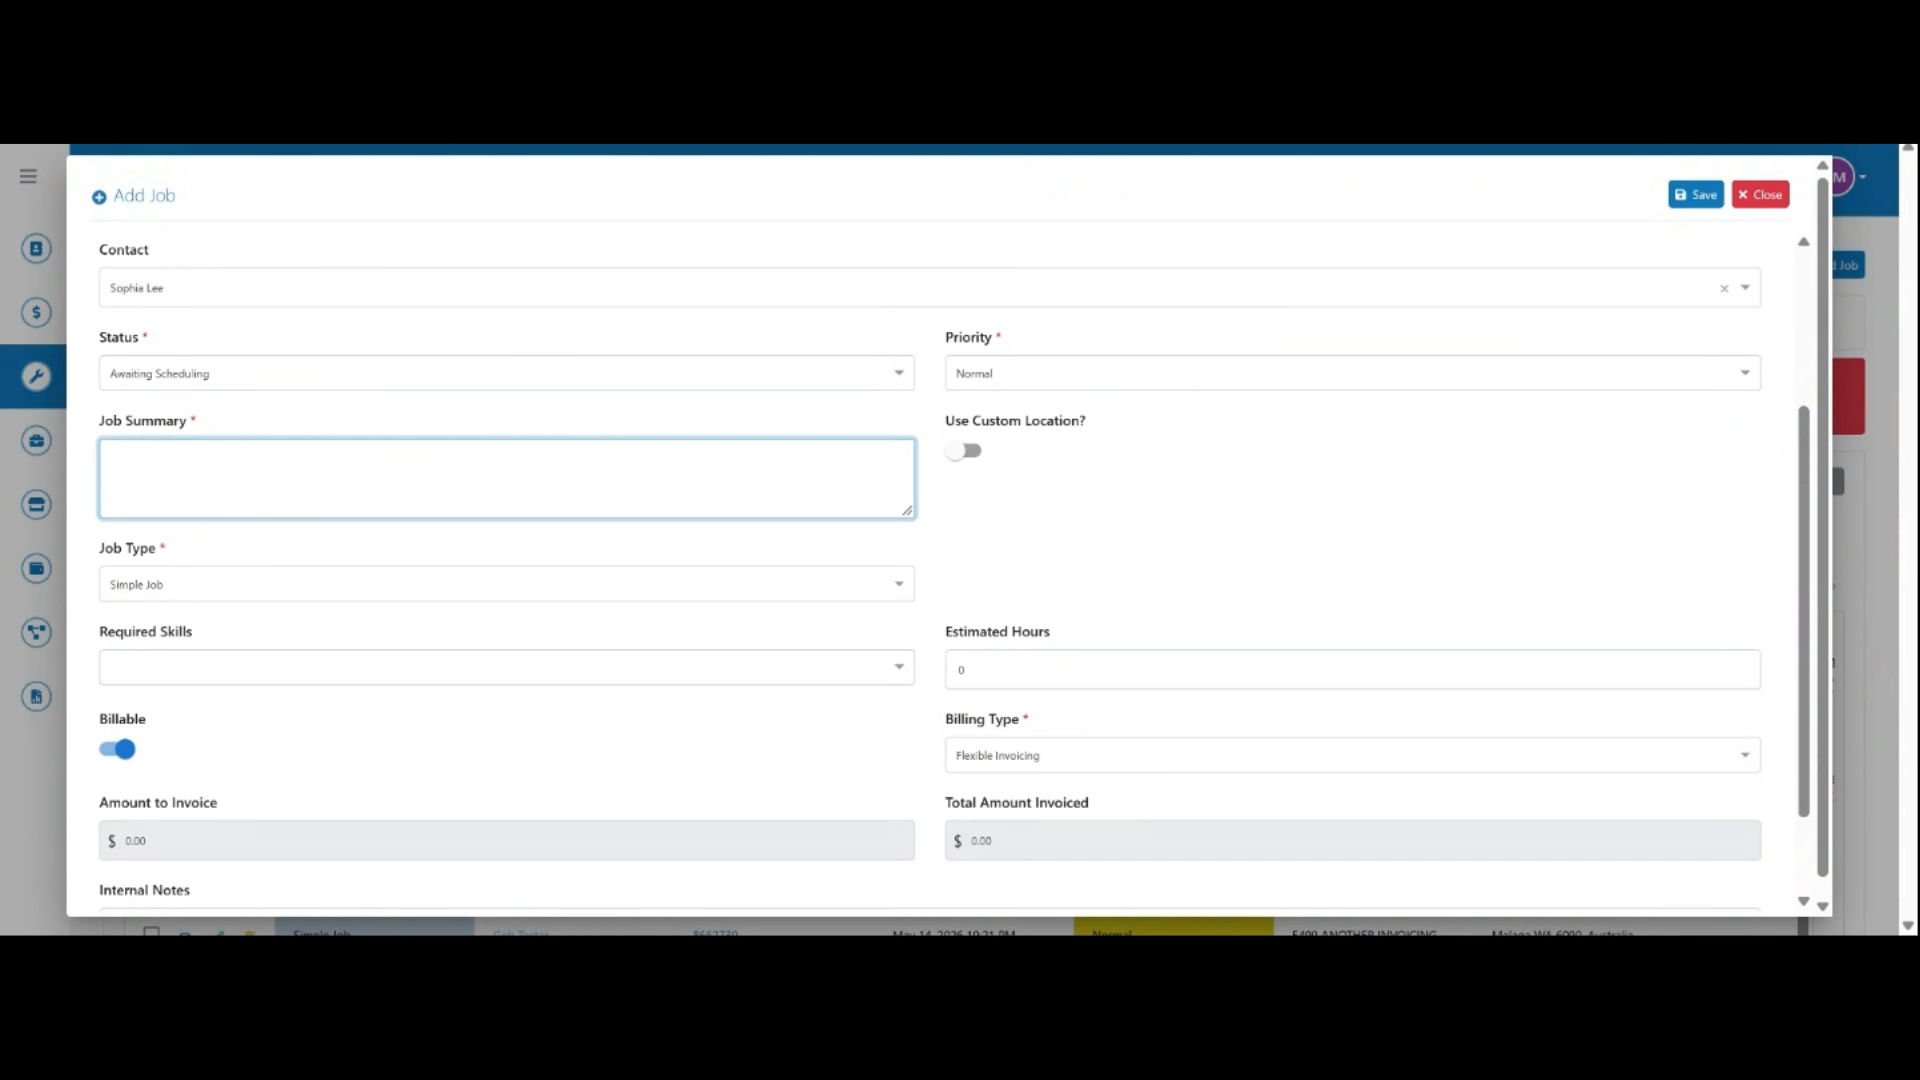 Step 8
Enter a job summary describing the work to be completed.
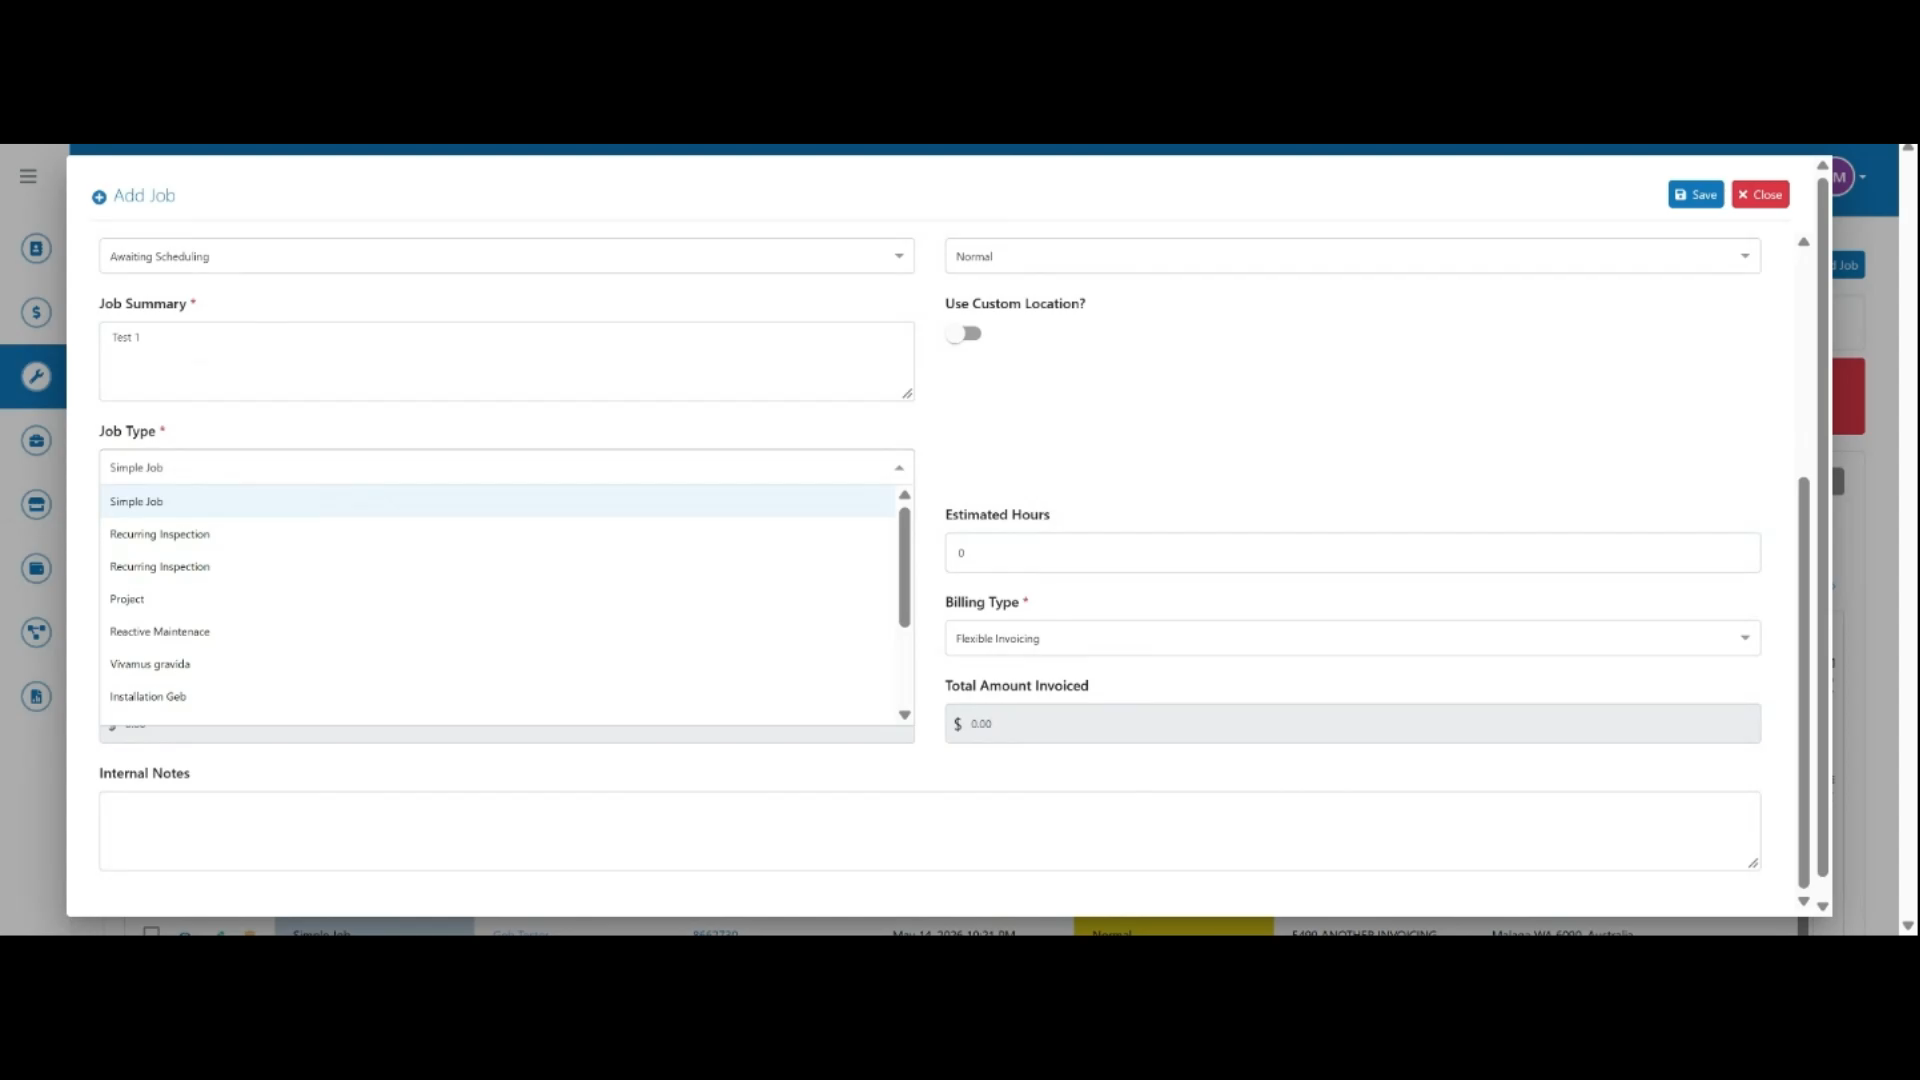 Step 9
Set the job type and specify any required skills.
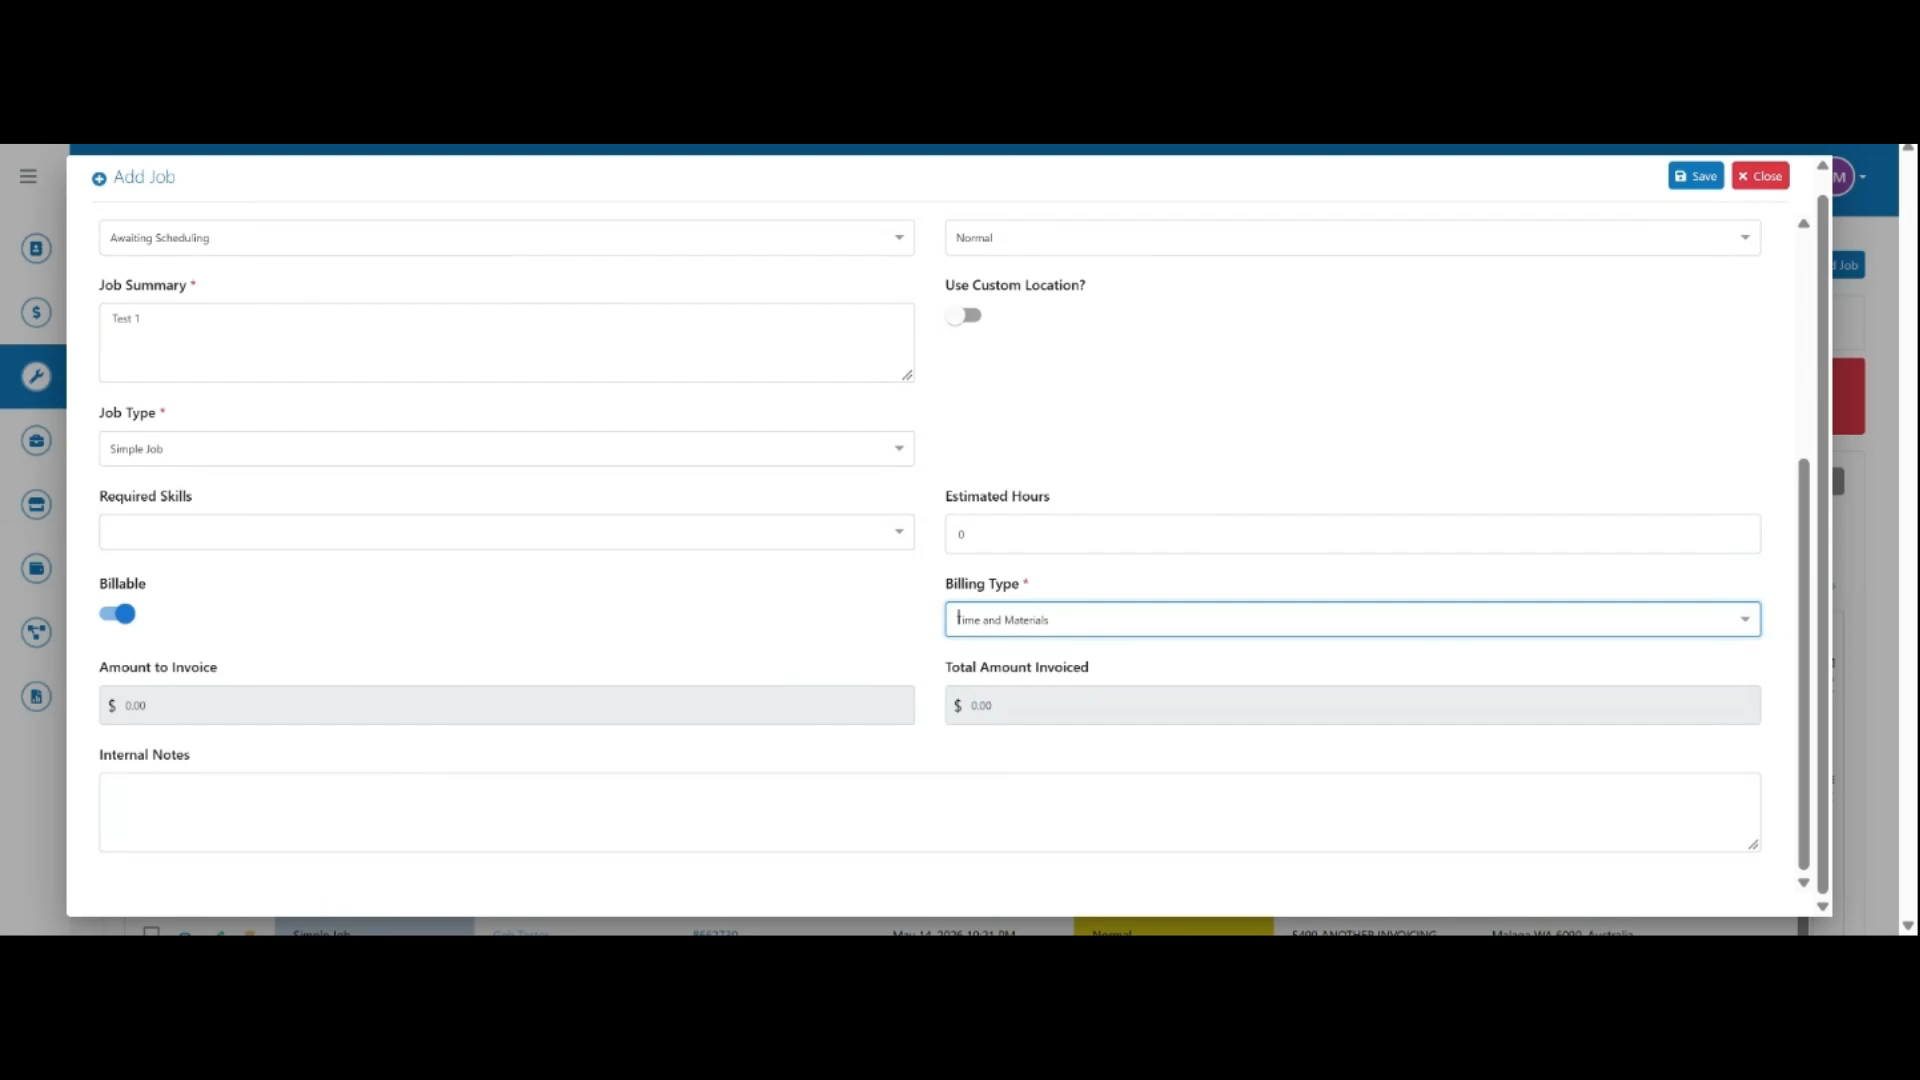 Step 10
Enter the estimated hours, mark the job as billable if applicable, and choose a billing type.
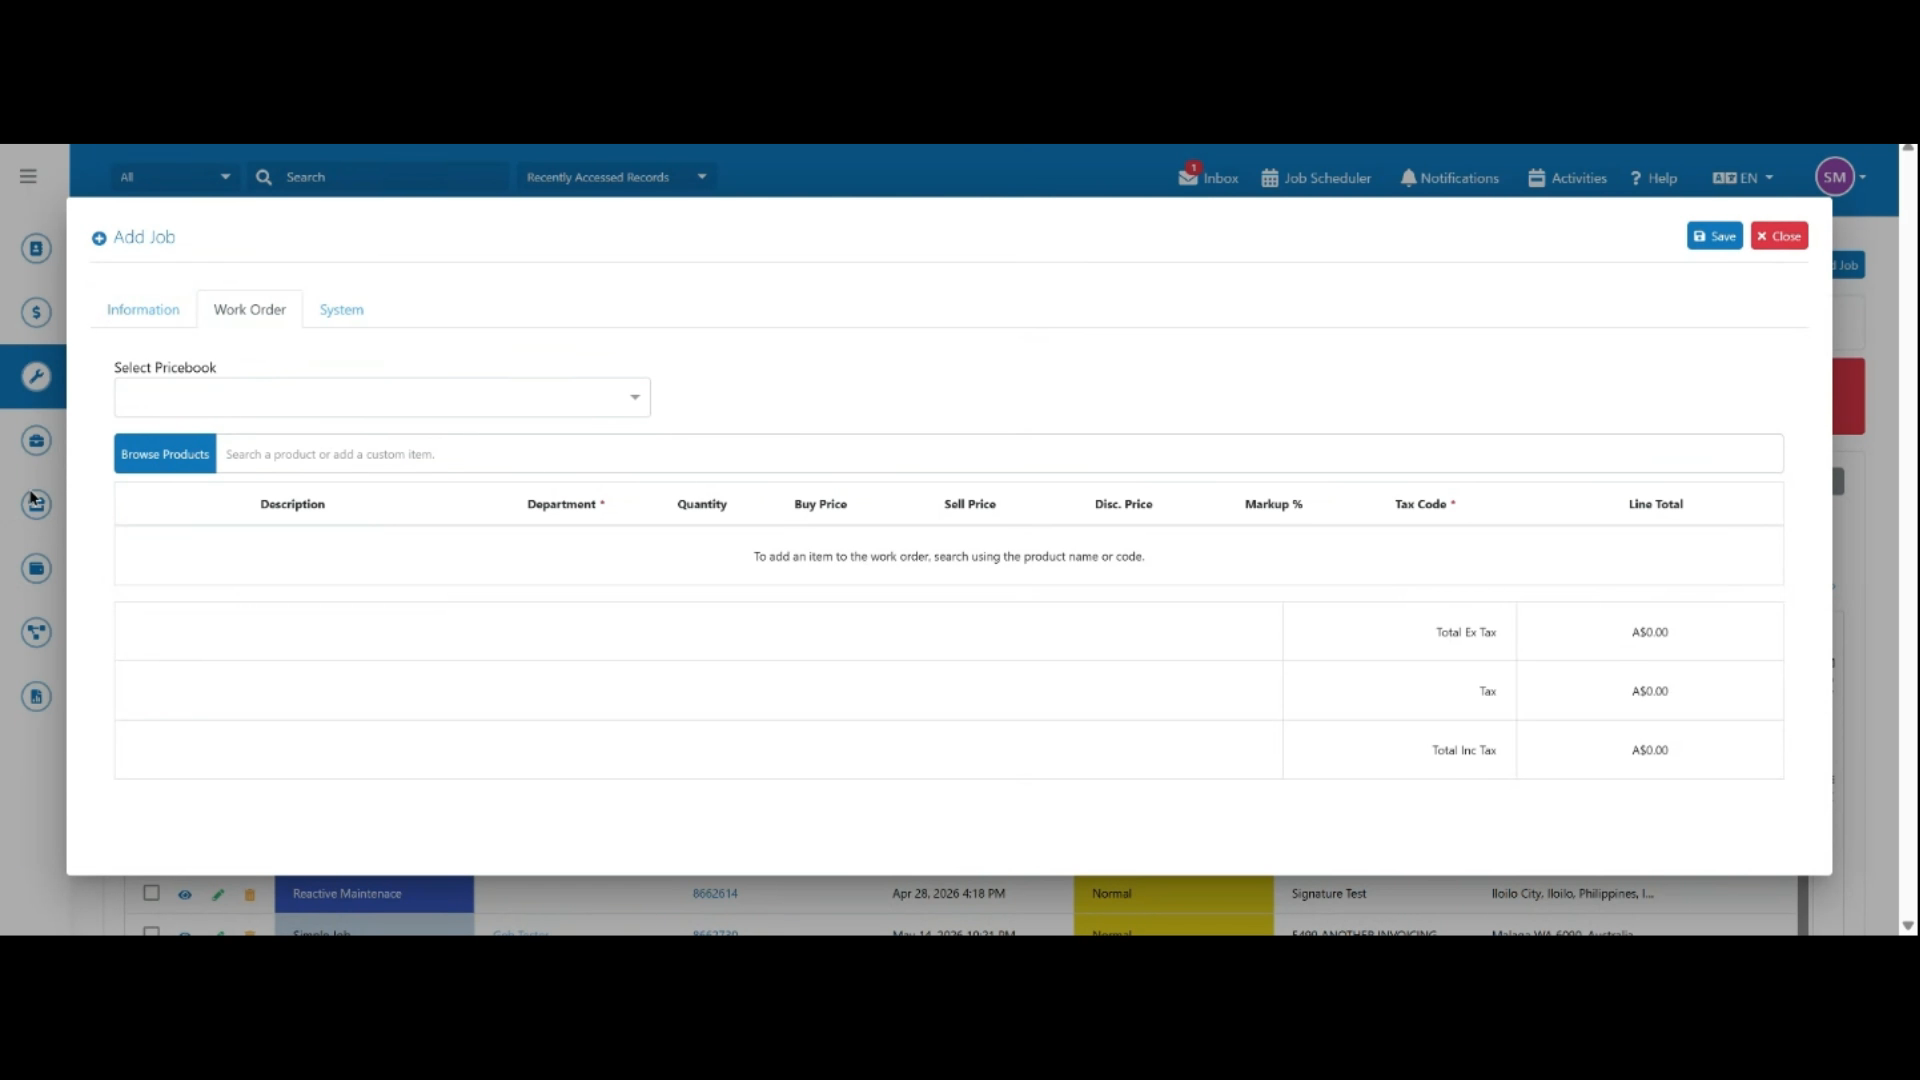 Step 11
Add internal notes and, if needed, products or items under the Work Order tab.
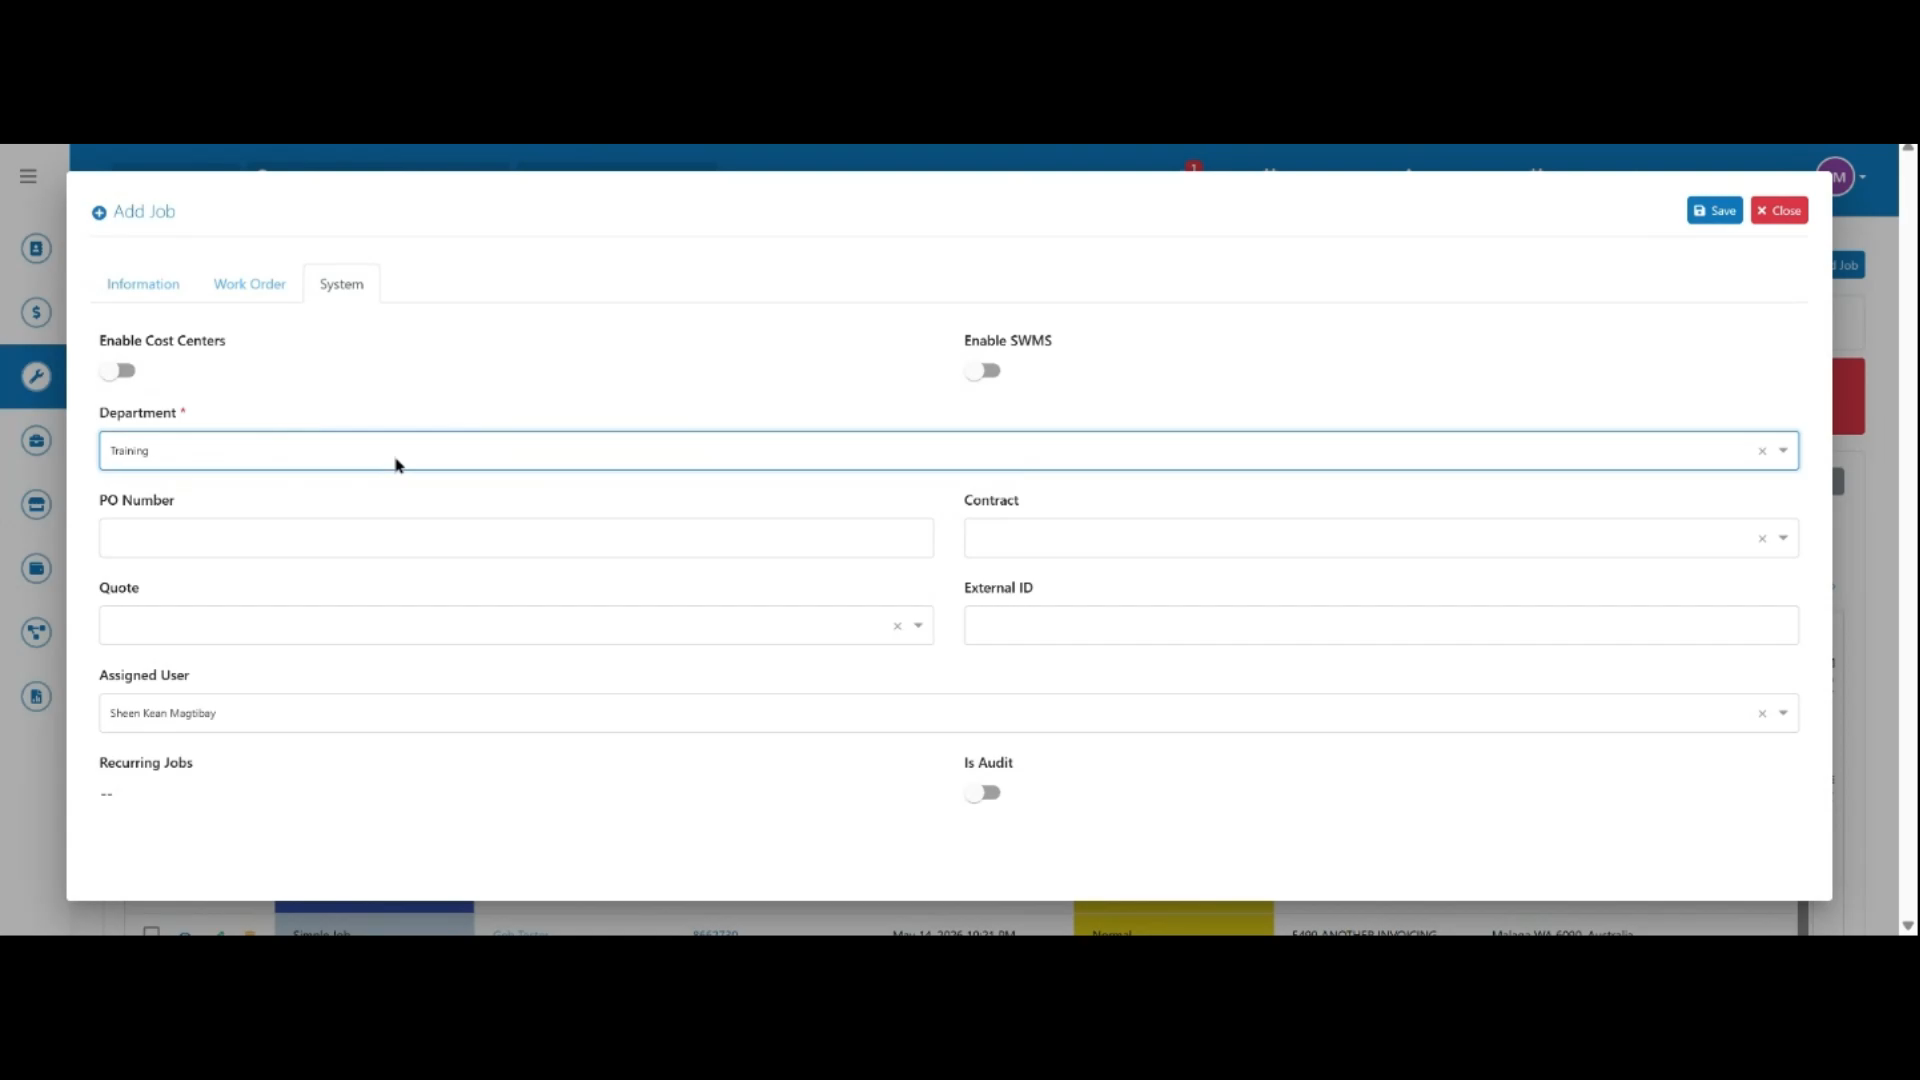 Step 12
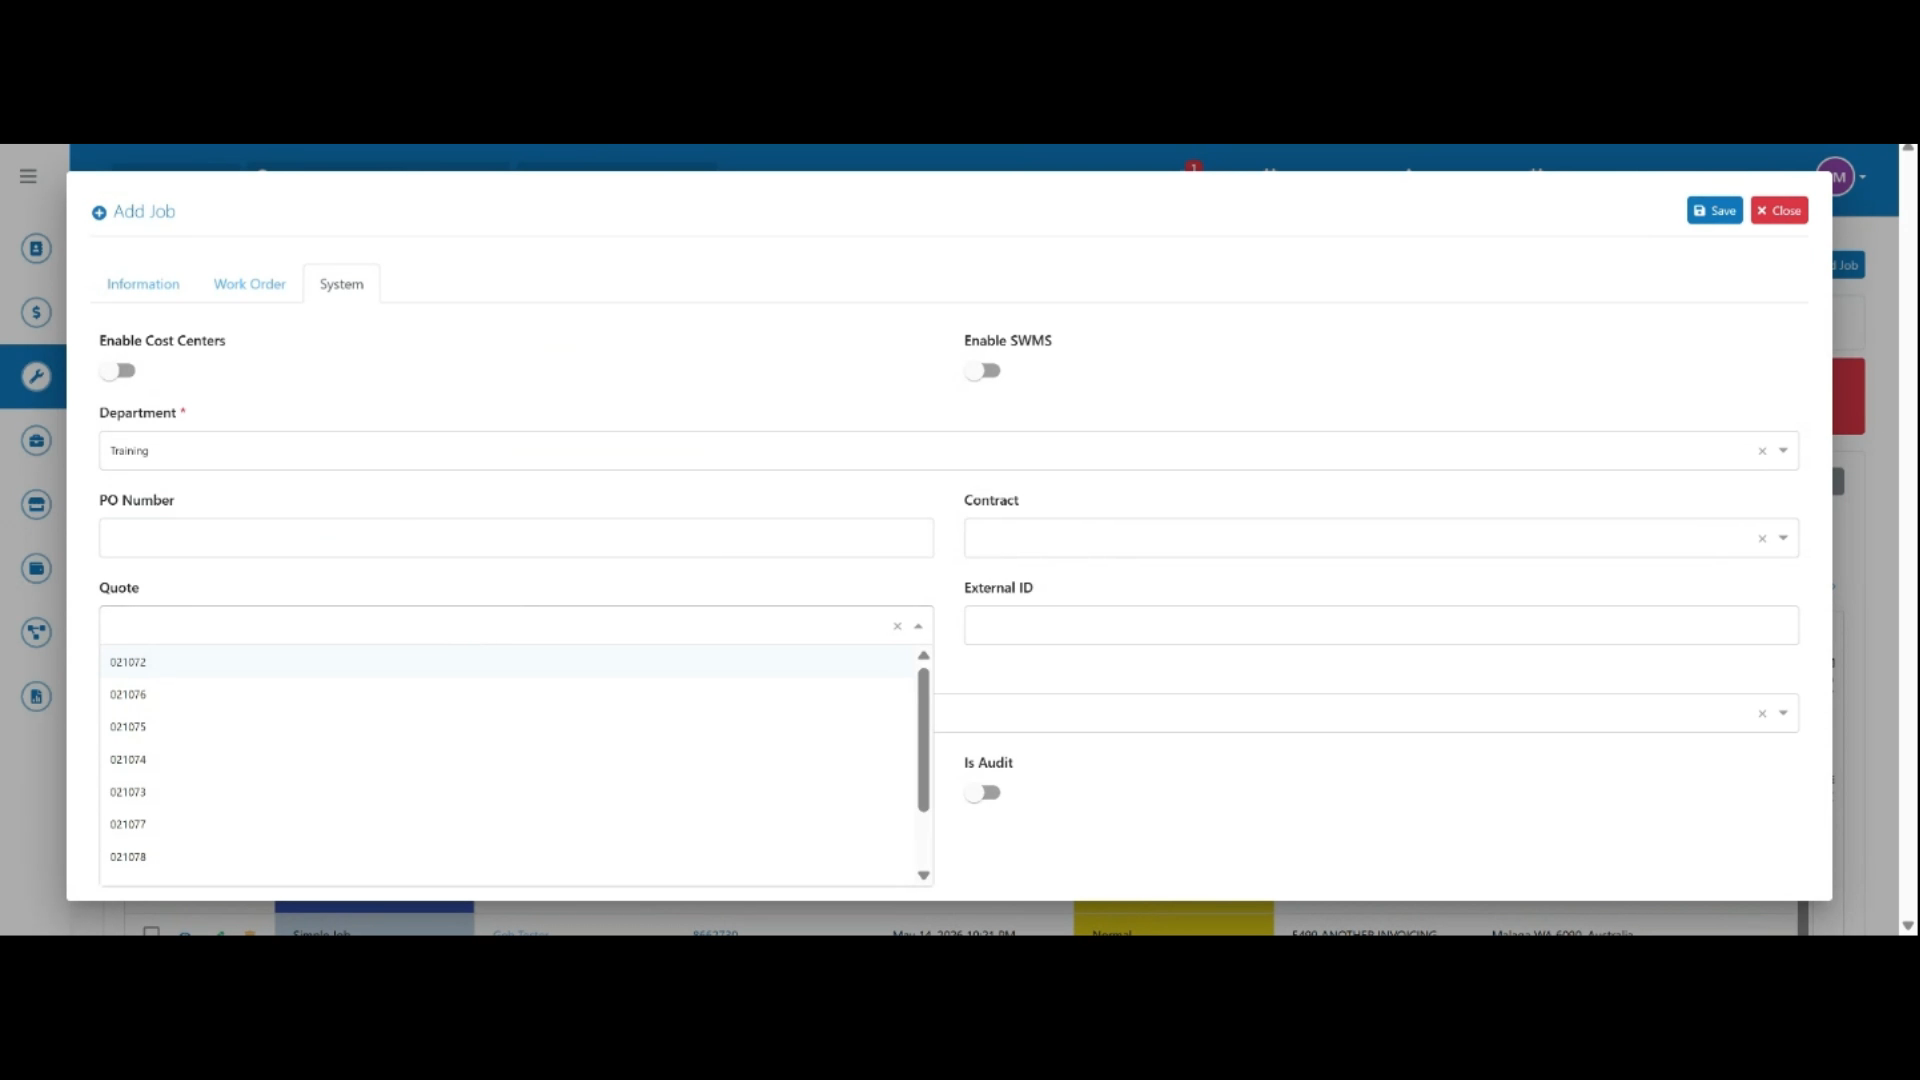
In the System tab, configure cost centers, SWMS, and assign a department.
 Step 13
Link a PO number, contract, or quote to the job if applicable.
 Step 14
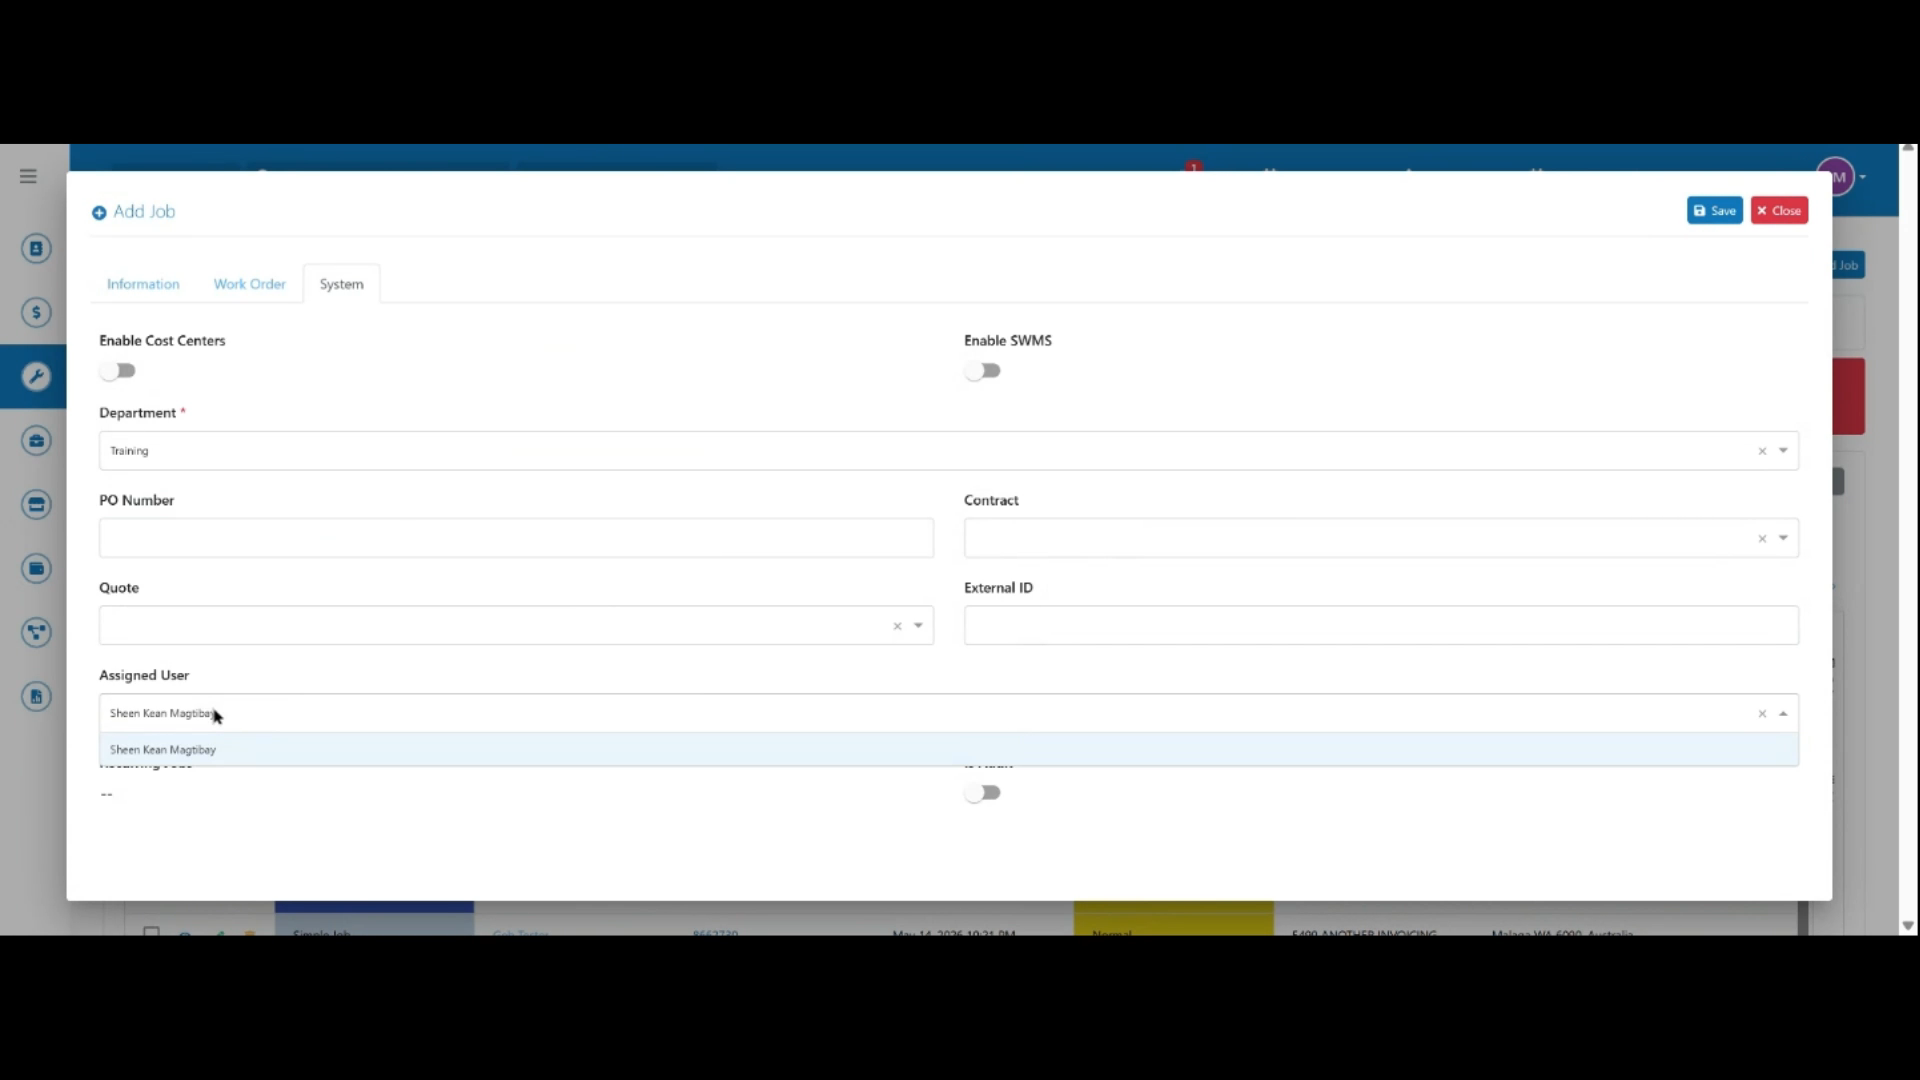
Assign a user to the job, then click Save.
 Step 15
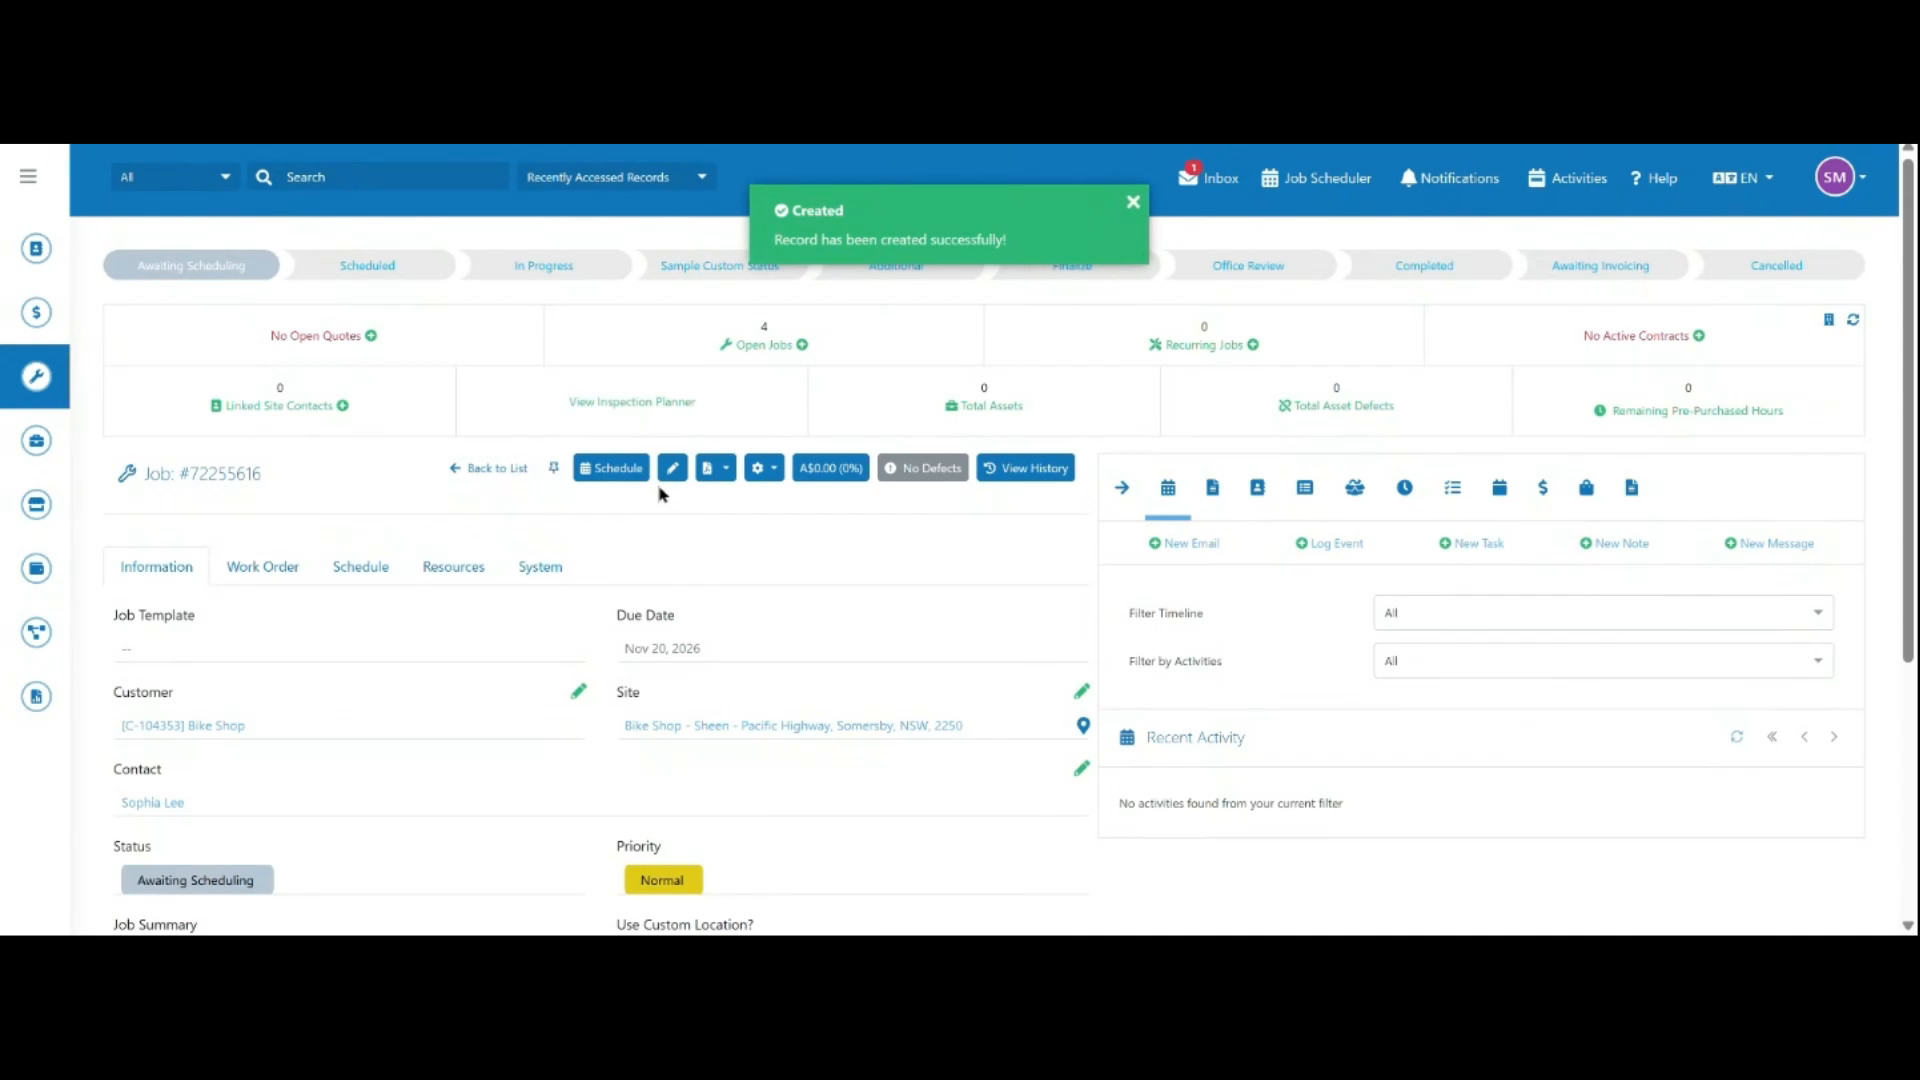
The job is created successfully and ready for scheduling.