Administration
Create and Set Up a Contract
Learn how to create and set up a contract in FieldMagic, including recurring jobs, contract pricing, and recurring invoices.
Step-by-step instructions
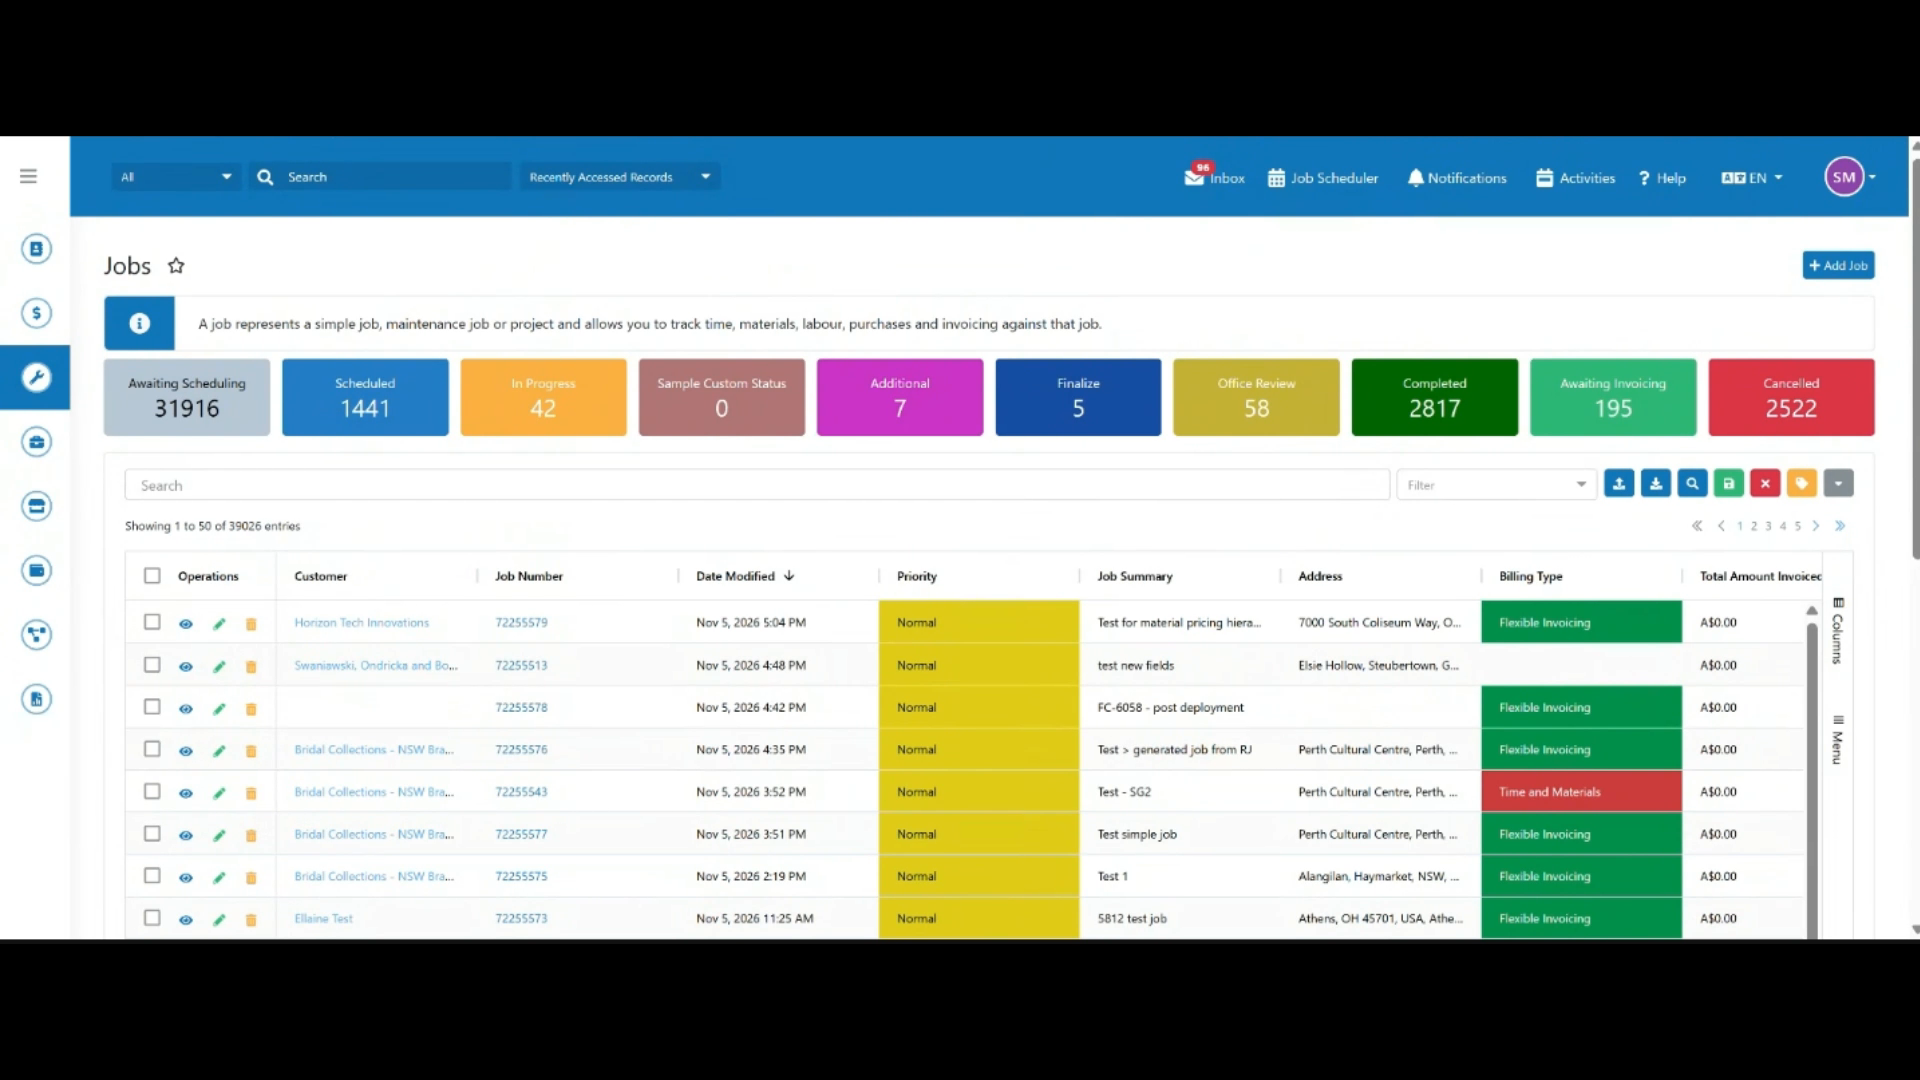 Step 1
Open the Contracts module and click Add Contract.
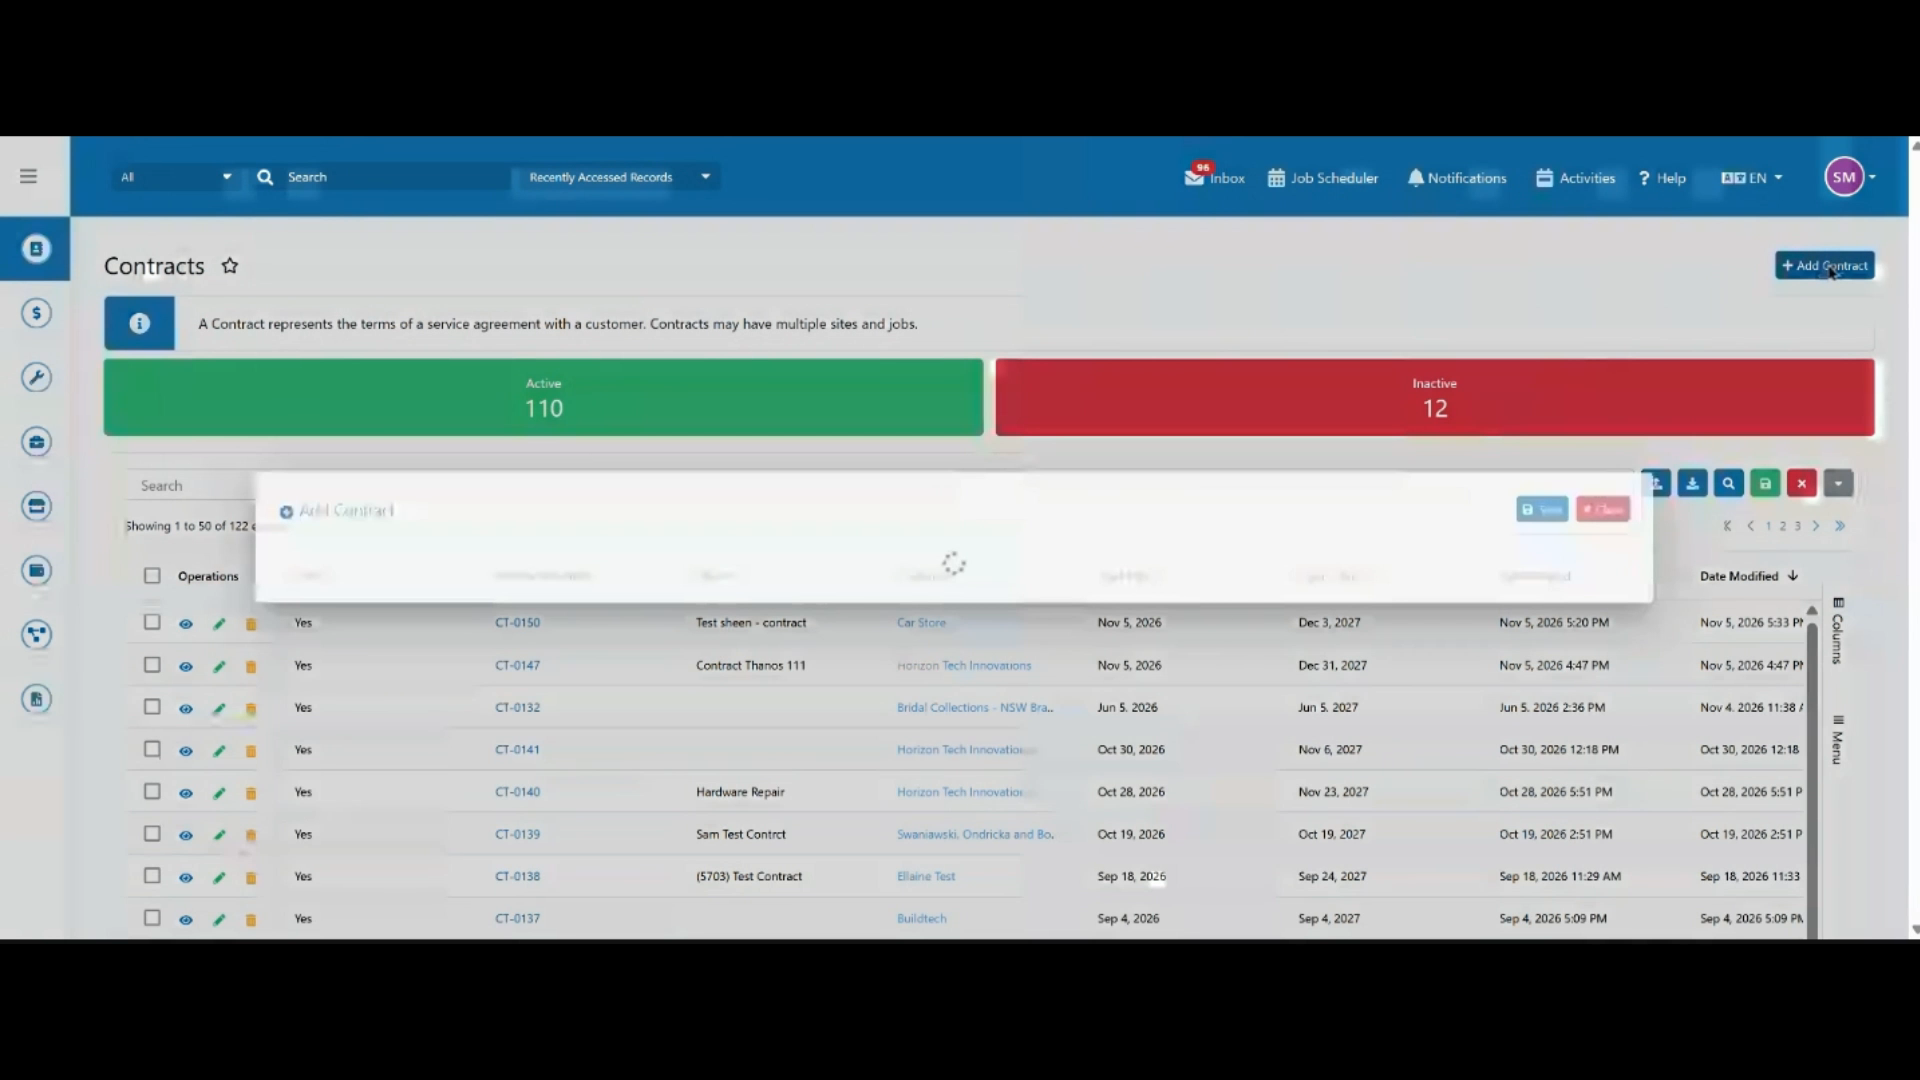 Step 2
Enter the contract name. You can leave the contract number blank, as it will populate automatically.
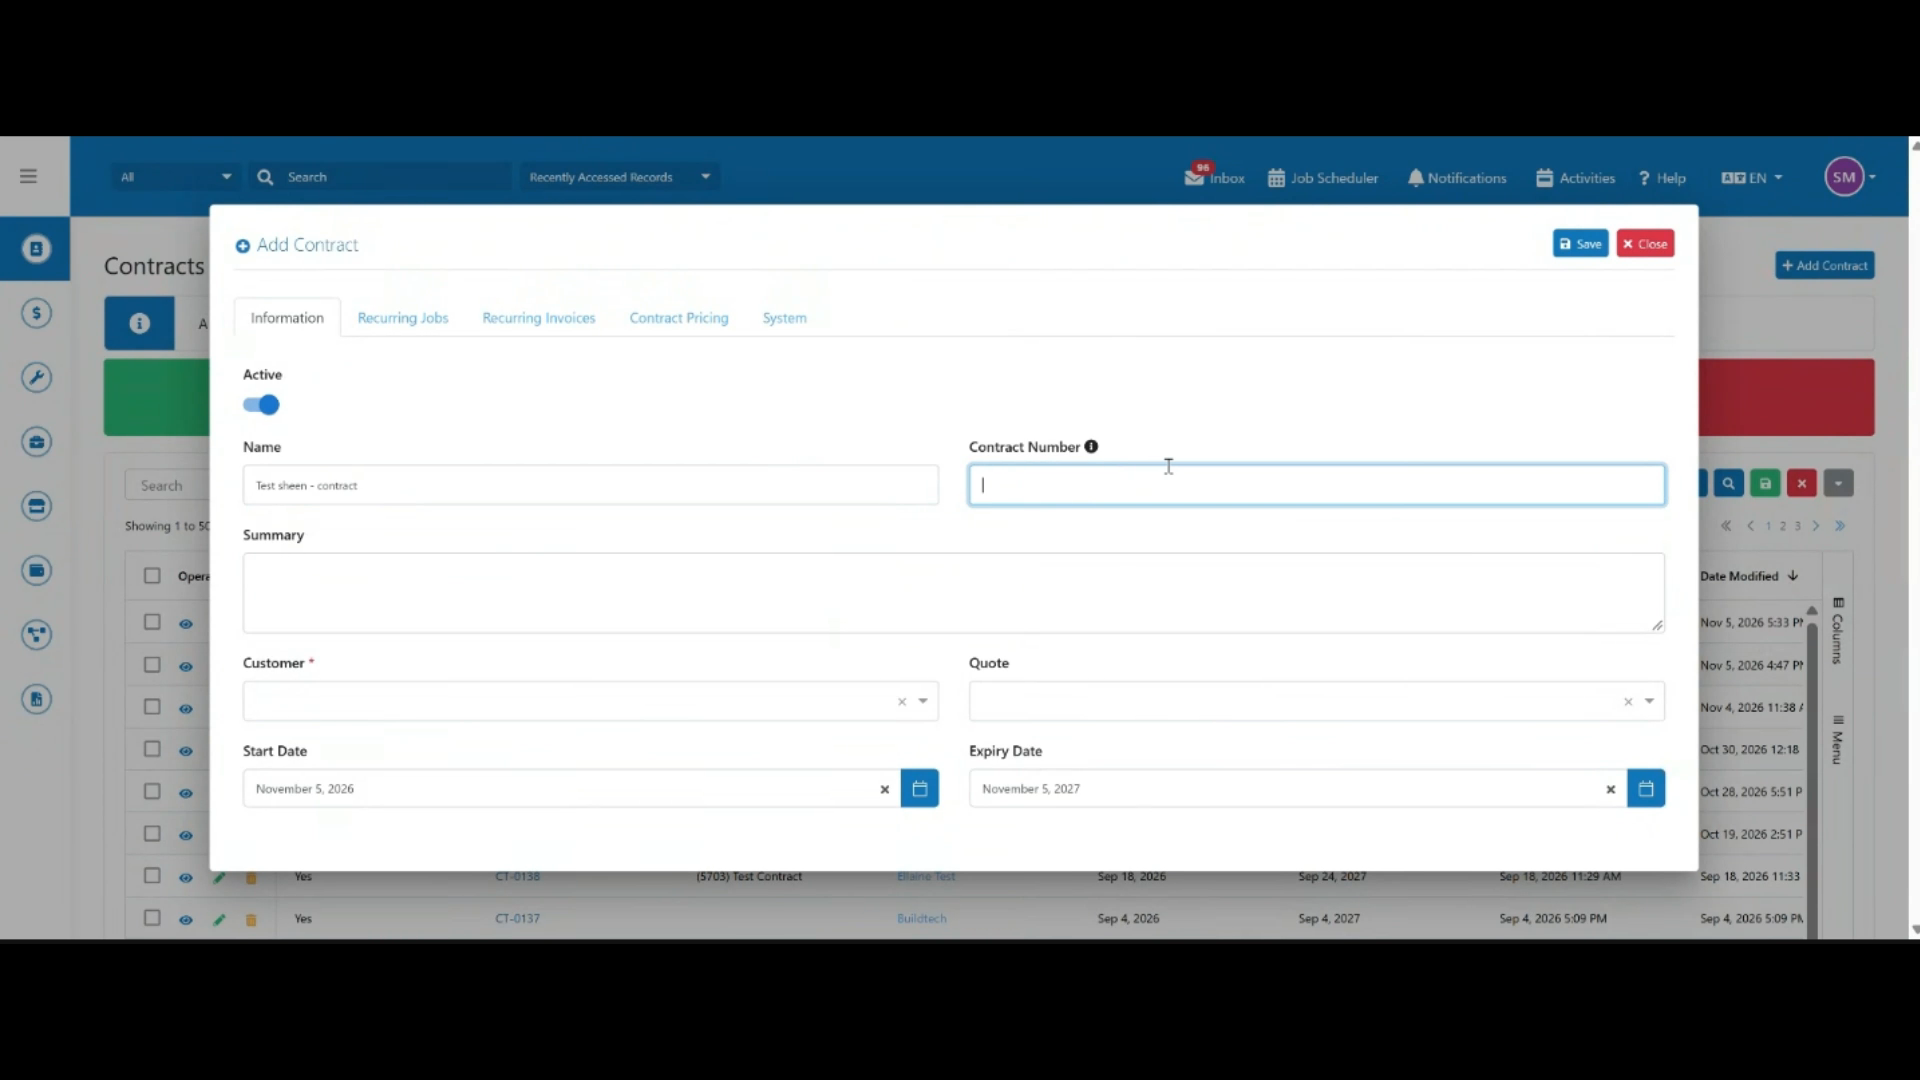 Step 3
Select the customer and associated code, if available.
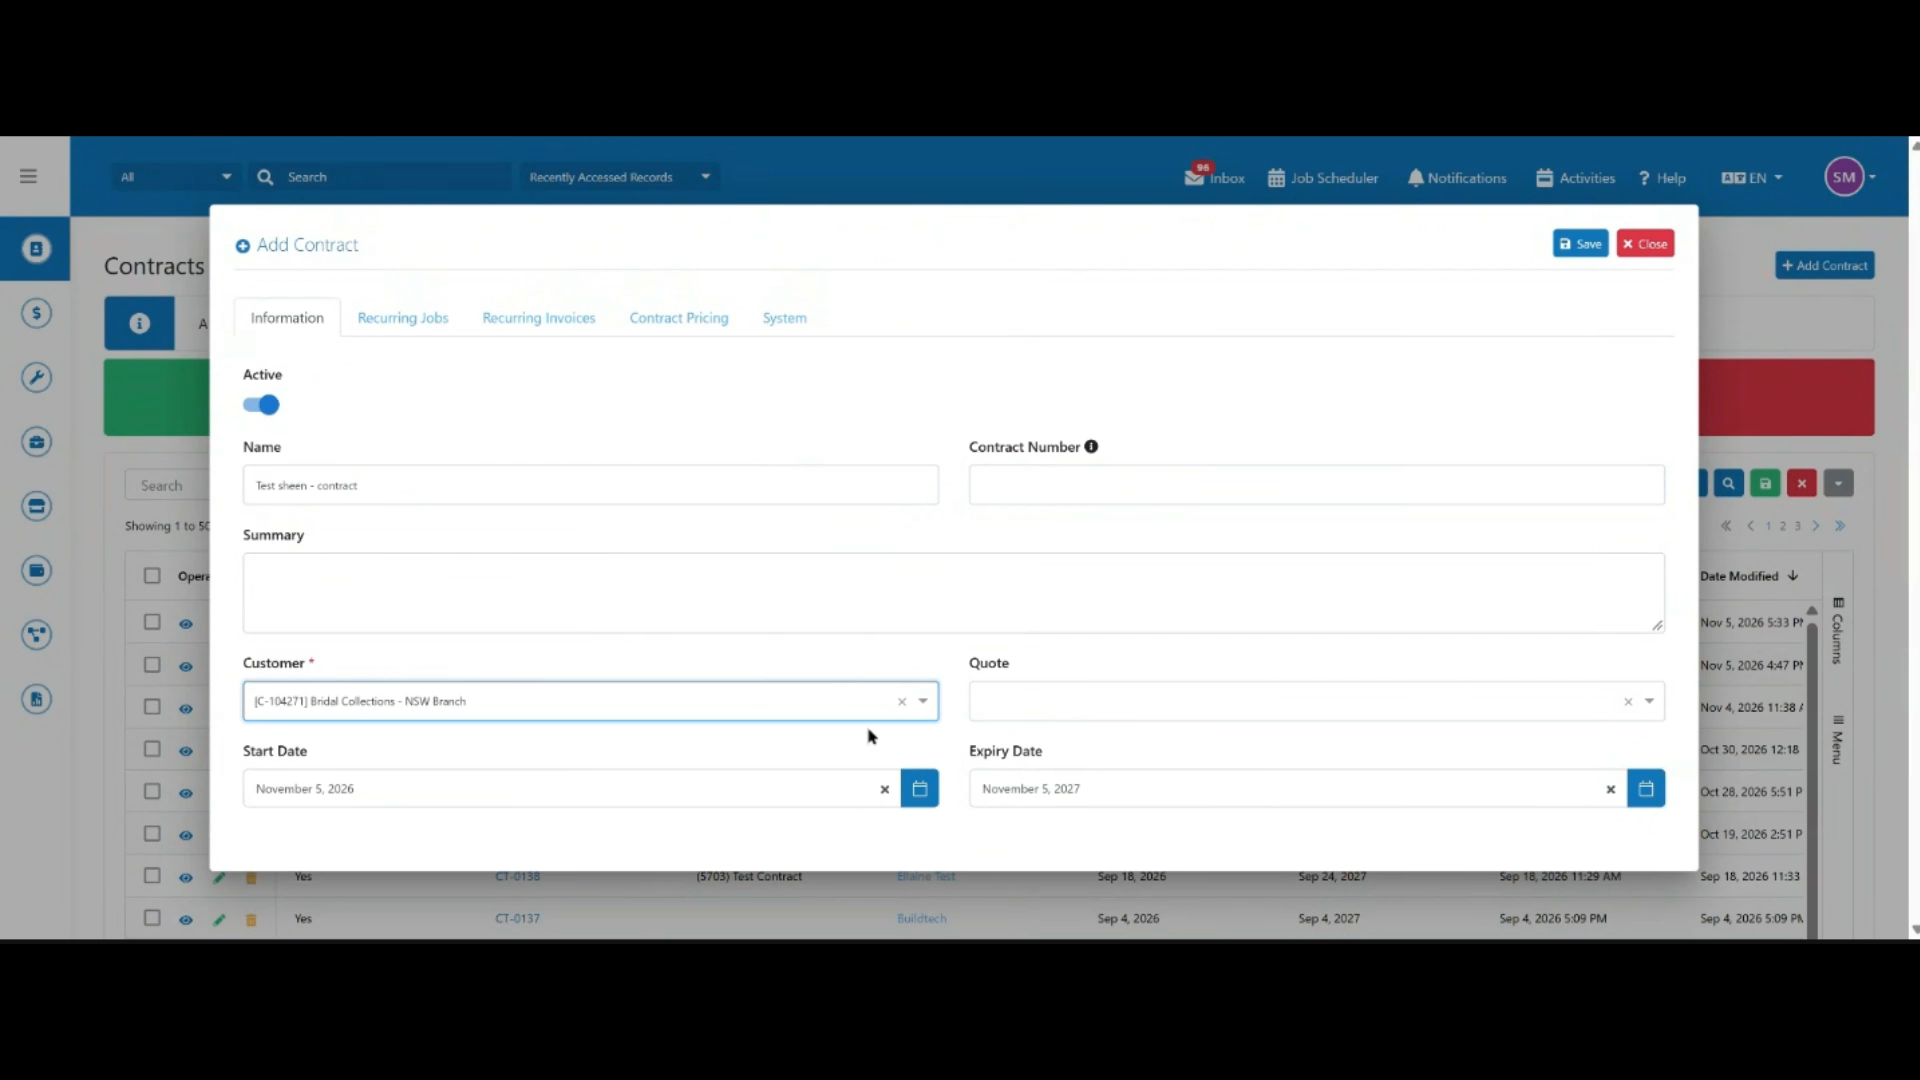 Step 4
Set the contract's start date and expiry date.
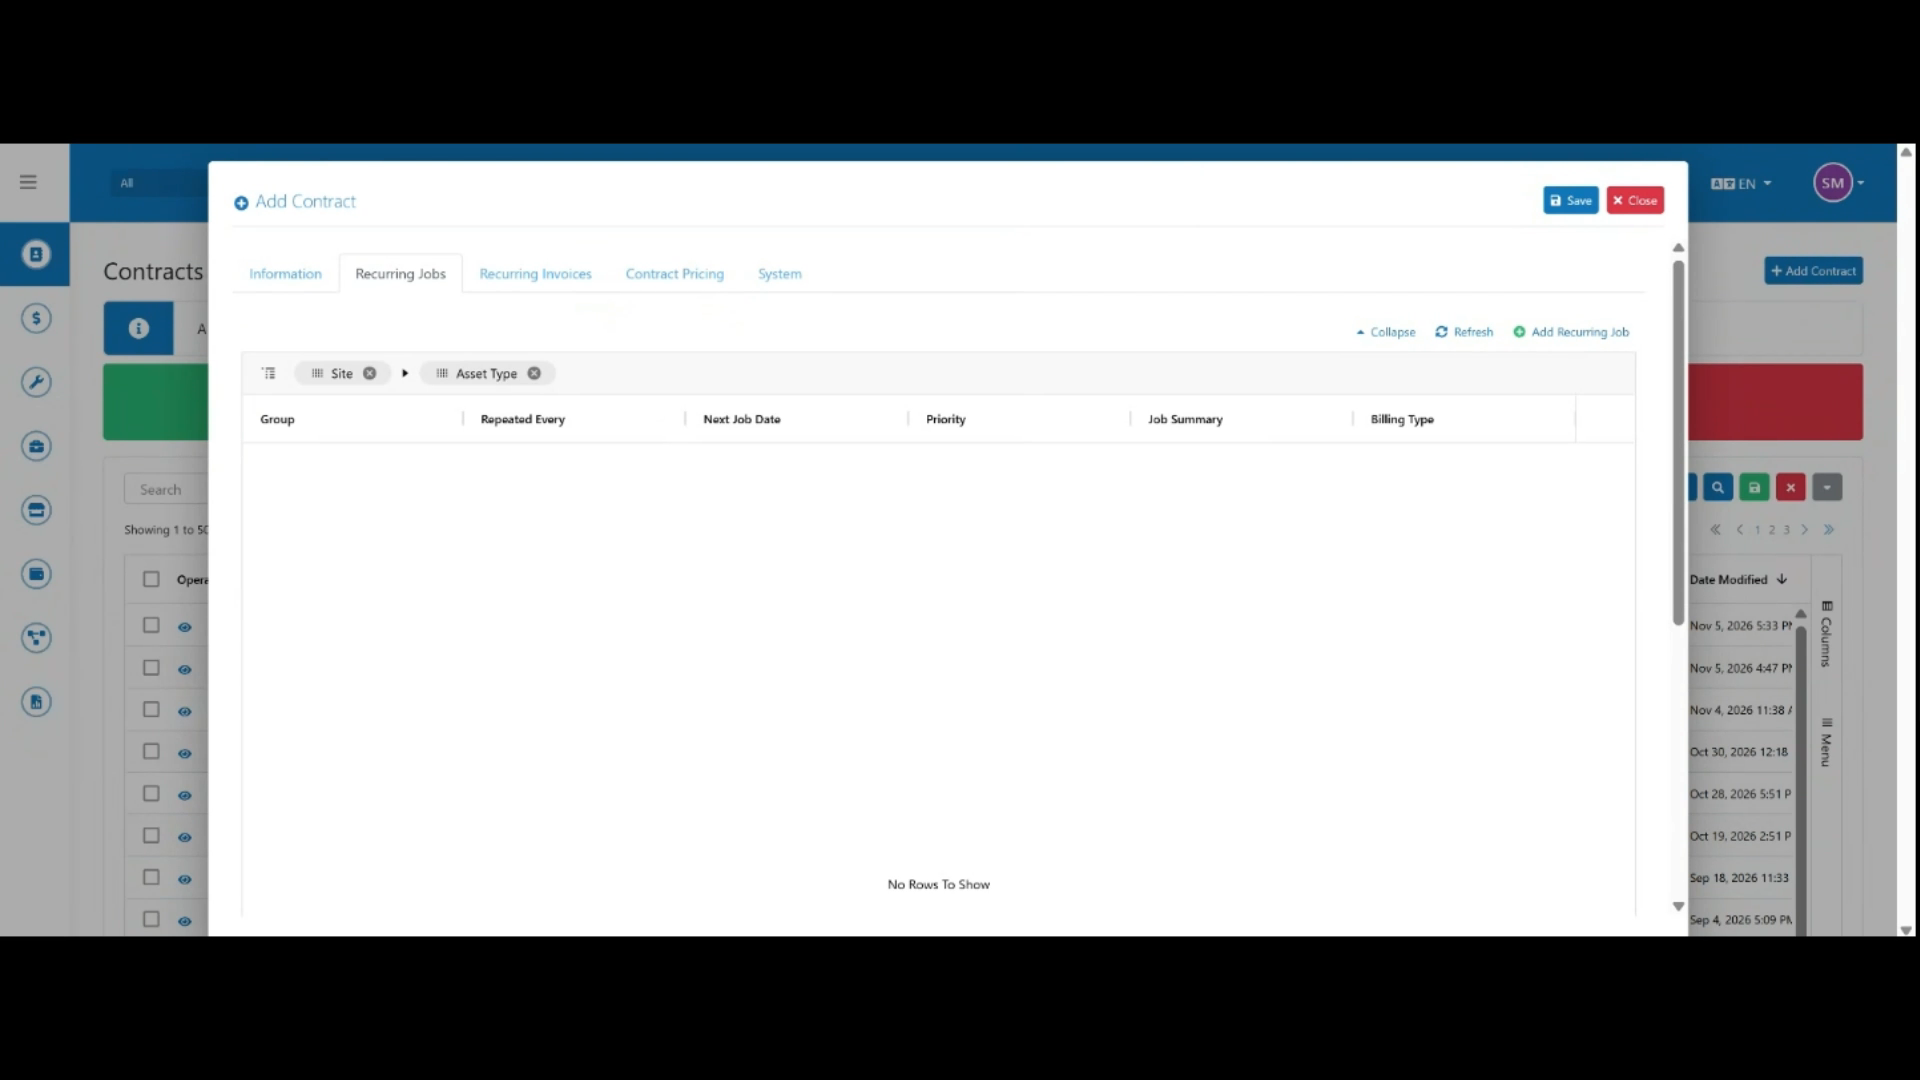 Step 5
Open the Recurring Jobs tab and click Add Recurring Job to automatically generate recurring jobs for this contract and customer.
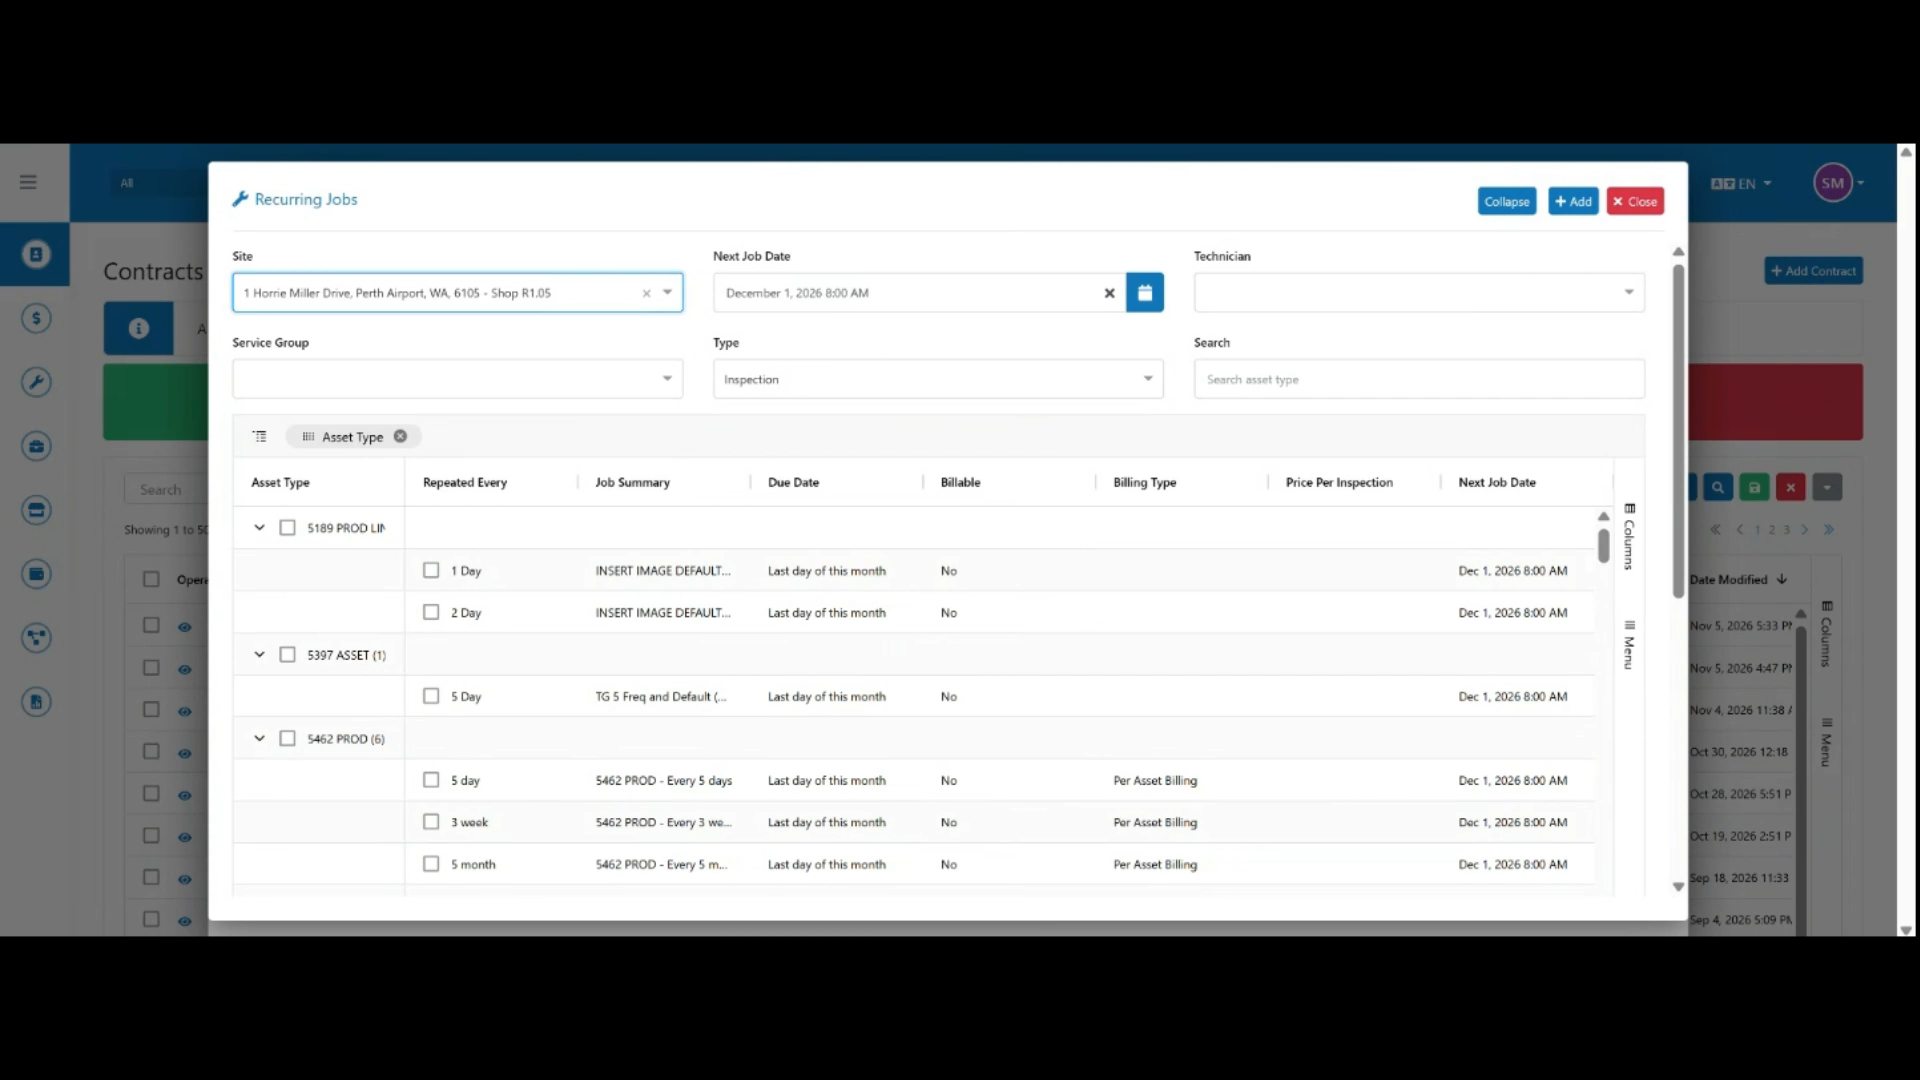 Step 6
Select the site, set the next job date, and assign a technician or service group.
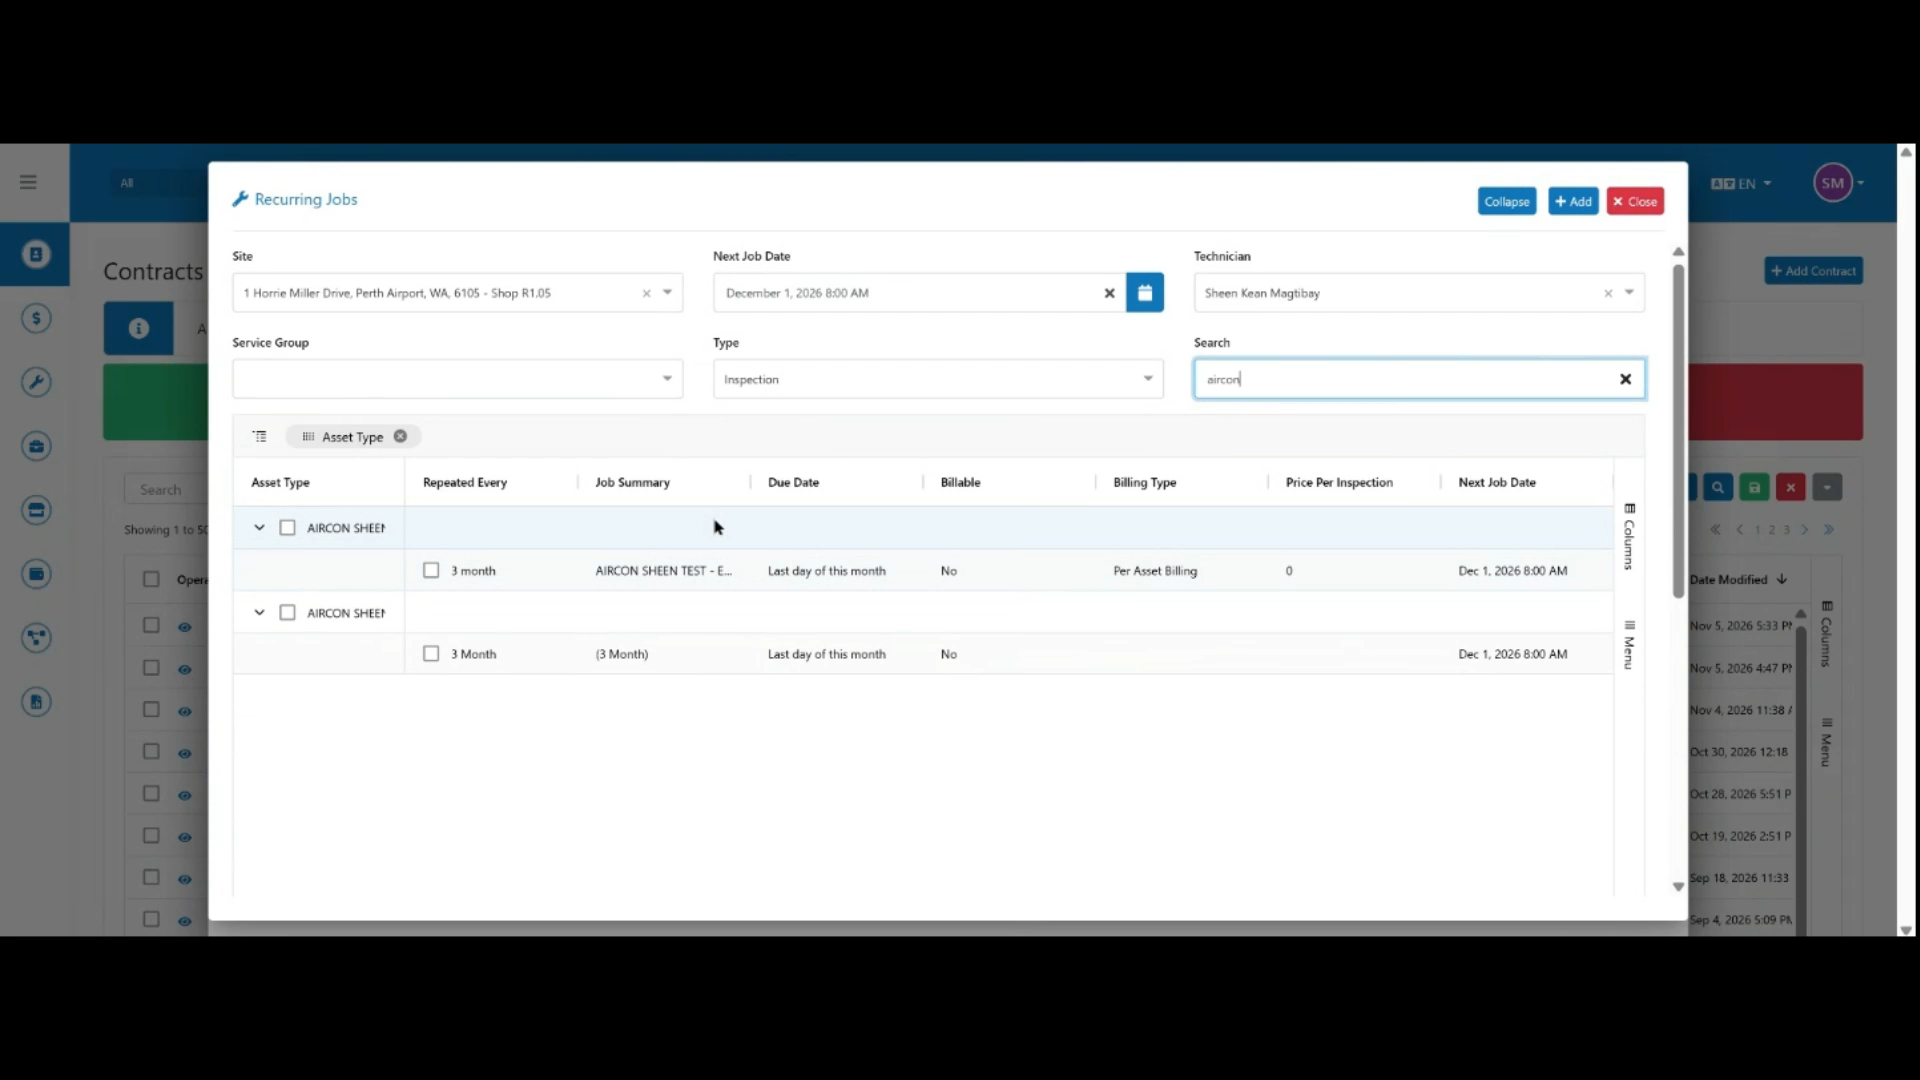 Step 7
Select the job type and search for the relevant asset type, then choose how often the job should repeat.
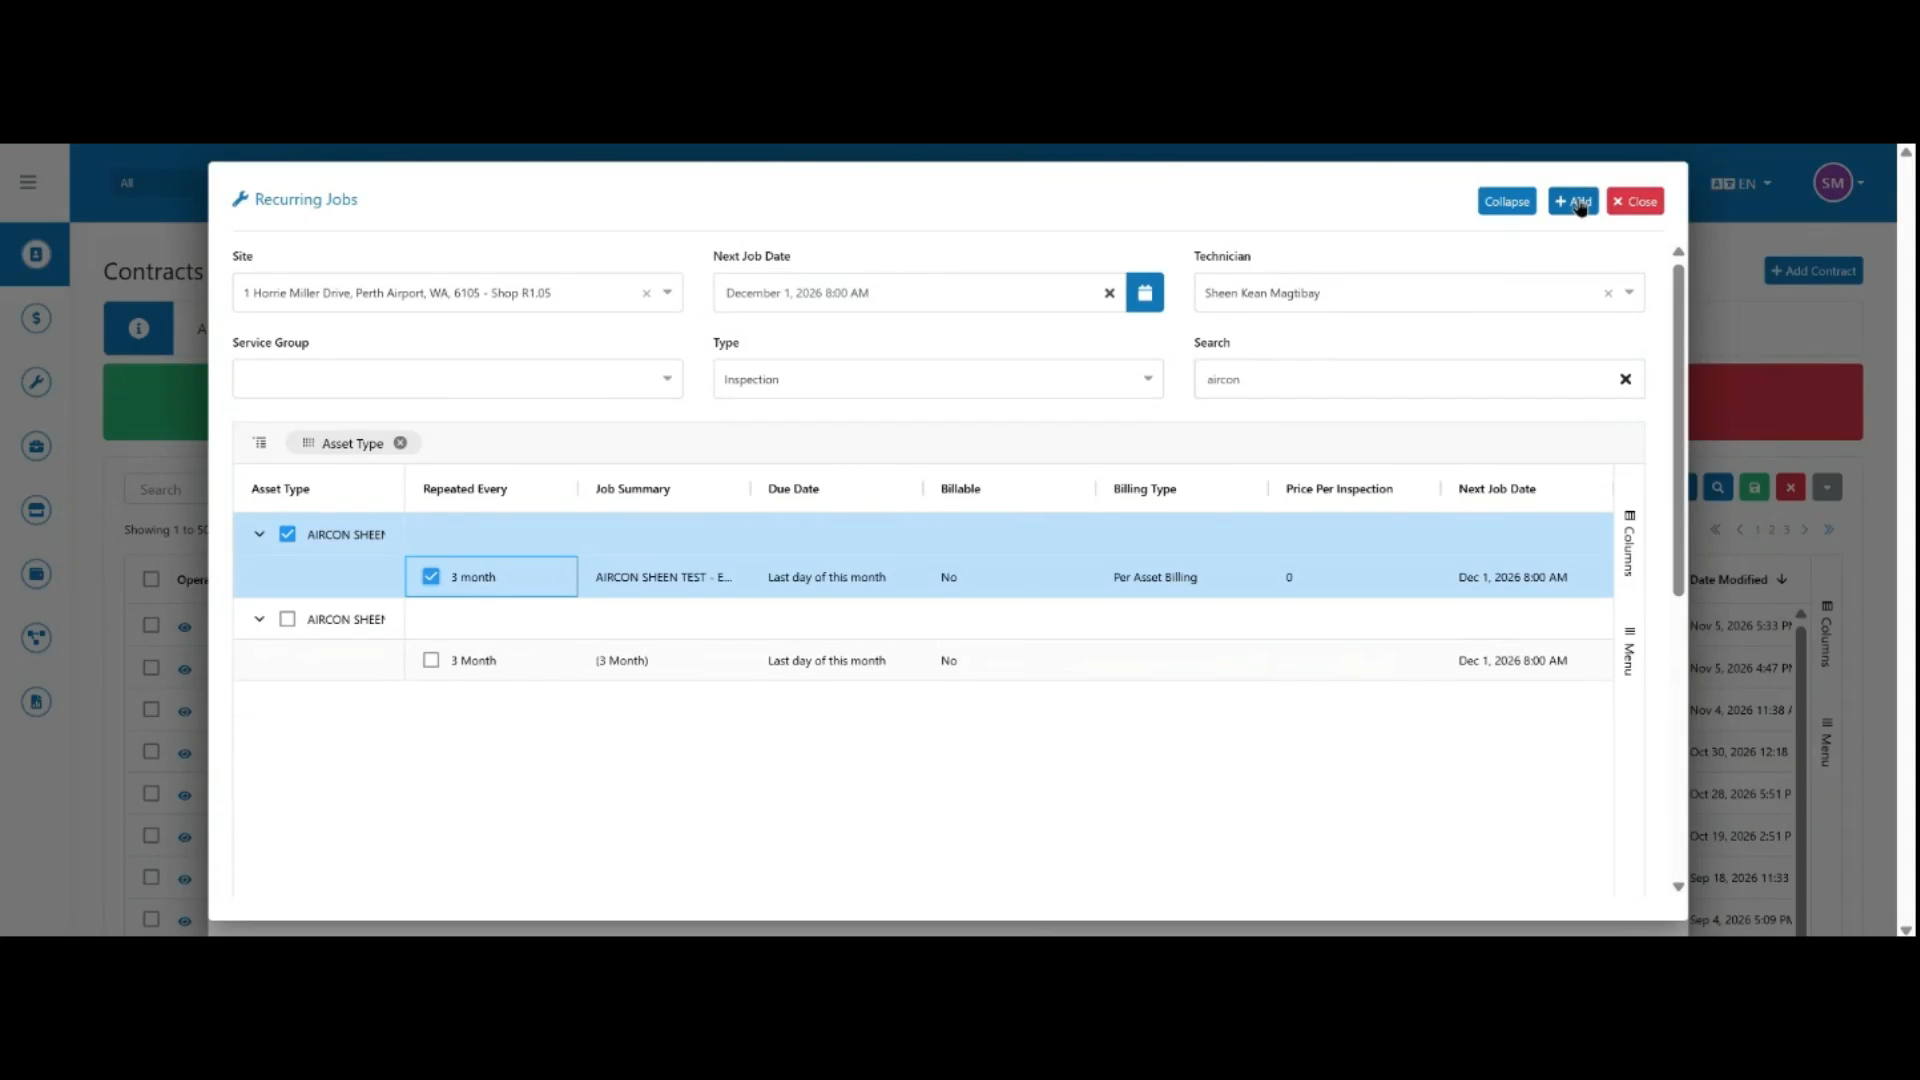 Step 8
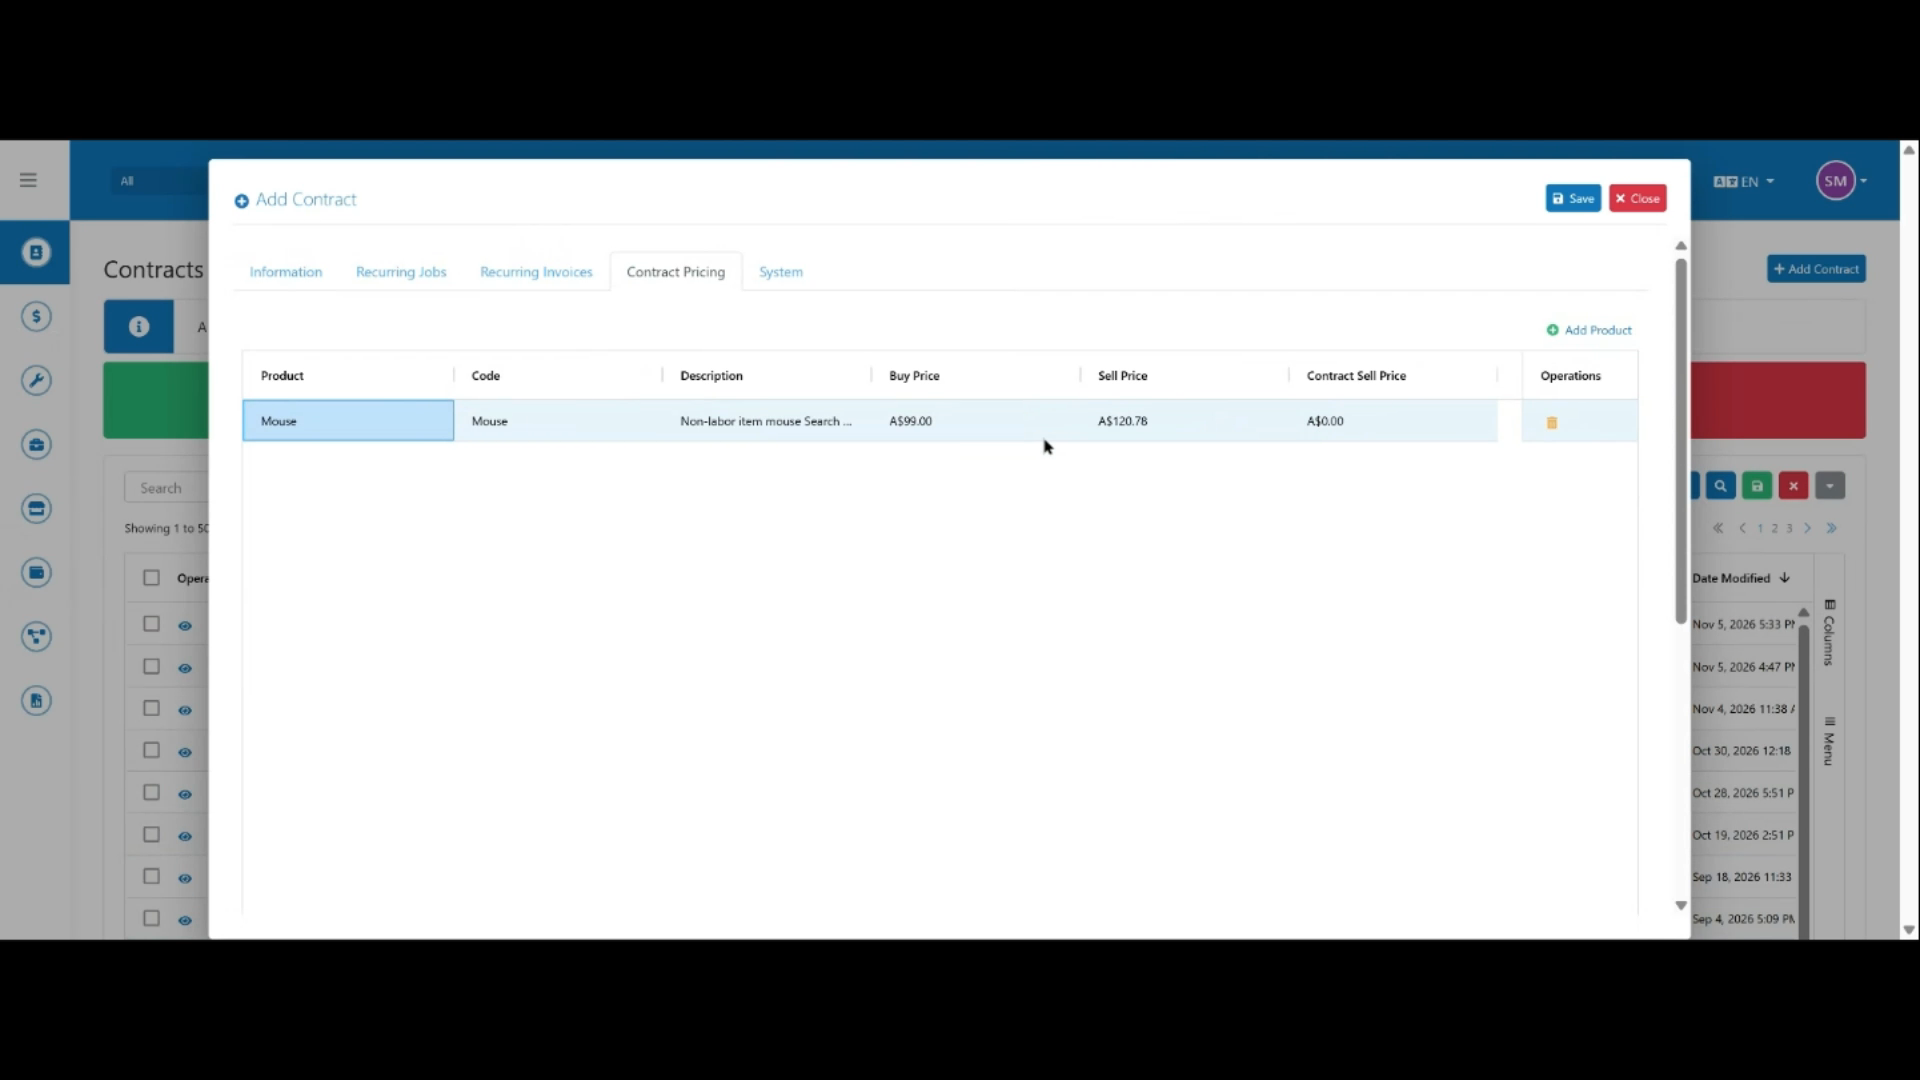
Click Add to save the recurring job. Skip the Recurring Invoices tab for now and open Contract Pricing, then click Add Product and select a product.
 Step 9
The buy and sell prices populate automatically from the product's existing pricing. Enter the contract sell price, then save the contract and click Edit.
 Step 10
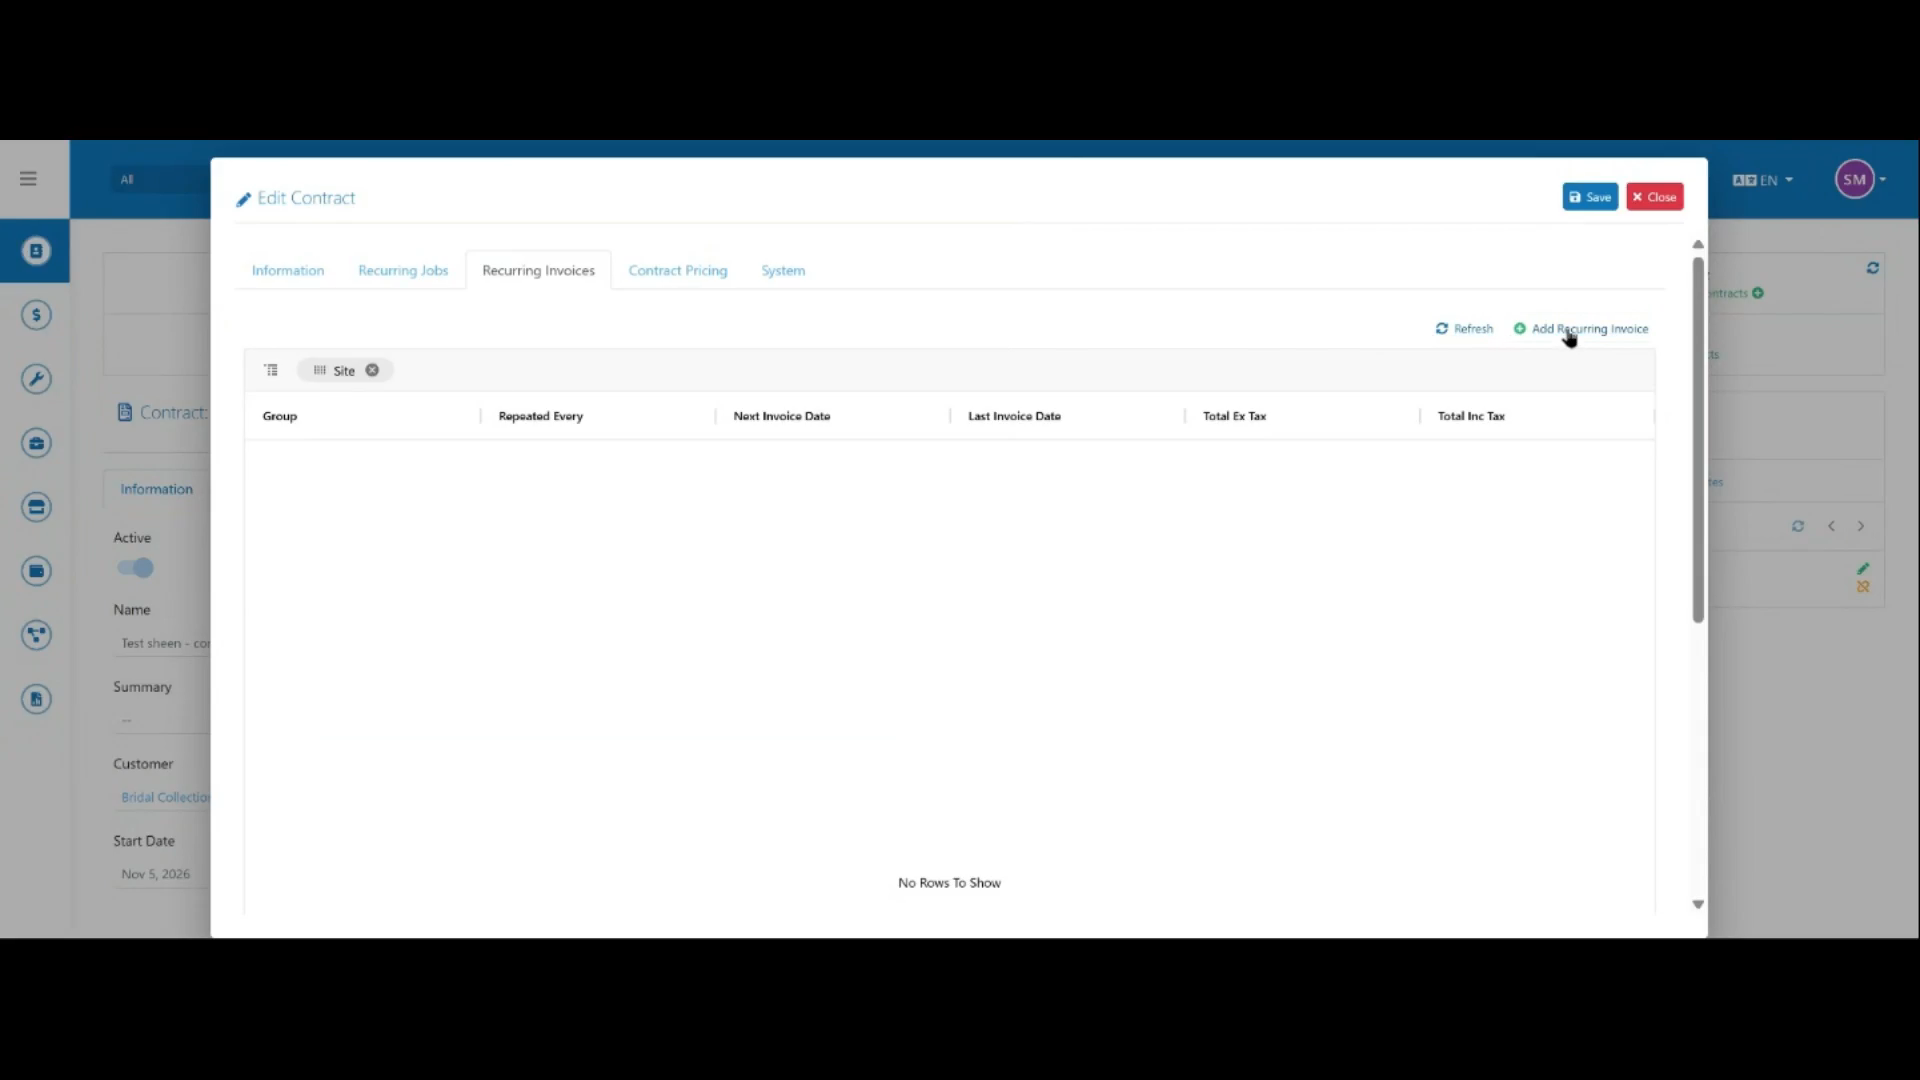
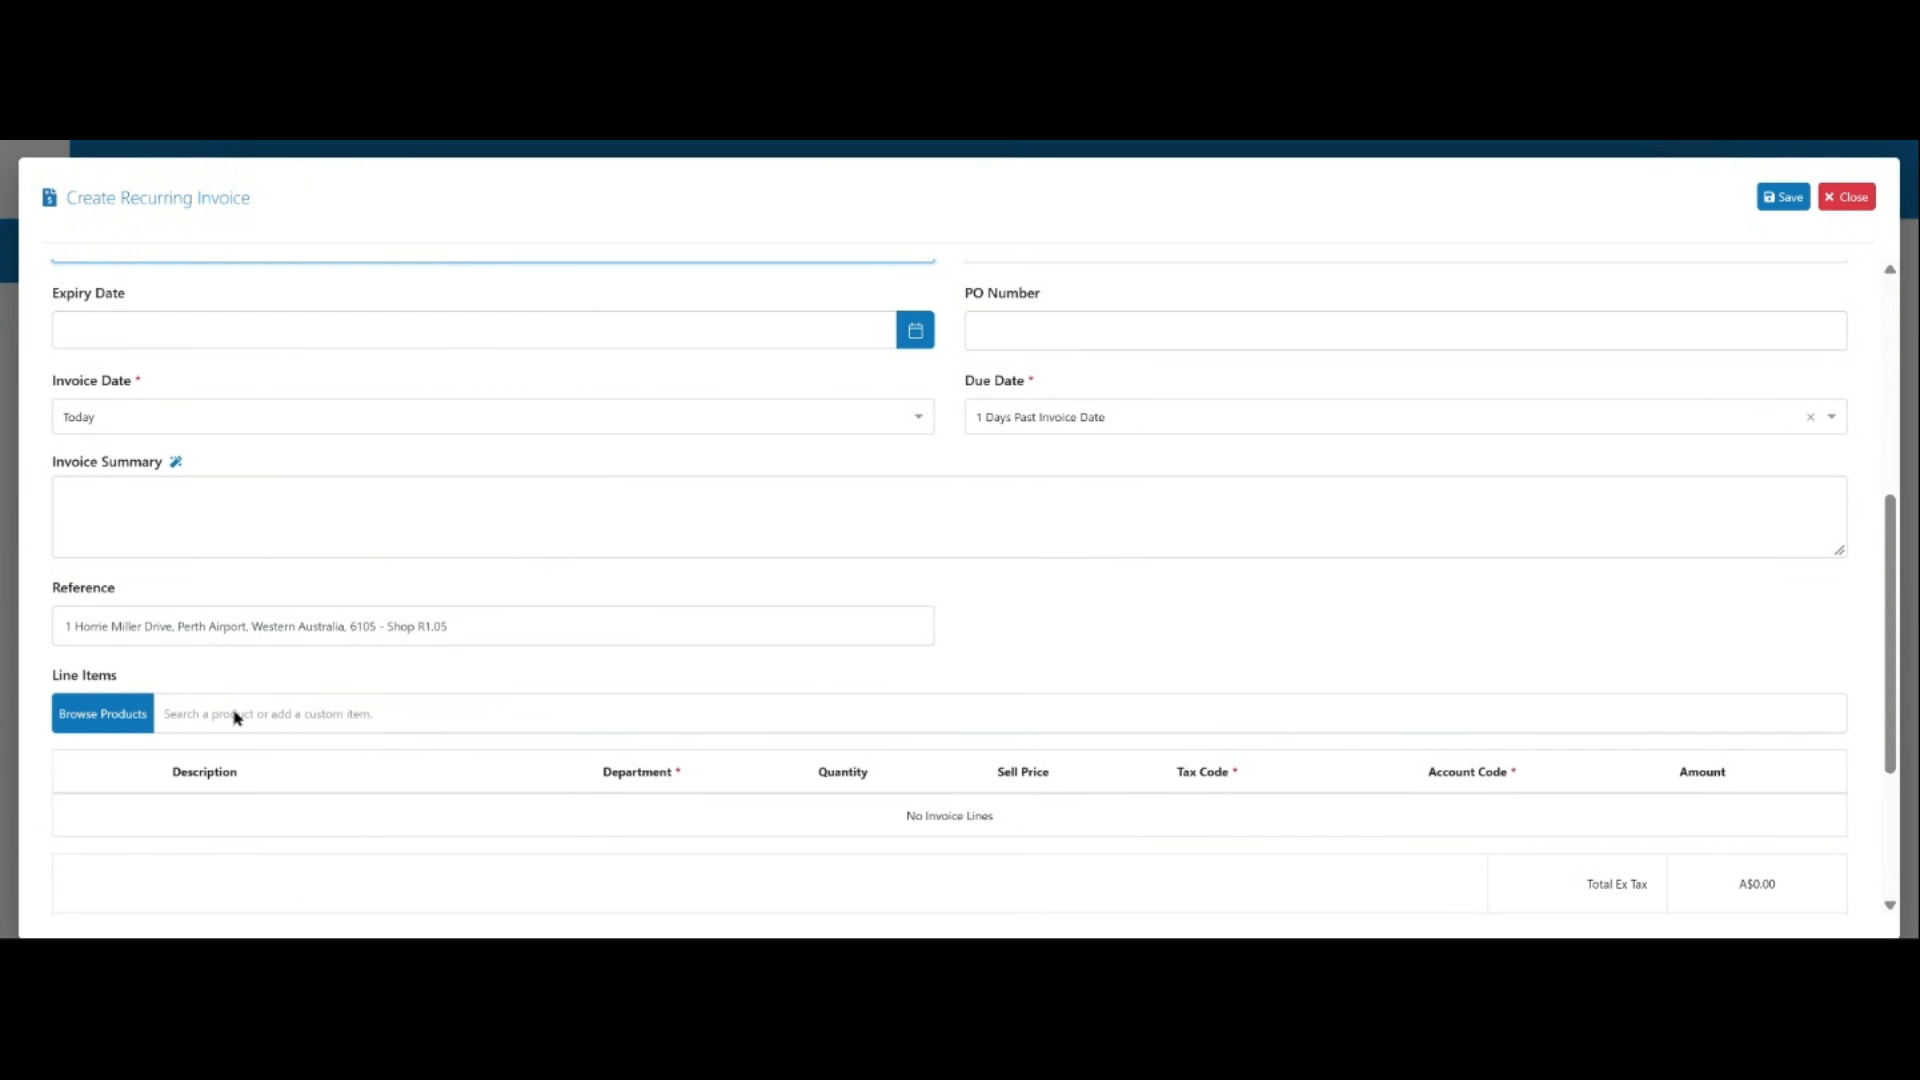
Go back to the Recurring Invoices tab, click Add Recurring Invoice, and fill in the record fields.
 Step 11
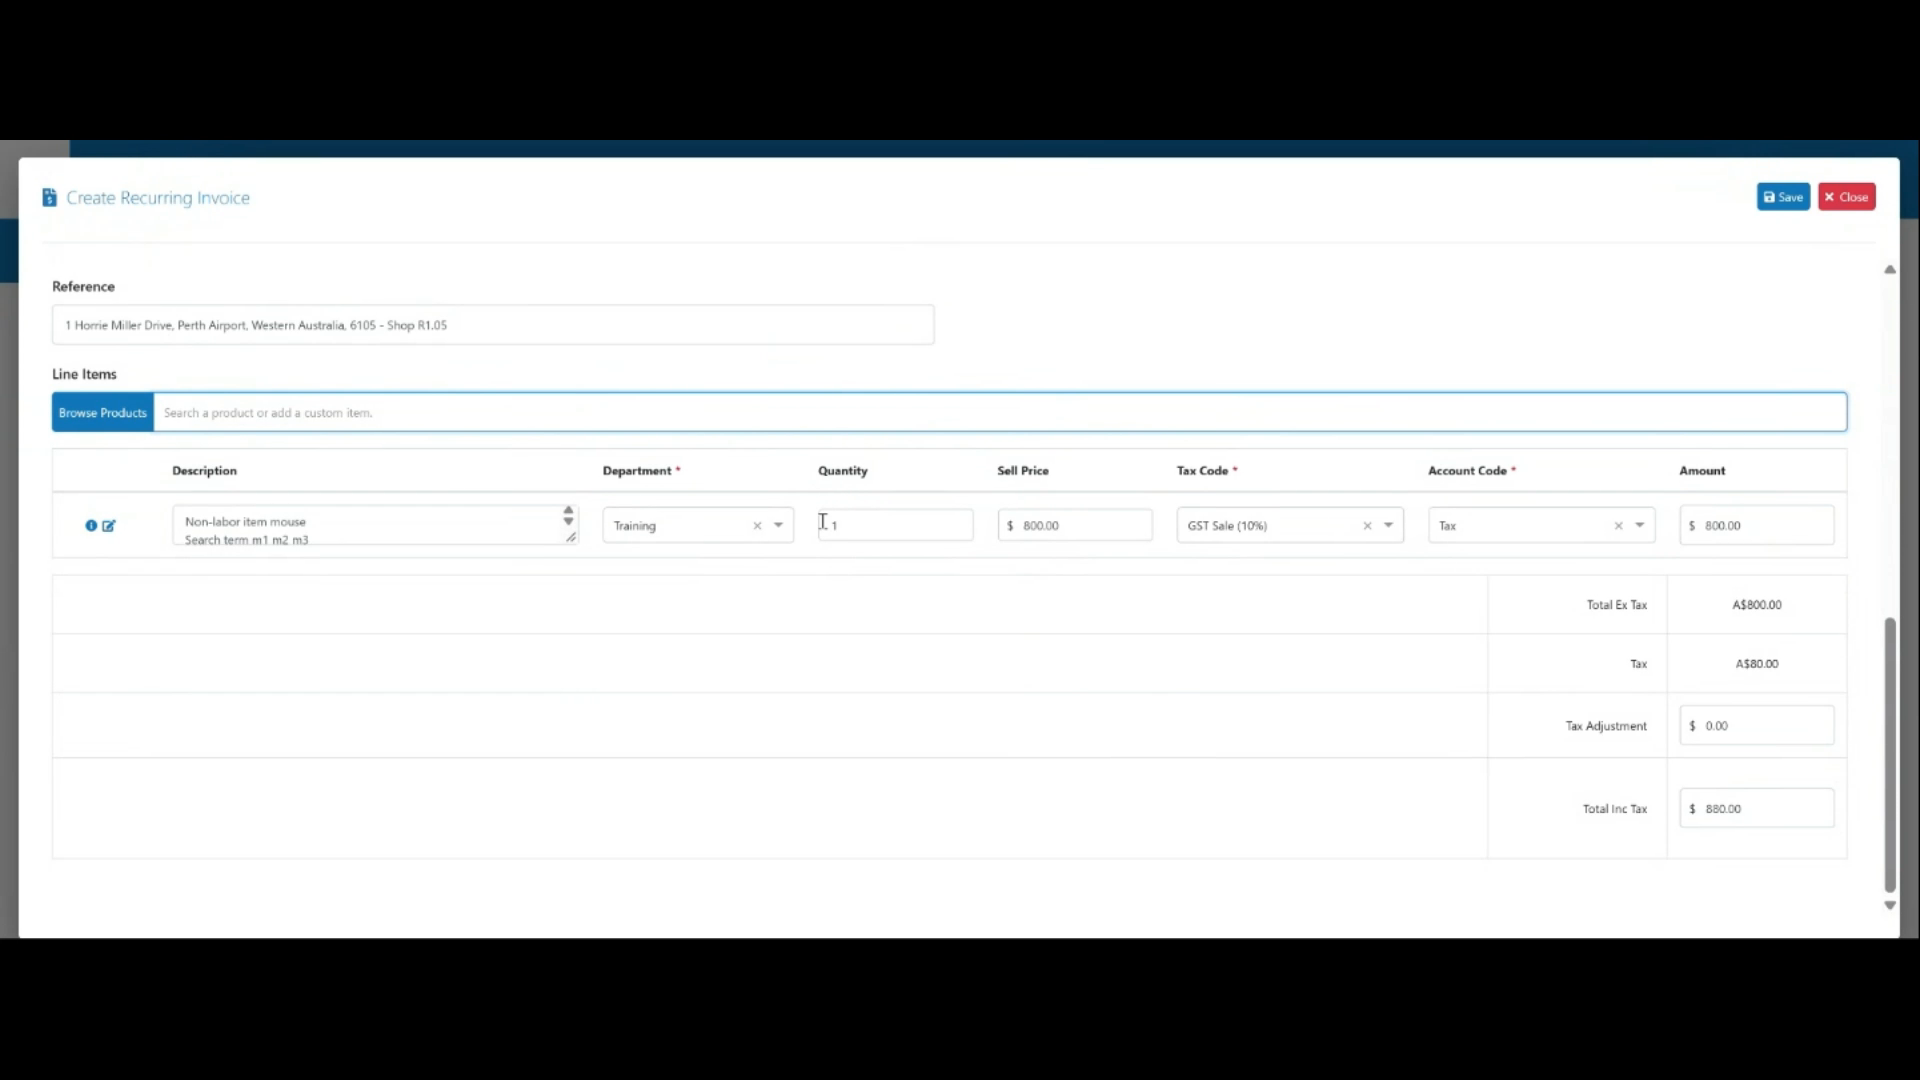
Under Line Items, click the product field and select the product — it will appear automatically since it was already added under Contract Pricing, along with its contract sale price.
 Step 12
Adjust the quantity as needed, then click Save to finish.