Customer Portal
Filtering Columns in Customer Portal
Navigate to the module in the FieldMagic Customer Portal that contains the data you want to filter.
Step-by-step instructions
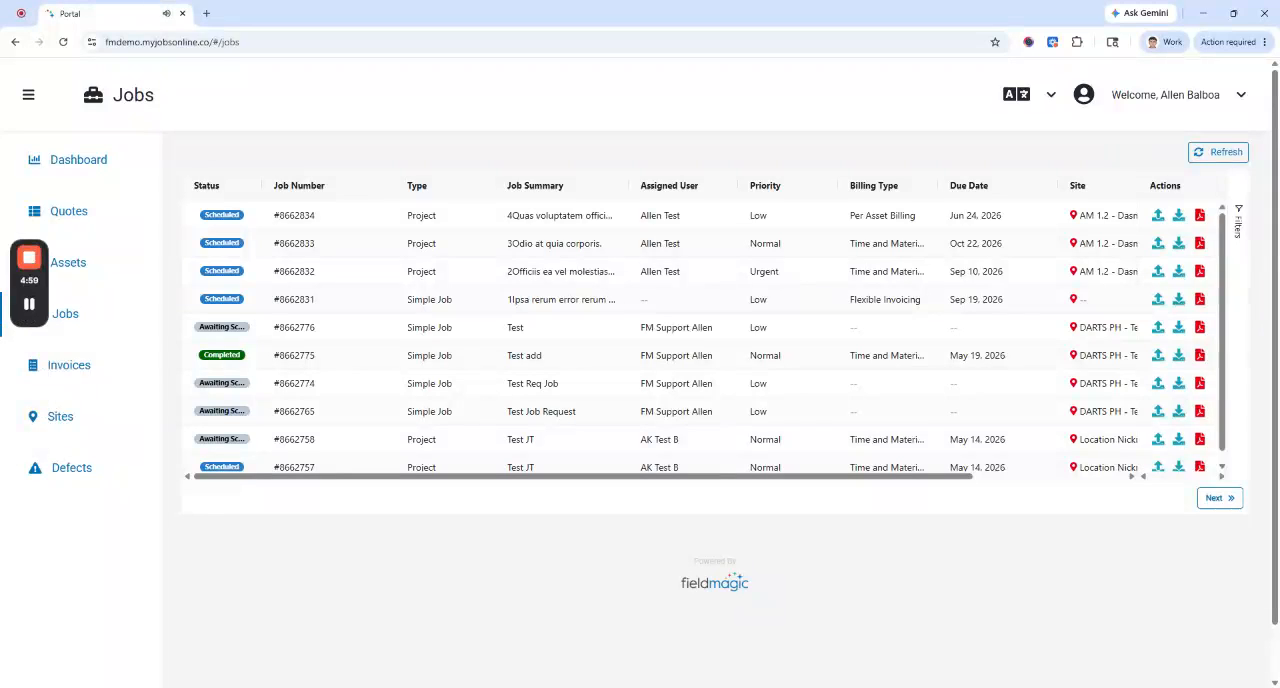 Step 1
Navigate to the module in the FieldMagic Customer Portal that contains the data you want to filter.
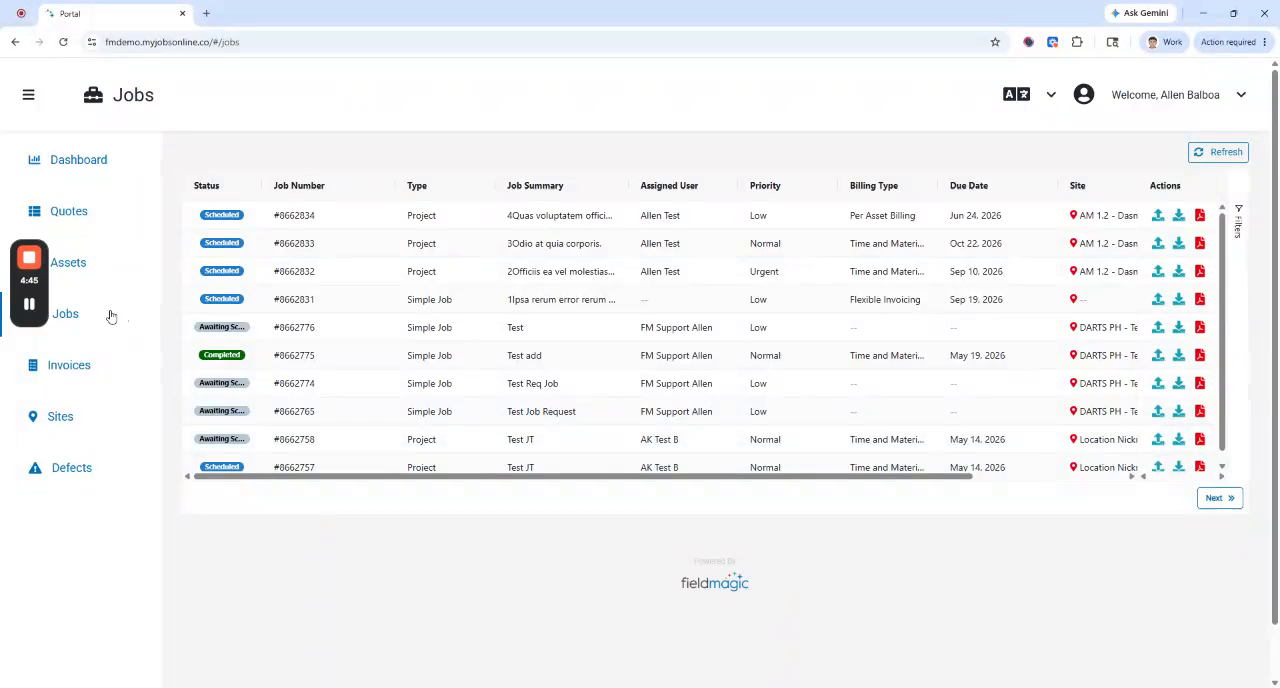 Step 2
Hover over the header of the column you want to filter and click the Column Options icon to open the filter dialog.
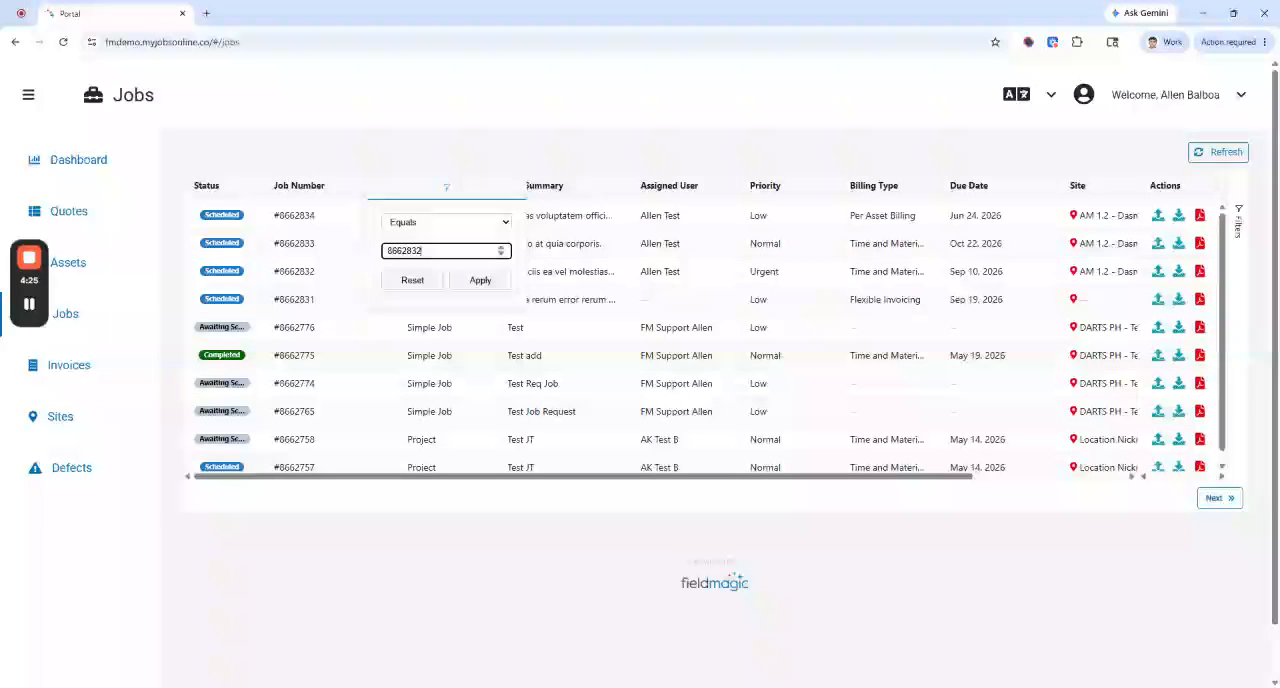 Step 3
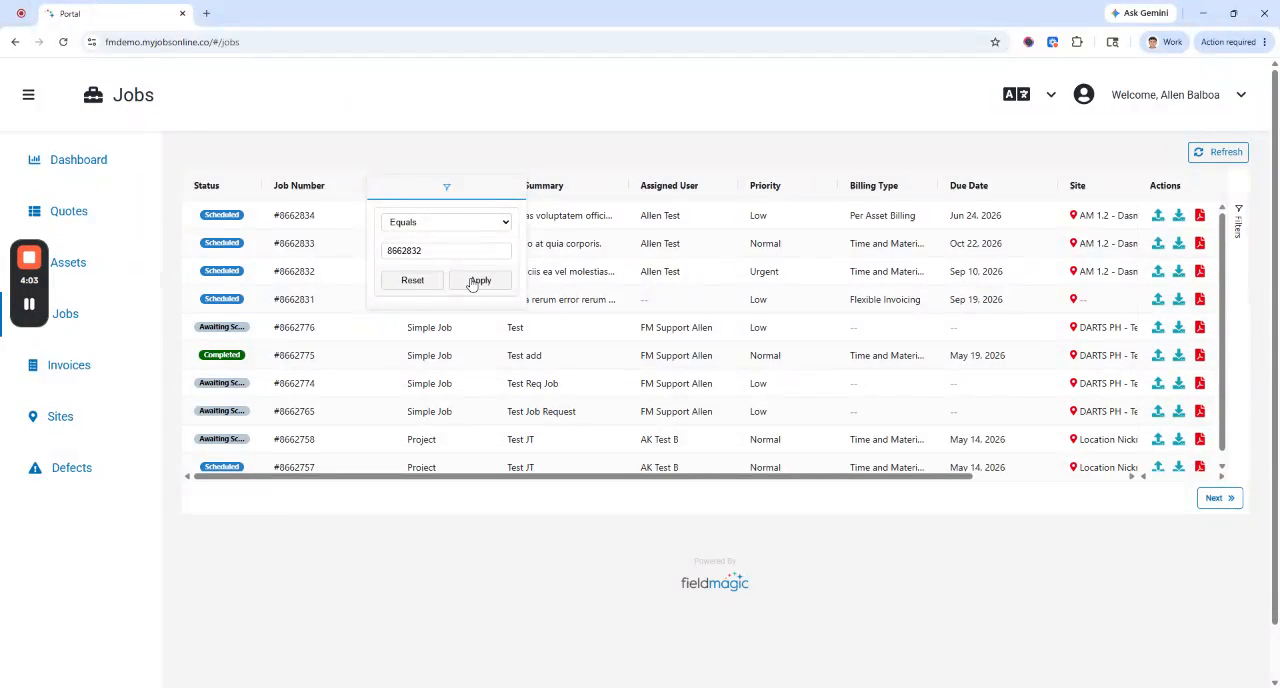
Select a filter operator (e.g., equals, greater than, less than, exists, or does not exist).
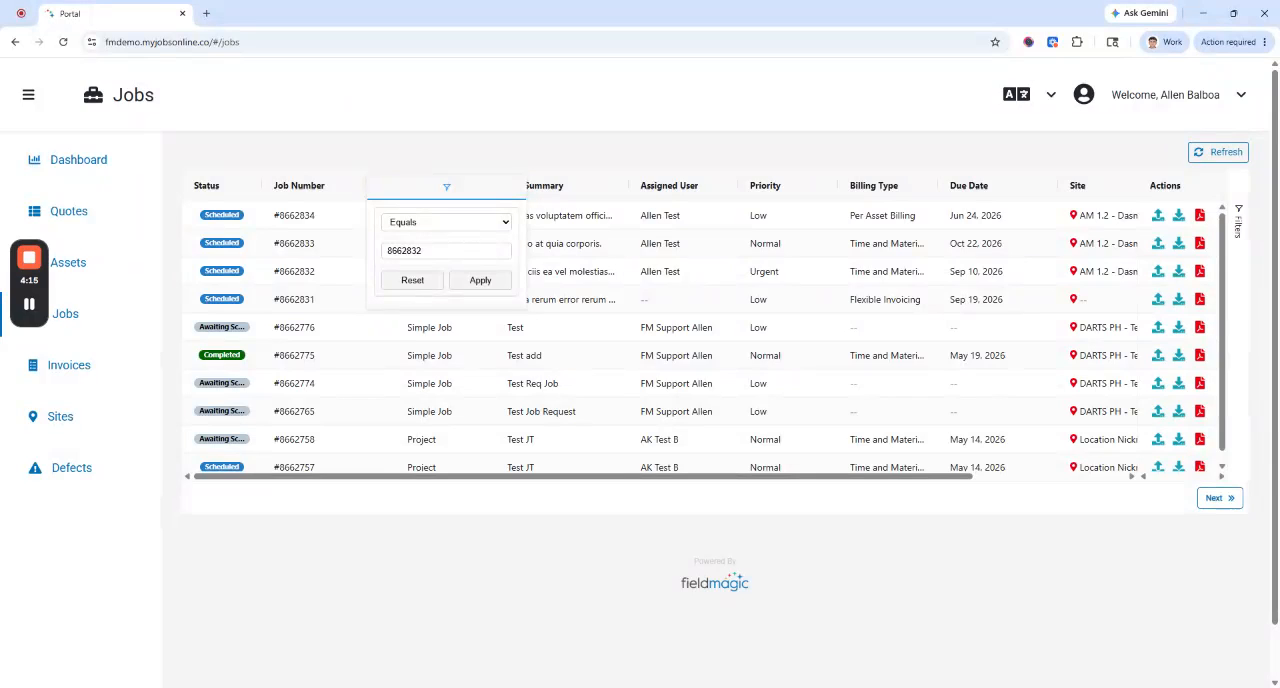 Step 4
Available operators depend on the field data type. Click Apply to view the results or Reset to clear the selection.
 Step 5
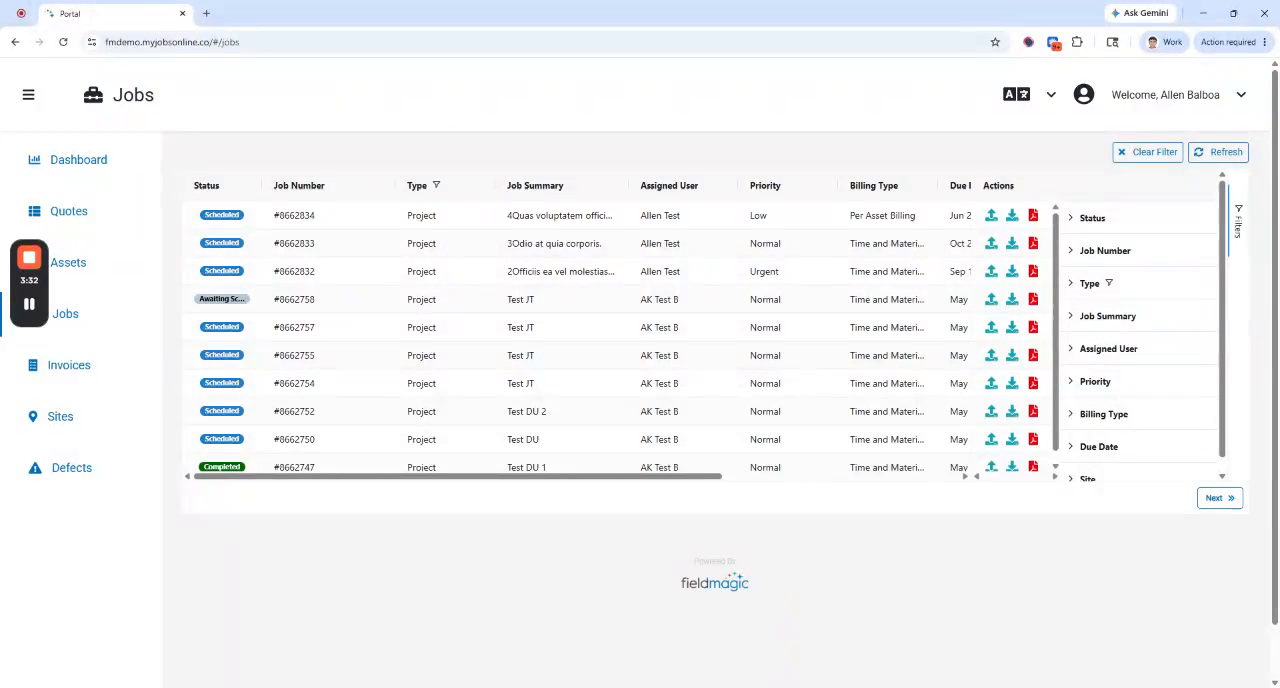
Alternatively, open the filter panel on the right side of the screen to view all fields and apply multiple filters at once.
 Step 6
When filters are active, a Clear Filters button appears at the top right. Click it to remove all active filters.