Job Scheduling
How to Bulk Schedule in Scheduler
Open the Bulk Schedule feature in the Calendar to begin scheduling multiple work items at once.
Step-by-step instructions
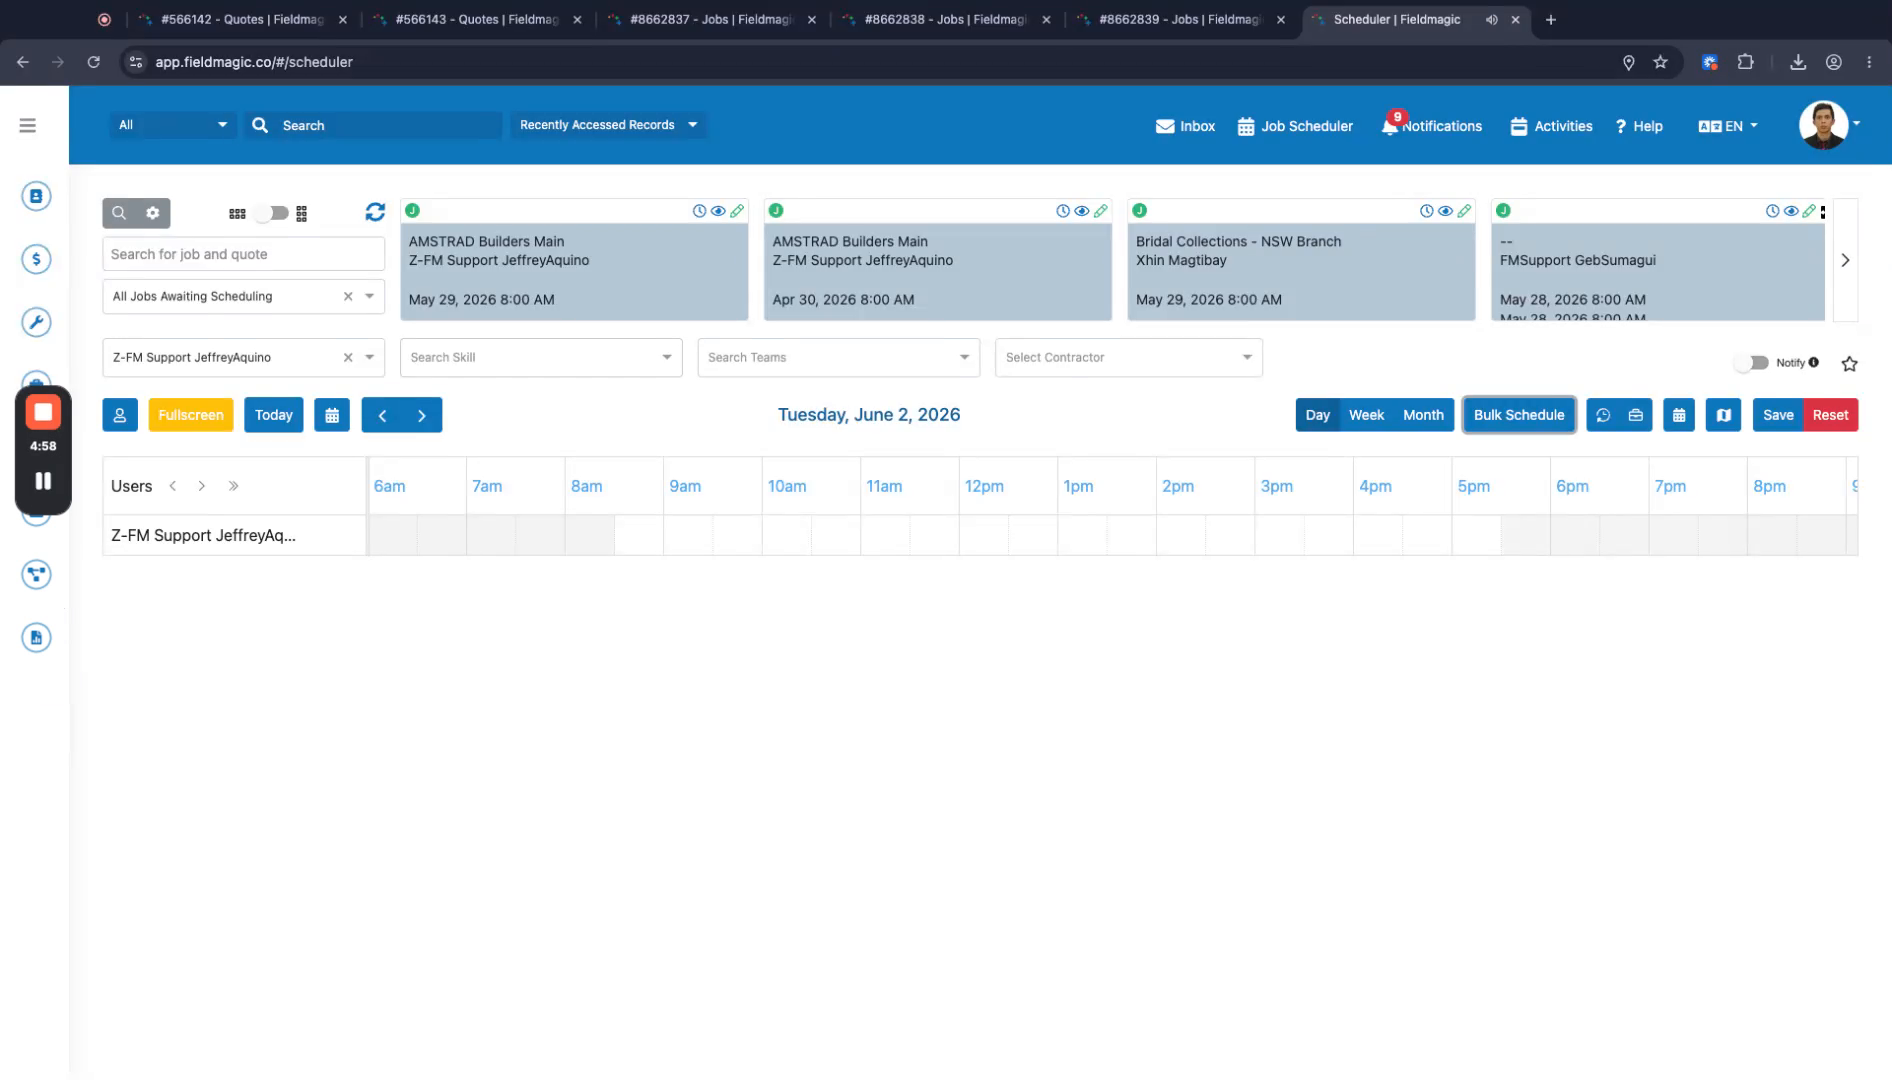 Step 1
Open the Bulk Schedule feature in the Calendar to begin scheduling multiple work items at once.
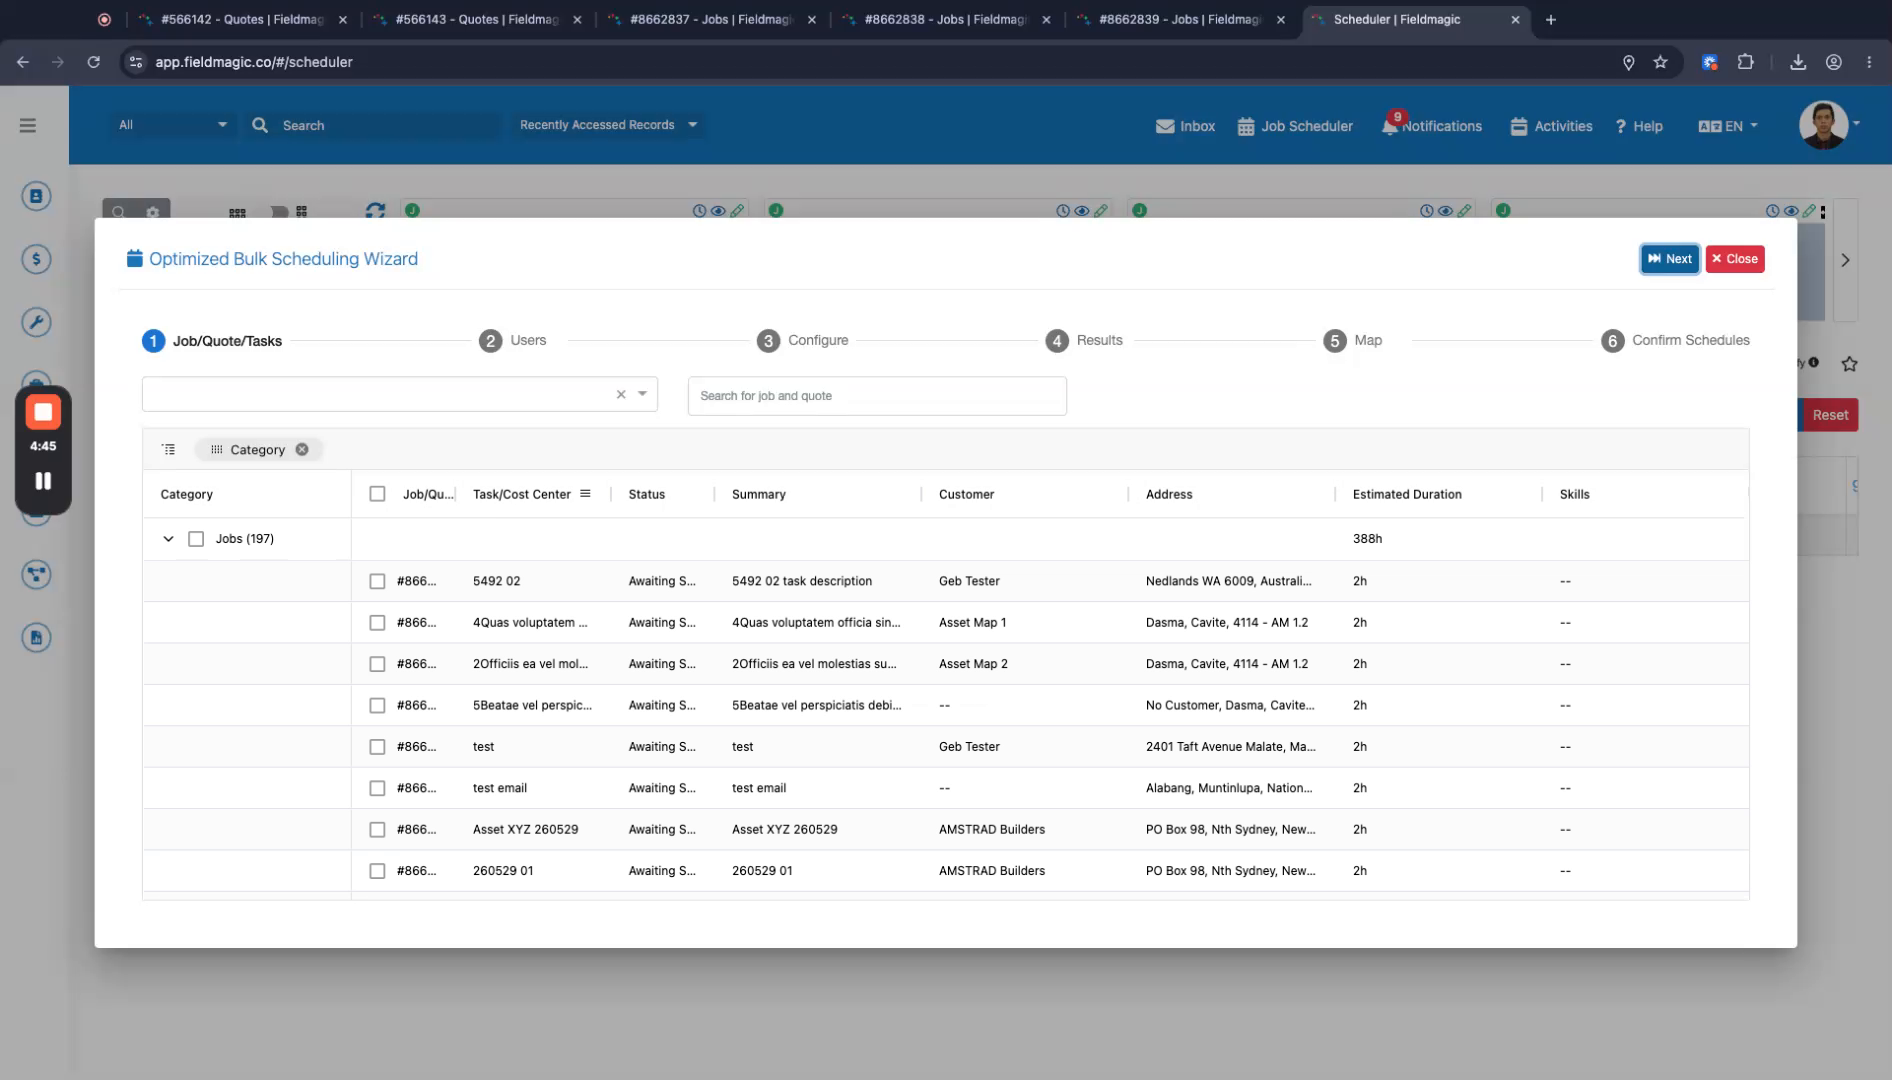 Step 2
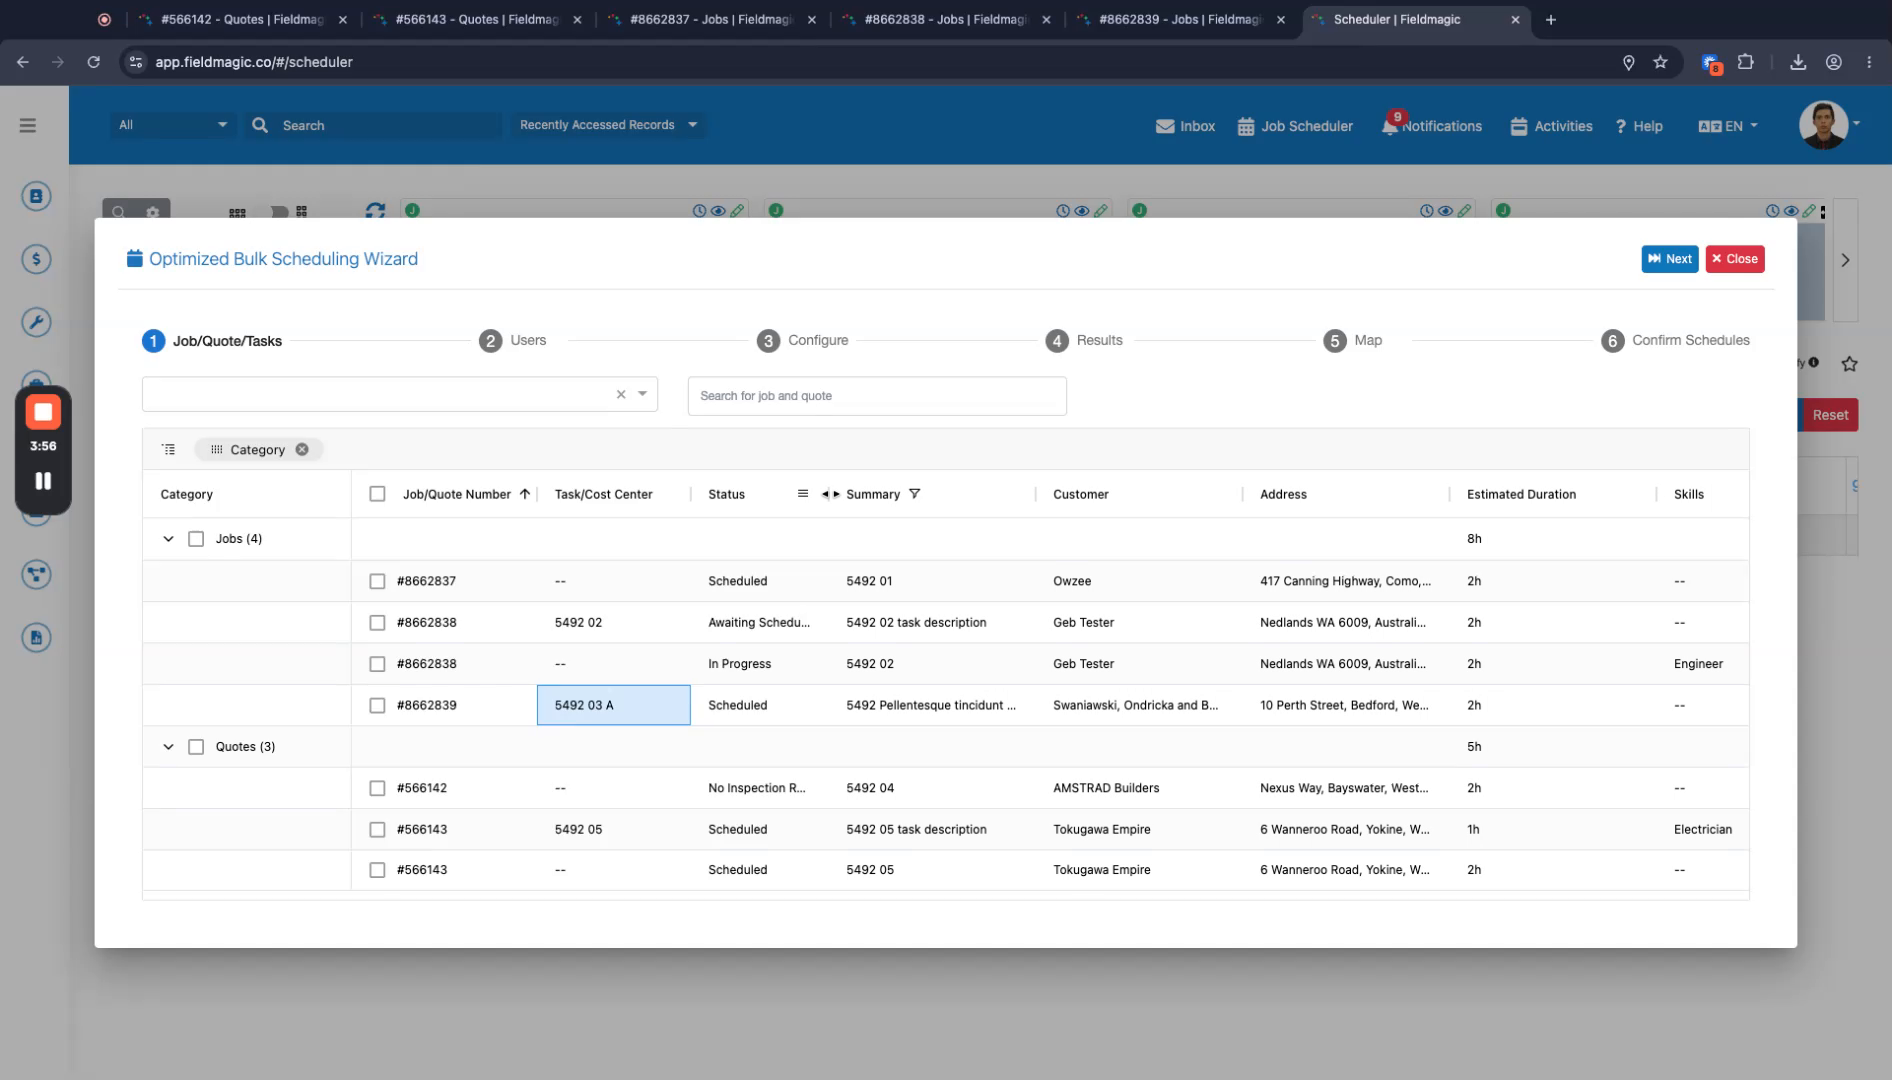
Filter the list by work item type, then select all jobs, codes, tasks, and project tasks you want to schedule.
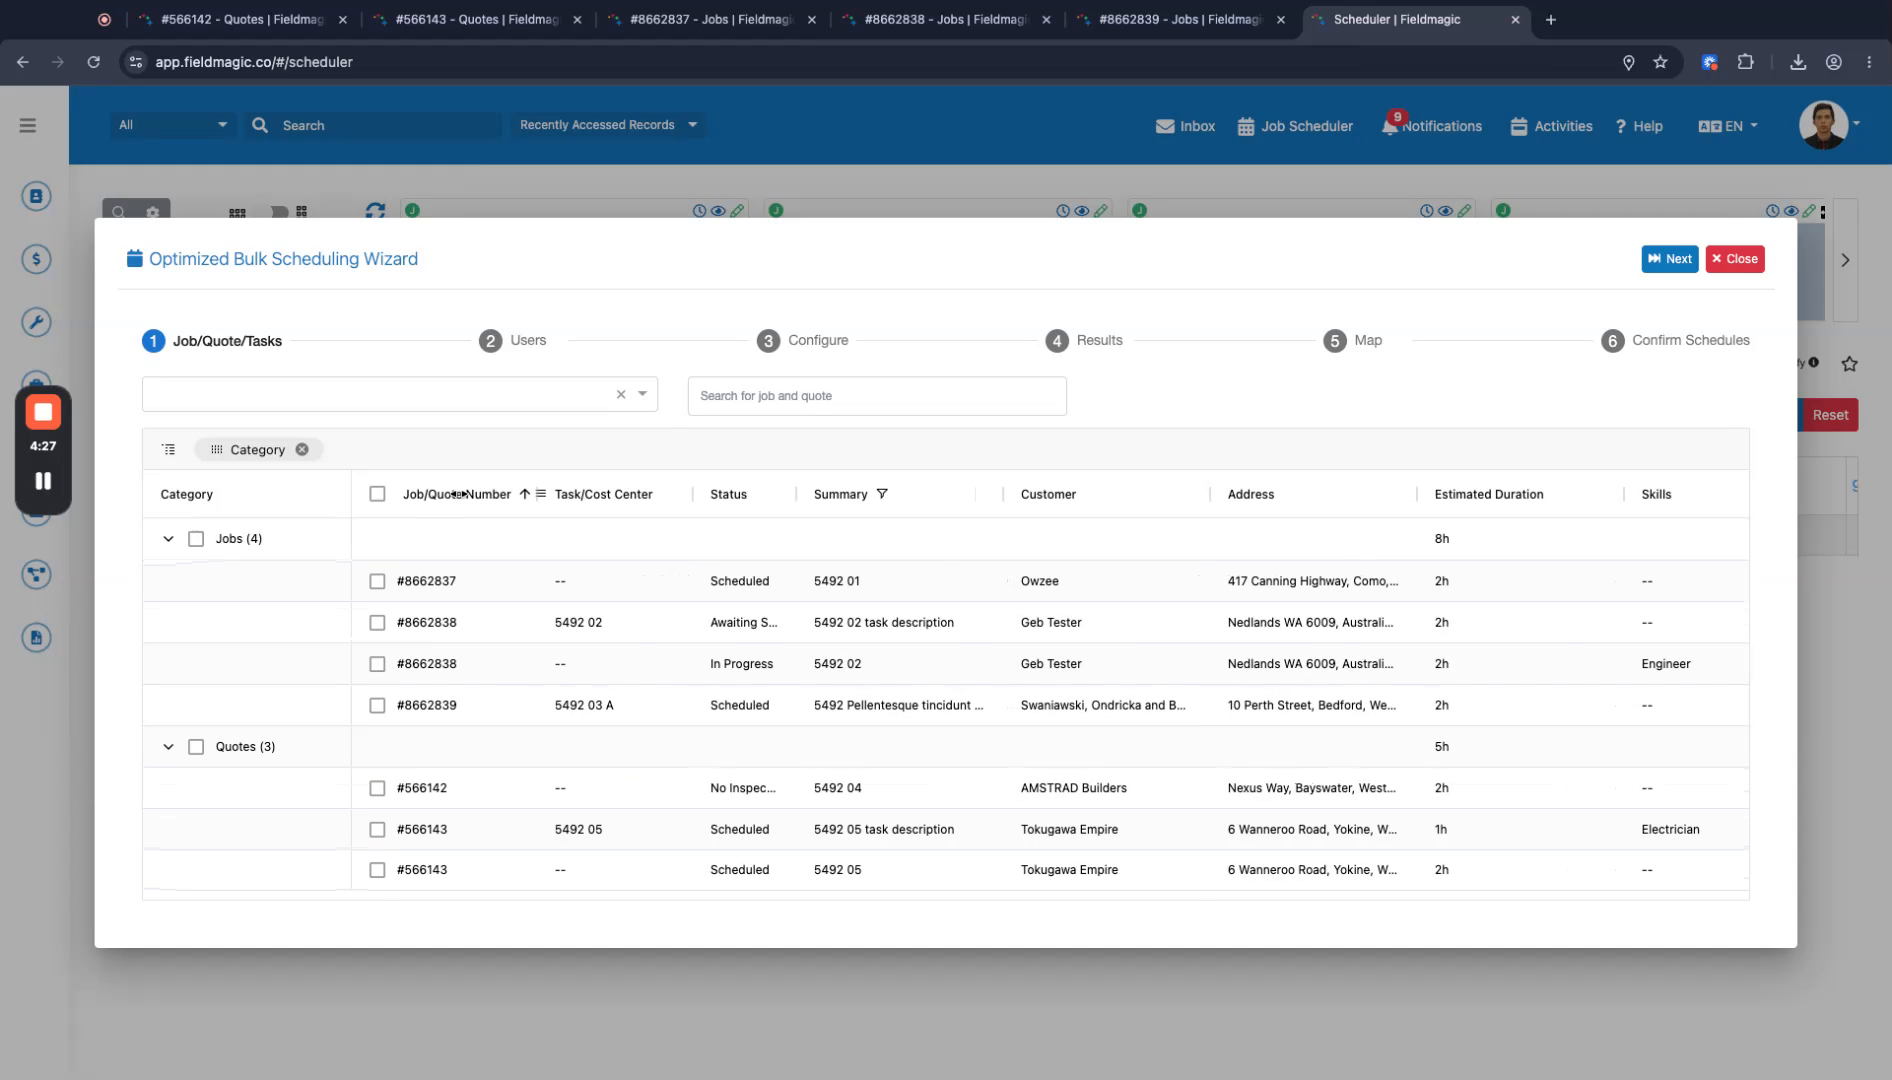 Step 3
Click Next to proceed. The post-center view indicates whether an item is a job, code, task, or project task.
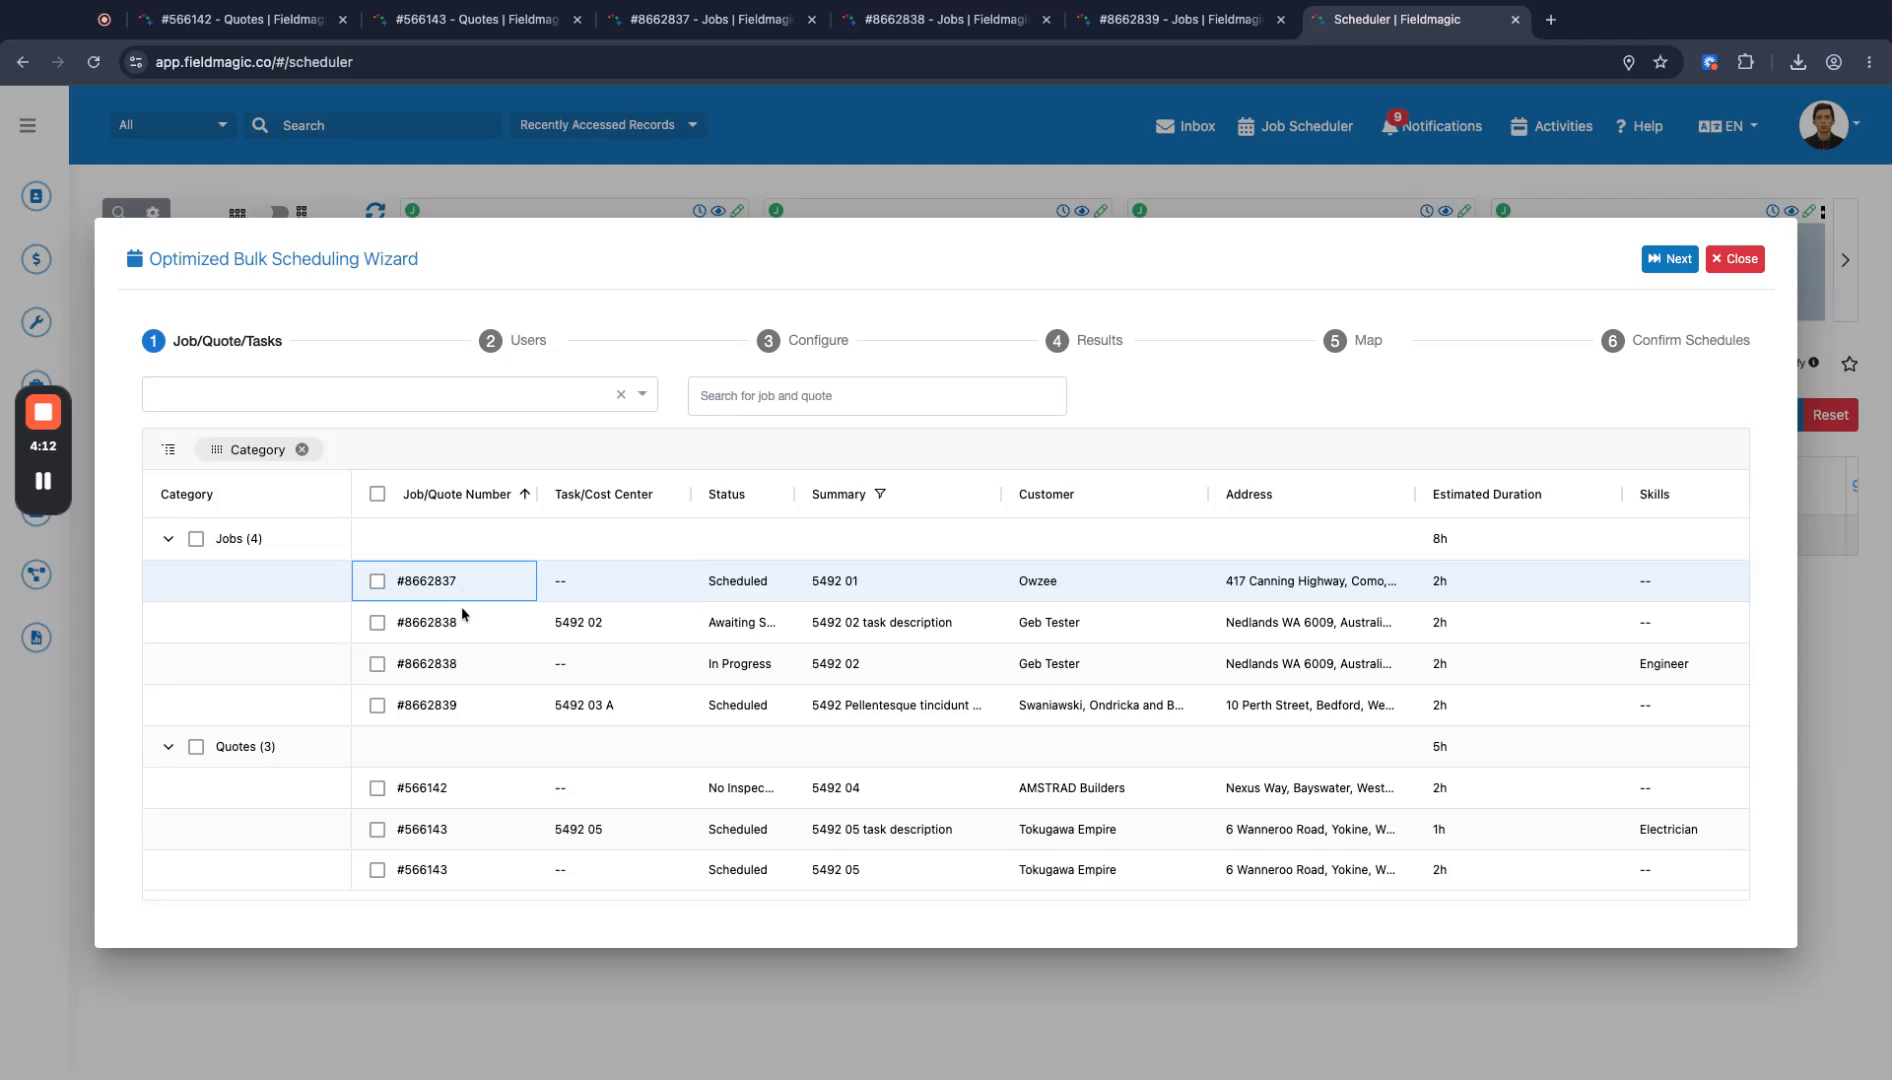 Step 4
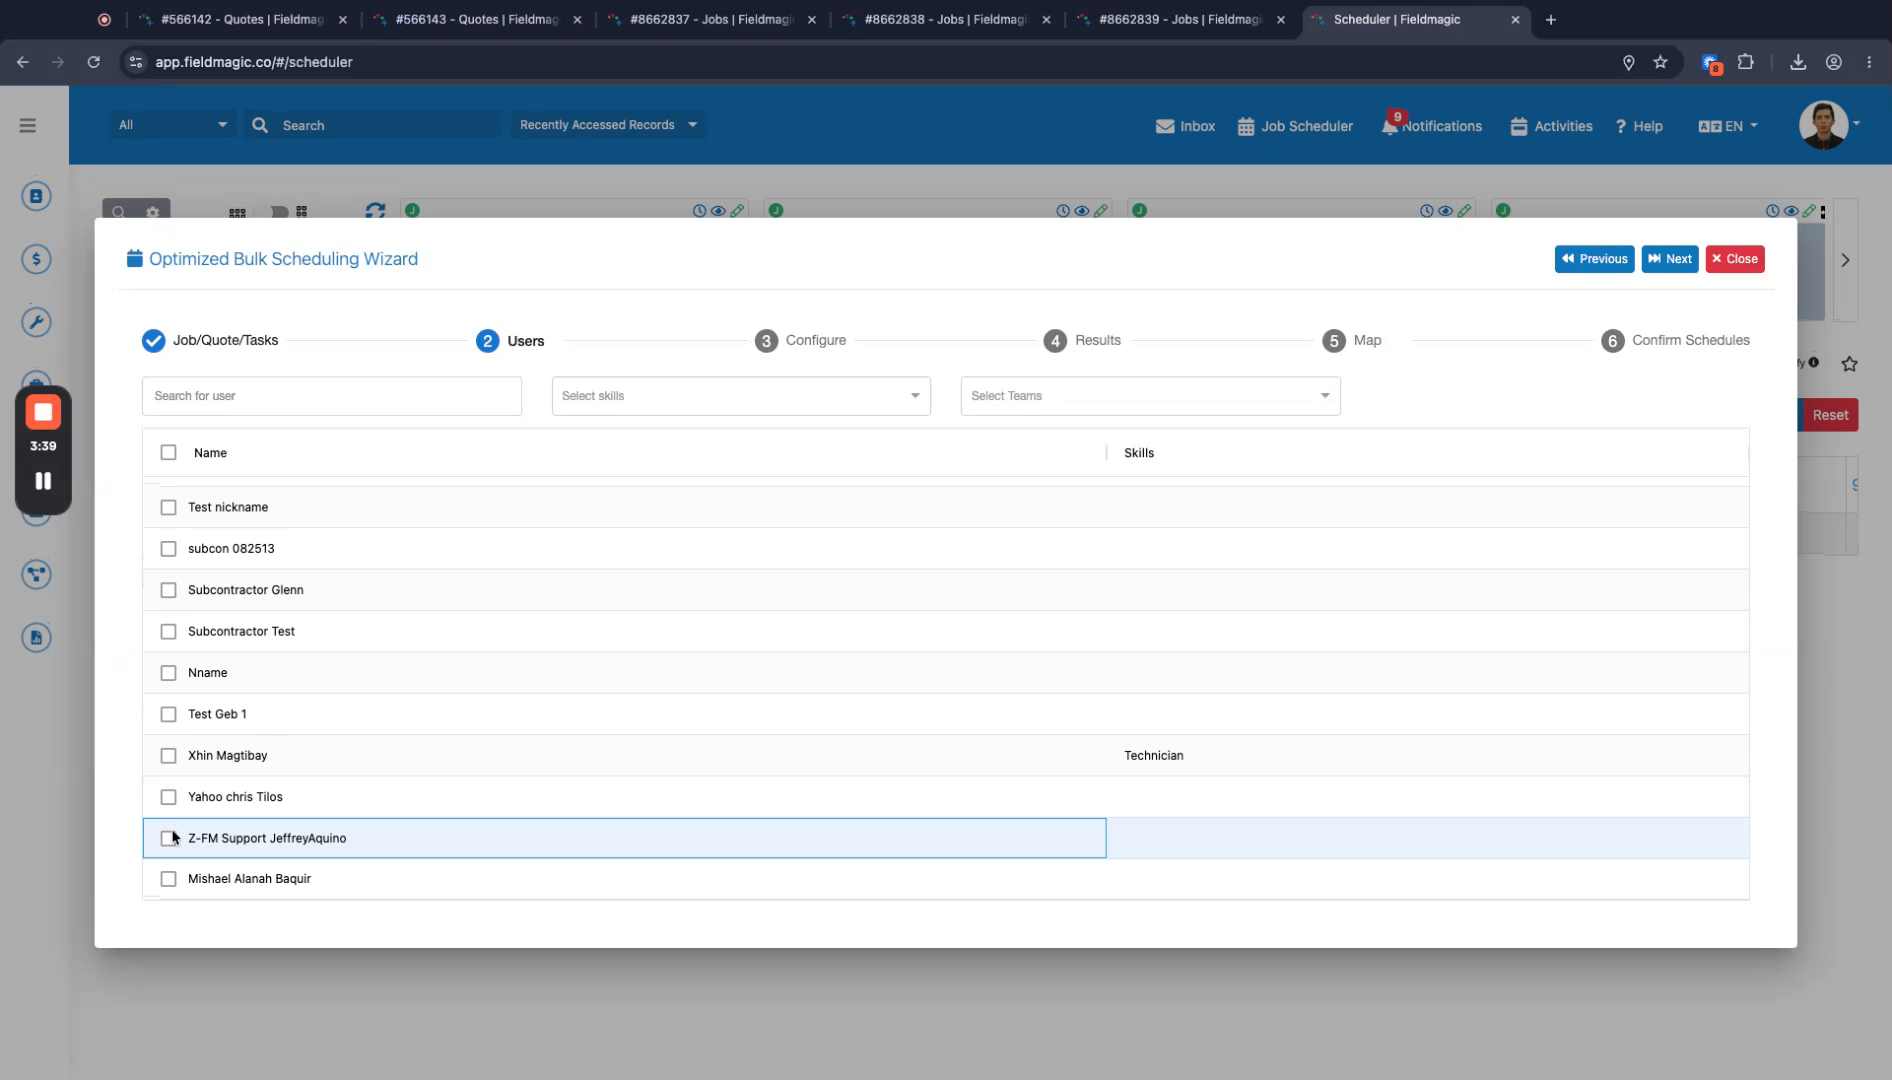
Select a technician from the available list, then click Next.
 Step 5
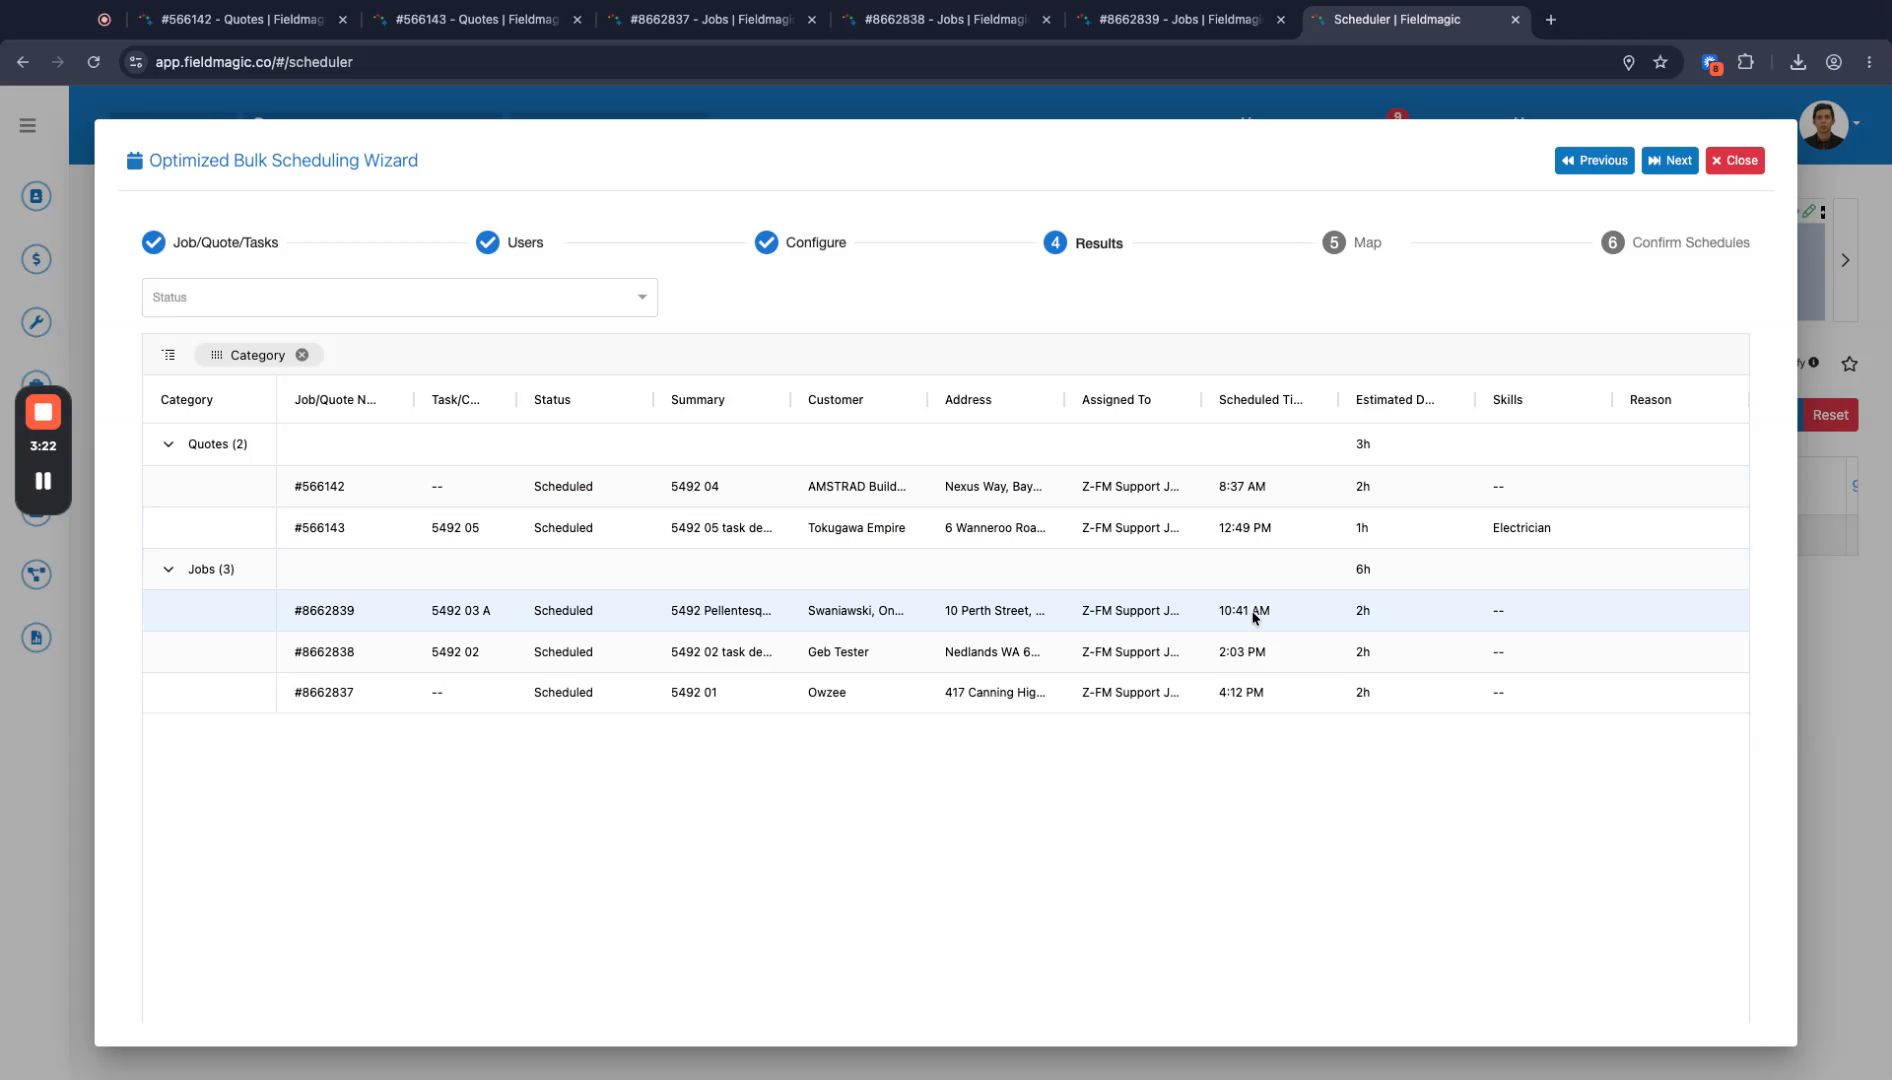
Adjust the scheduled time for each work item as needed, then click Next.
 Step 6
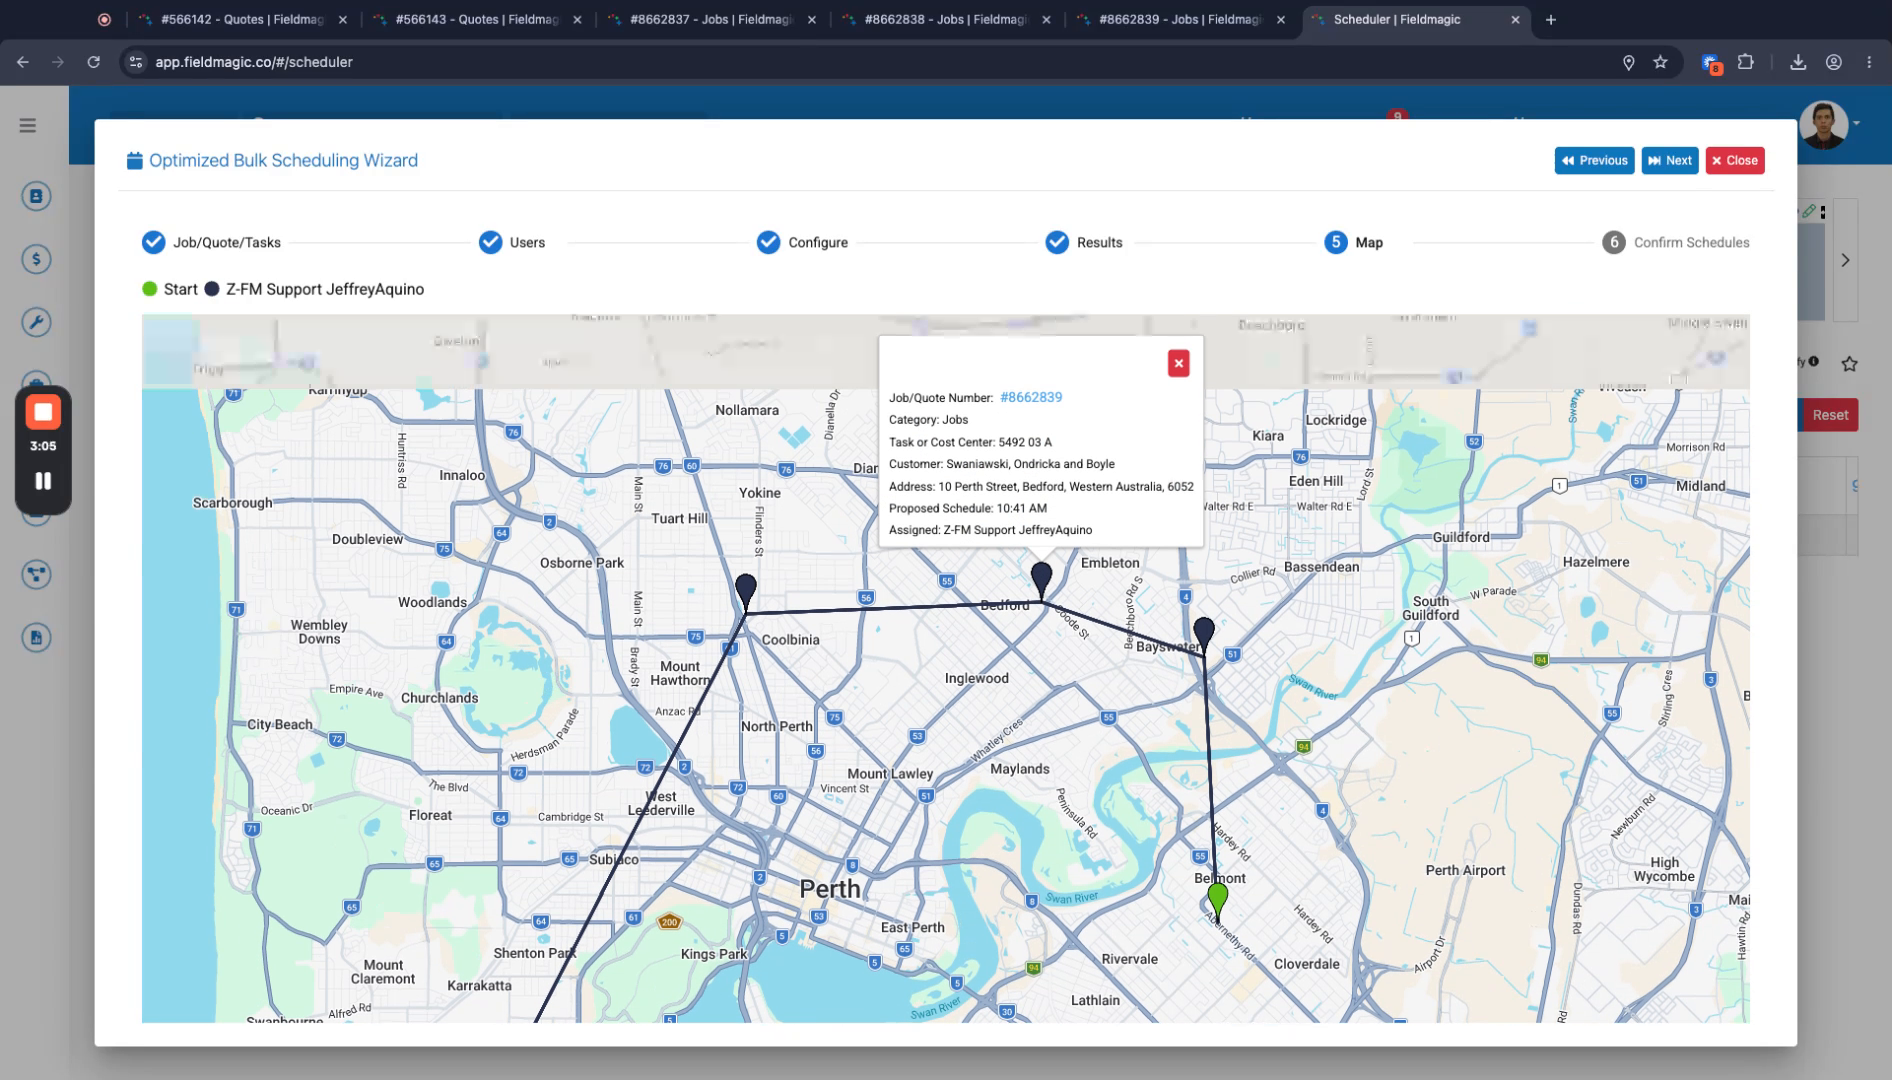
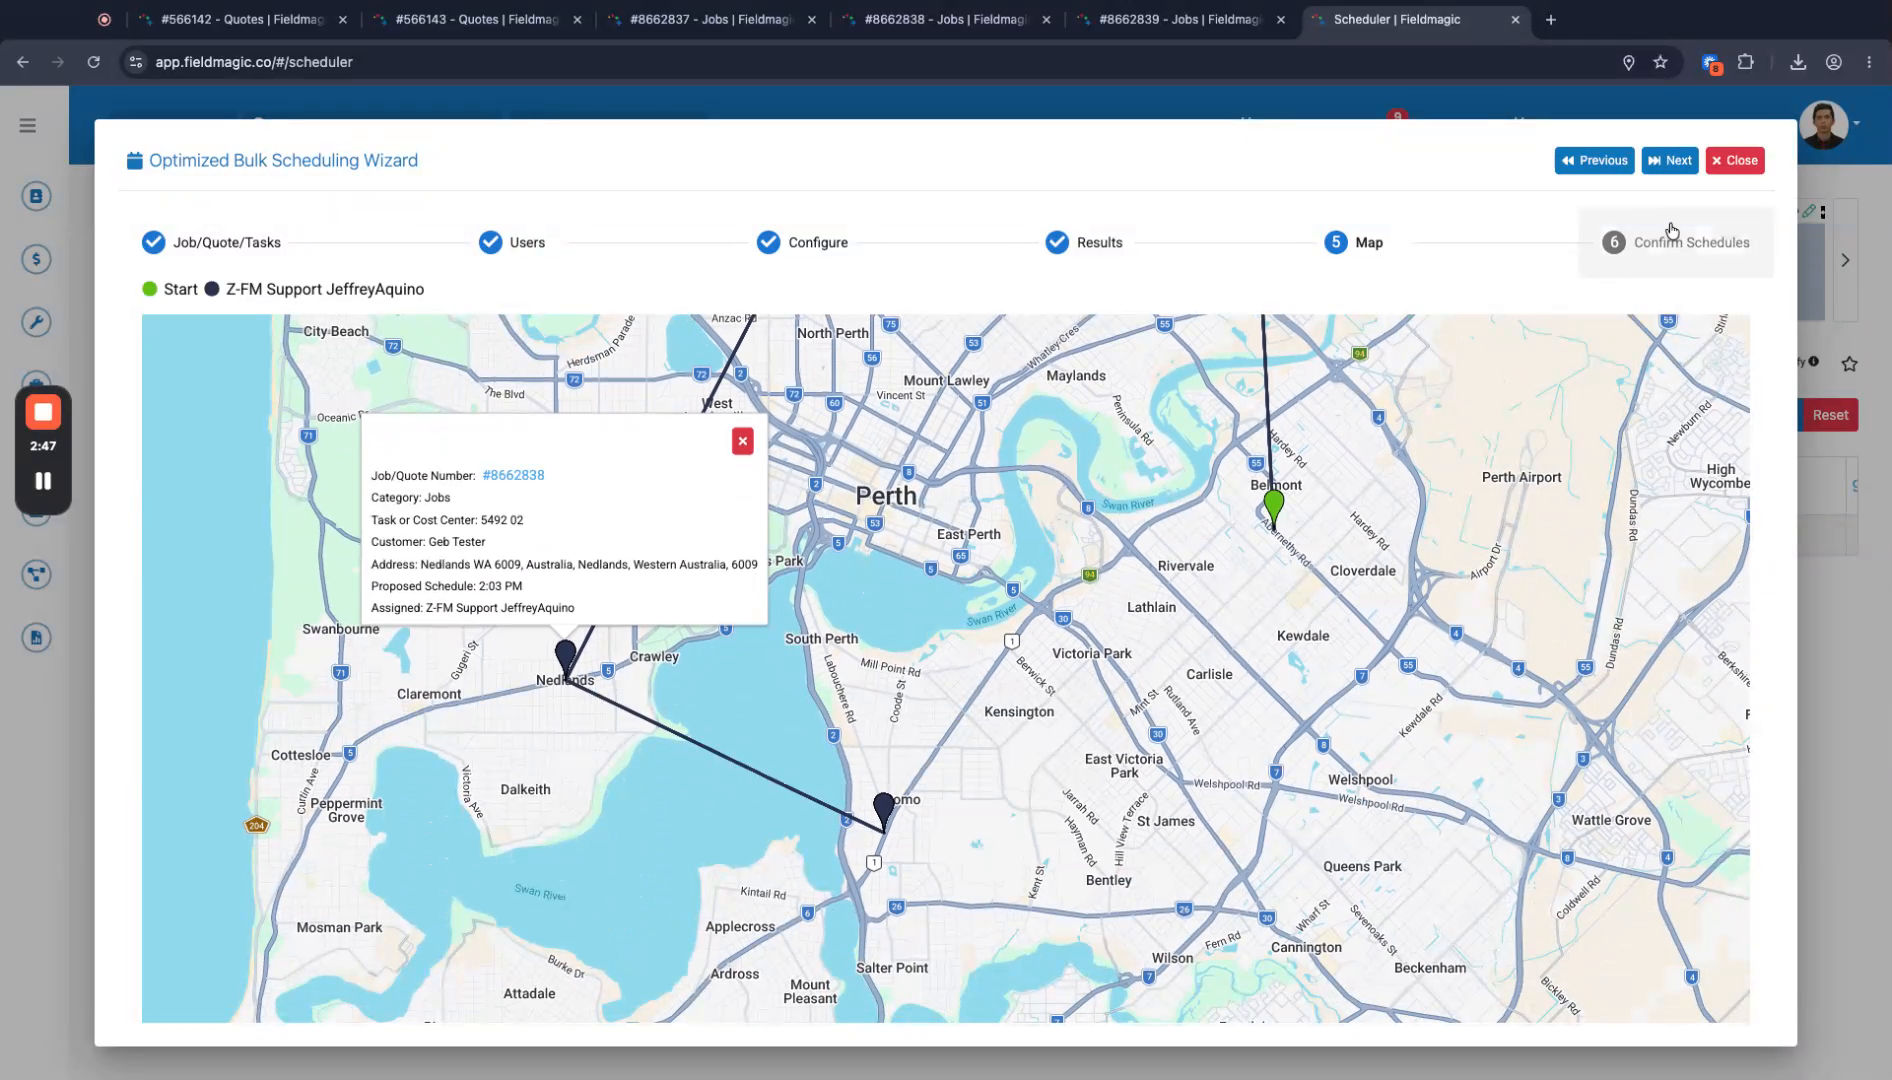
Click Next to generate the schedule. The schedule will display items starting from your office location and routing to each subsequent job.
 Step 7
Review the generated schedule in the calendar view. Jobs and codes display without a post-center view, while tasks and project tasks include this indicator.
 Step 8
Click Next to finalize the schedule. Select any additional work items you want to add, then click Next again.
 Step 9
Click Schedule to confirm. Your bulk schedule is now saved in the Calendar.